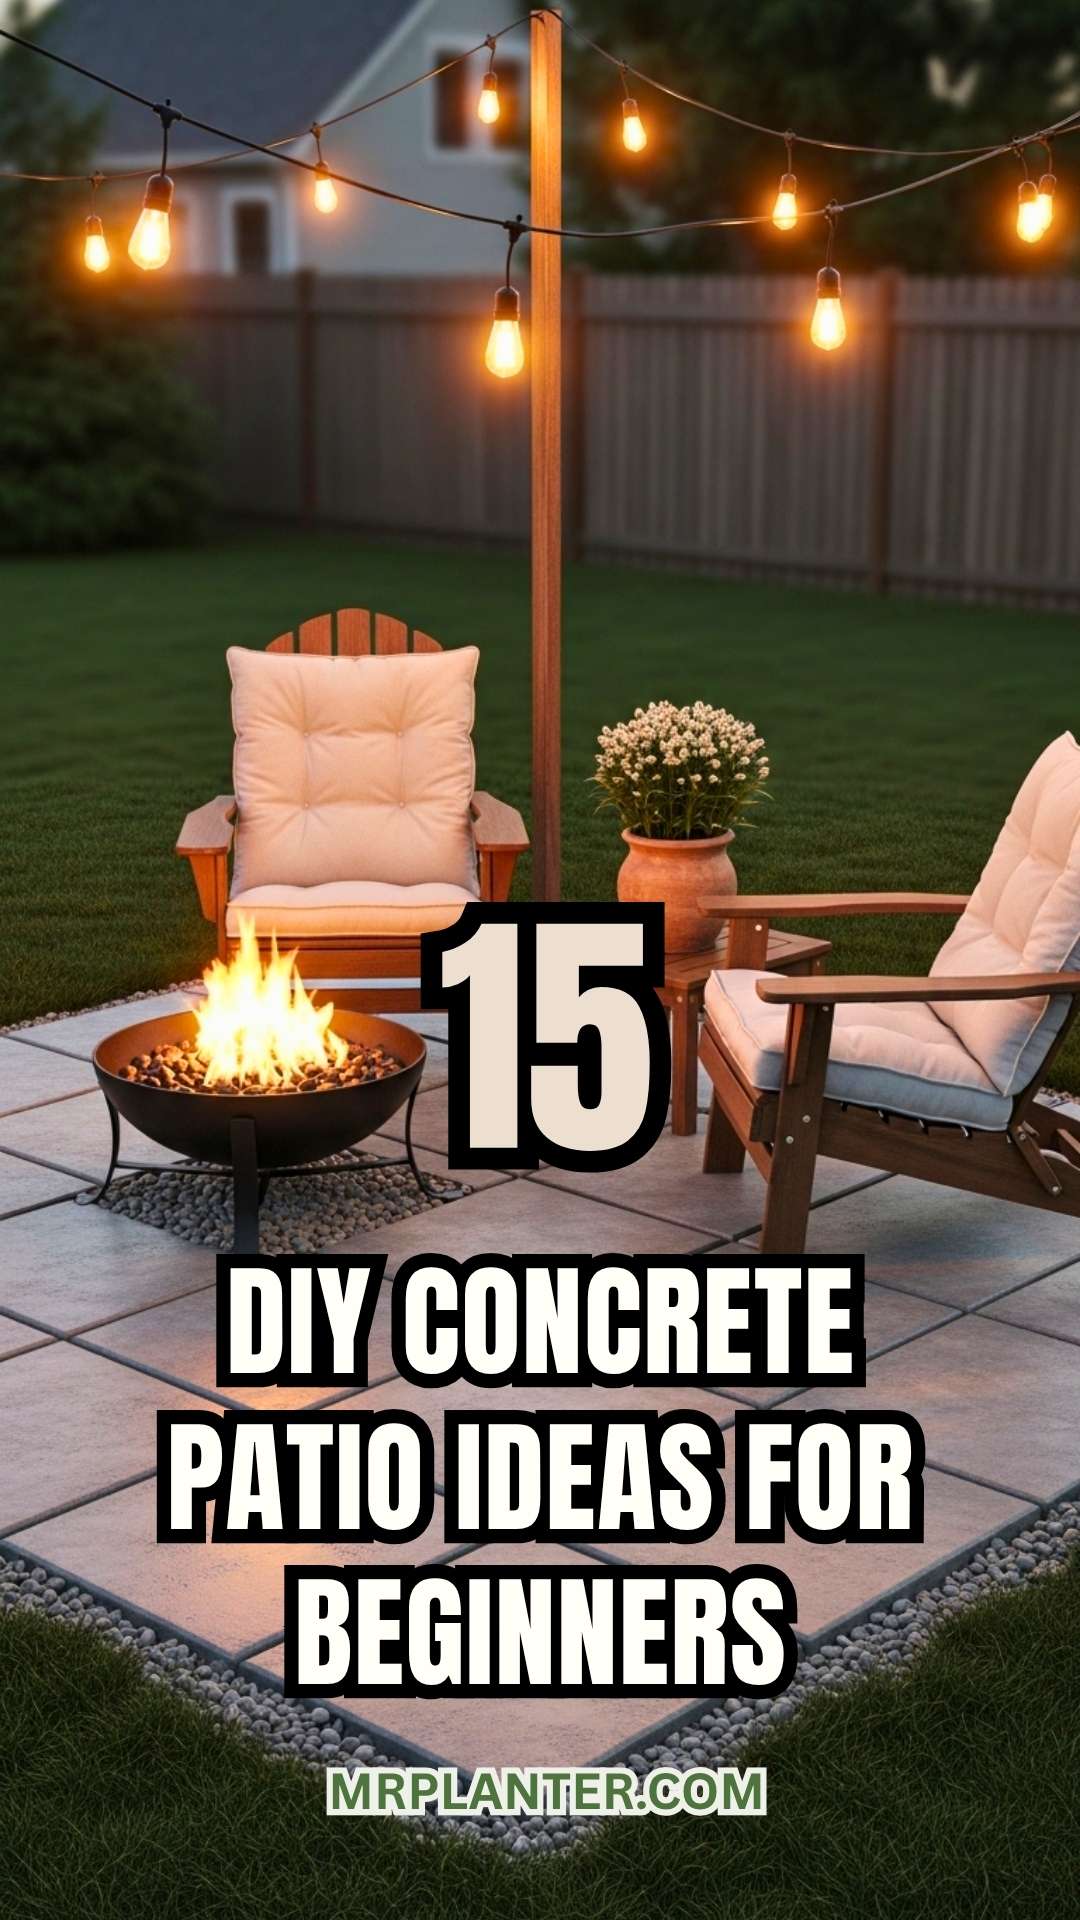
You can turn a boring slab into a cozy, stylish patio in just a weekend. No need to call in the pros or empty your wallet.
Here are beginner-friendly ideas and easy steps that’ll actually get you a patio in a couple of days.
I’ll walk you through hands-on stuff like mixing concrete, setting up forms, stamping patterns, and even adding seating or a fire pit. These projects teach you something and give you fast results.
You’ll get practical tips, safety reminders, and a few creative tricks that make the work more fun and the final look way better.
1. Start with a simple 4×4 concrete slab as your patio base—easy, foolproof, and fast.
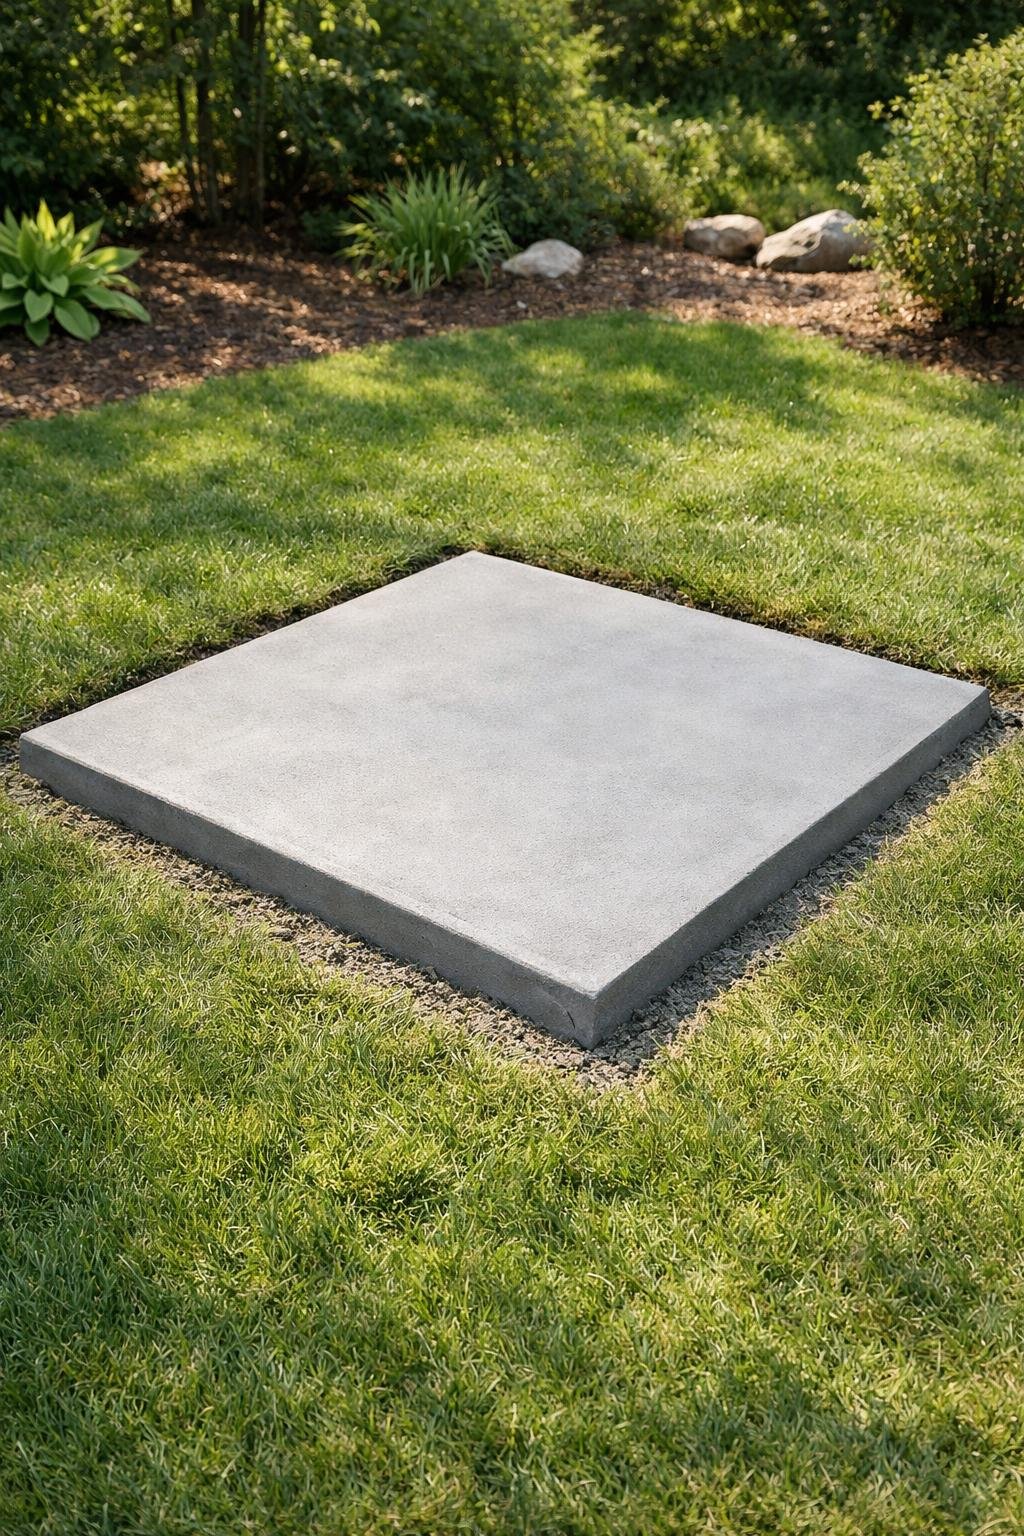
Let’s bust a myth: you don’t need fancy skills to make a solid patio. A 4×4 slab gives you a neat, usable space without a giant project.
Just dig a shallow hole, toss in some compacted gravel, and set up basic forms. You can mix and pour concrete, or grab a delivery bag to keep it simple.
Finish it with a broom for grip and let it cure for a couple days. Add some chairs, a few potted plants, maybe a rug—it’ll look like you hired someone.
Expert Tip From MrPlanter: “Measure twice, level once; a flat base saves you headaches later. Let the slab cure at least 48 hours before light use.”
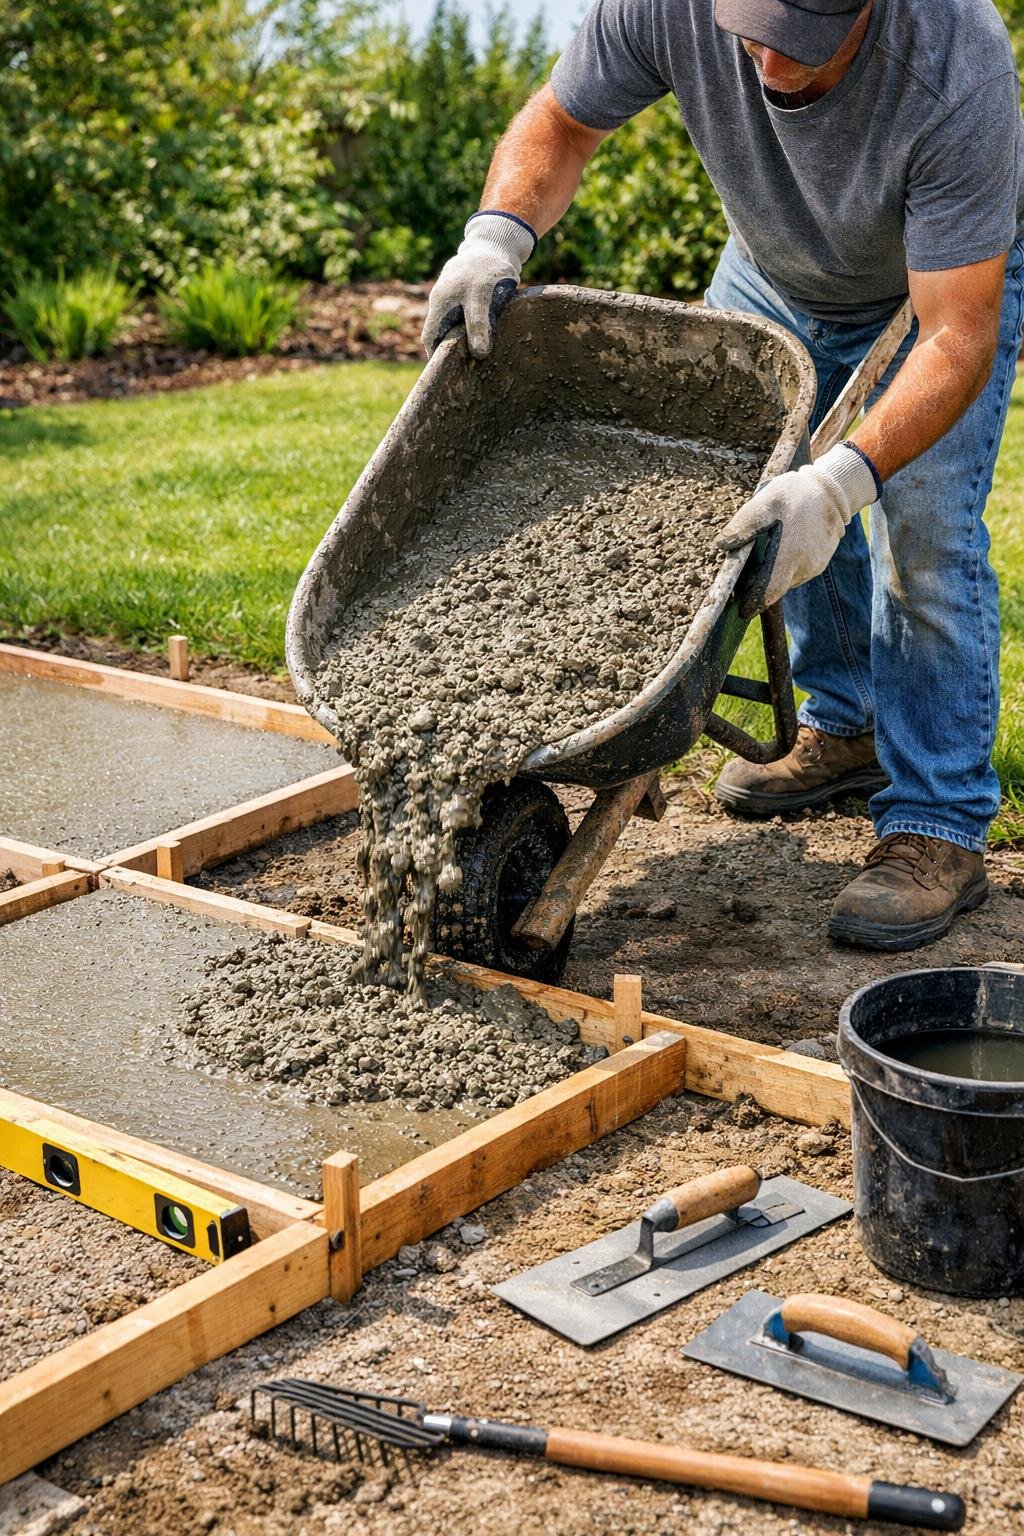
2. Mix your own concrete at home using a portable mixer for a hands-on, satisfying weekend.
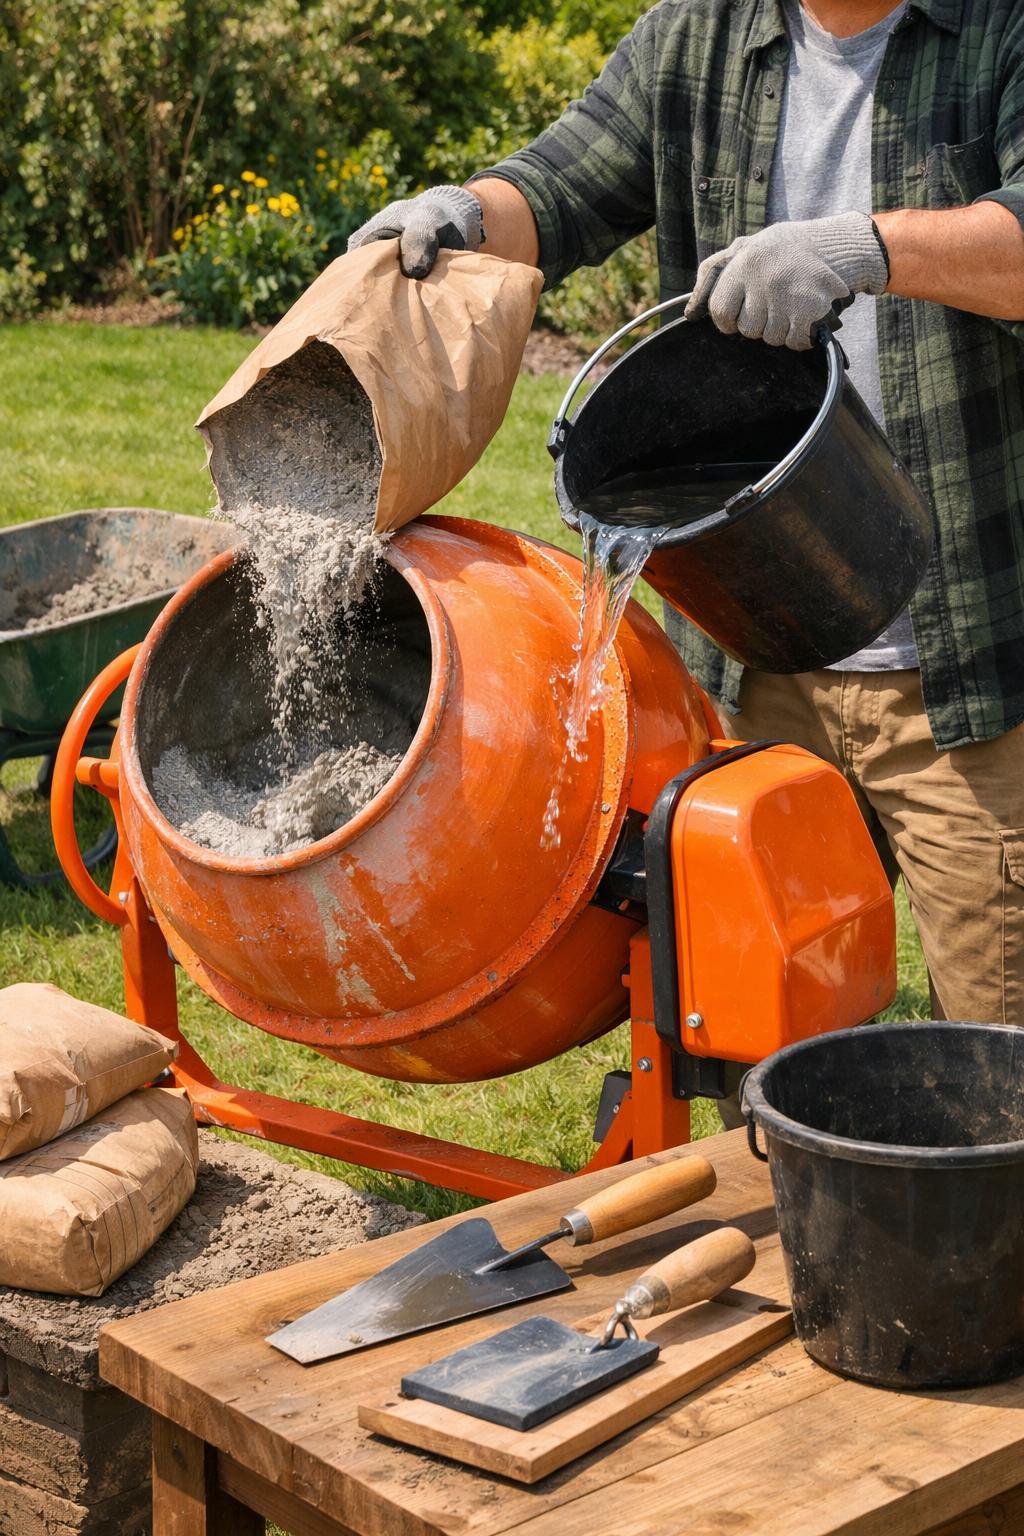
Ever had a batch of concrete turn out lumpy or wasted a whole bag? A small electric mixer keeps things consistent and gives you a nice, workable batch every time.
You’ll need cement, sand, gravel, and water. Throw the dry stuff in first, start the mixer, then add water slowly until it’s about as thick as oatmeal.
Work in small batches so you can pour before it gets too stiff. Clean the drum right after, or you’ll spend forever chipping out dried concrete later.
Expert Tip From MrPlanter: “Try a wheelbarrow test mix to check consistency before loading the mixer. Wash the mixer with water and a stiff brush while it’s still wet.”
3. Build wooden forms to shape your patio—think of it as framing your masterpiece.

You don’t need expensive tools to make sharp edges.
Set up straight, sturdy forms using 2×6 or 2×8 boards to hold in the concrete. Hammer in stakes every couple of feet so the boards don’t budge.
Cut any corners or curves before you install the boards. A smooth form gives you a cleaner patio and saves you from sanding later.
Brace the forms from the outside to stop them from bowing out. Check that everything is level and sloped away from the house.
Expert Tip From MrPlanter: “Use stakes and clamps to keep forms tight; gaps make a mess. Always check the level twice before pouring.“
4. Use a steel trowel for a super smooth finish or a broom for texture that screams ‘grip safety first!’
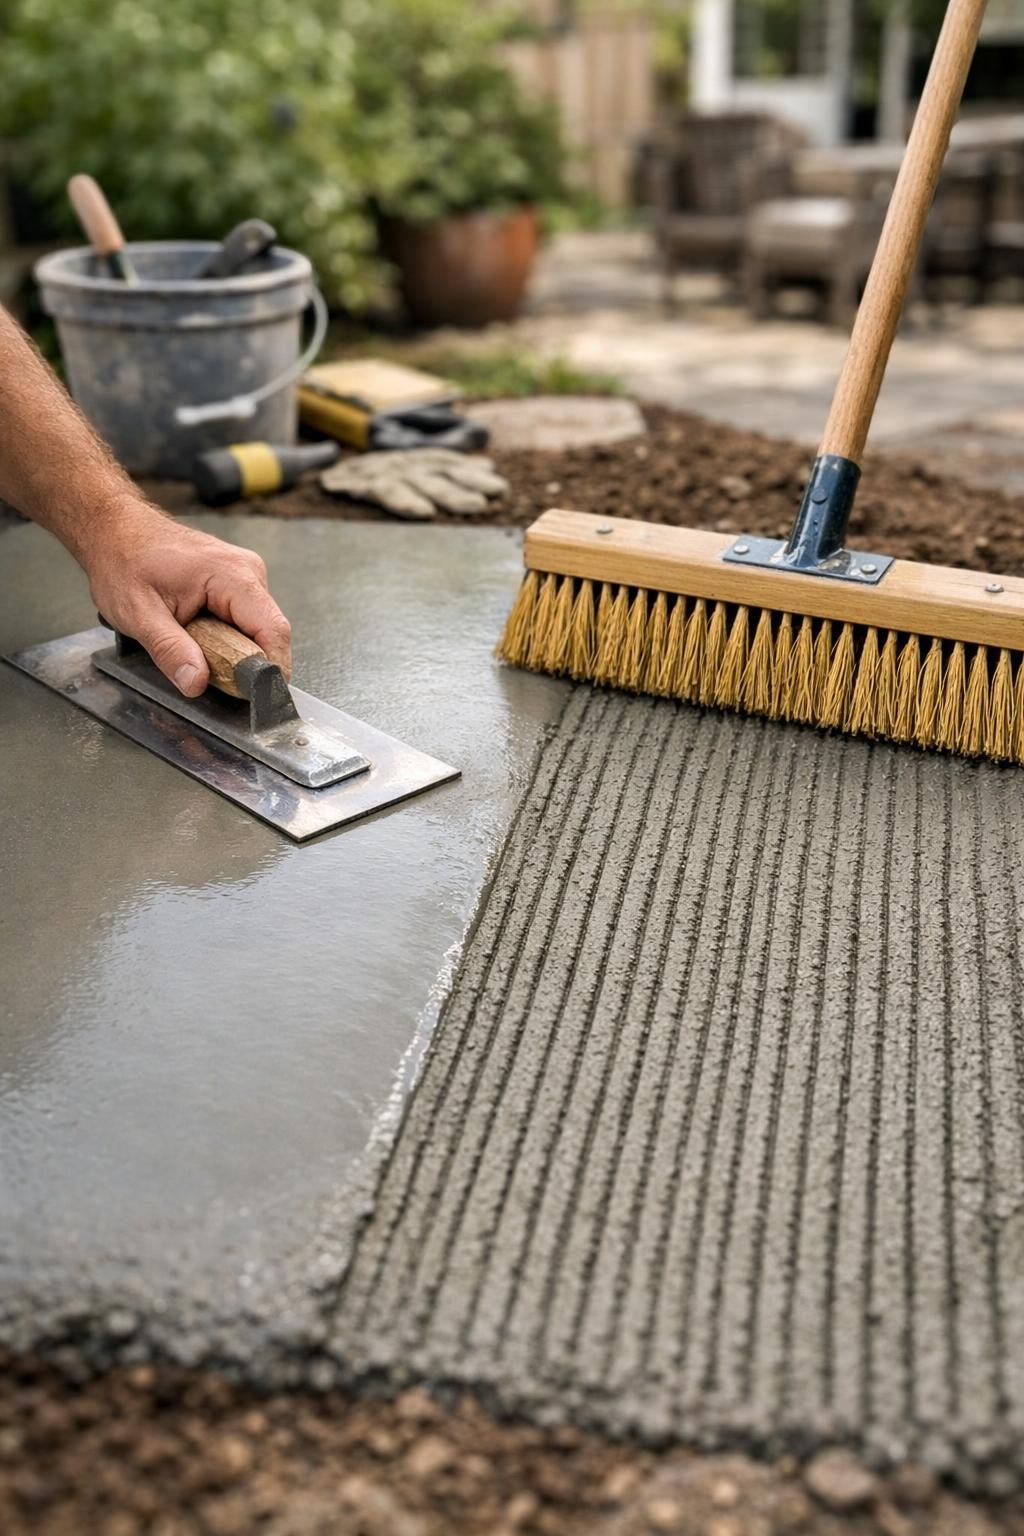
Smooth concrete looks nice, but it’s not always the safest. If you want a sleek, indoor vibe for your patio, grab a steel trowel for a hard, shiny finish that’s easy to clean.
Trowel the concrete once it’s firm but still soft enough to work. Hand troweling takes some patience, but a power trowel speeds things up on bigger slabs.
If you’re worried about slipping, a broom finish adds little ridges for grip. Just drag a stiff broom over the surface—it’s quick and works great for patios and driveways.
Pick the finish that fits how you’ll use the space and how much time you want to spend fussing with it.
Expert Tip From MrPlanter: Start brooming when the surface holds your weight but still feels soft—test with a fingertip. For a smooth look, wait until the concrete is firm enough to trowel without pulling up paste.
5. Add embedded glass gems or pebbles for that unexpected splash of backyard bling.

Here’s a fun one—glass gems can turn plain concrete into something really eye-catching.
You can press colorful glass gems or smooth pebbles into wet concrete to make patterns or borders. It’s super easy on small projects like stepping stones or the patio edge, and it gives your space a bit of personality.
Pick gems that are flat on one side so they sit flush. Press them in while the concrete is still soft, then let it cure before you walk on it.
Expert Tip From MrPlanter: “Test a small patch first to see how the gems sit and how the colors look when wet. Use a clear sealer over the finished surface to lock the gems in and make cleanup easier.”
6. Install DIY concrete pavers in fun geometric shapes—hexagons are trending, trust me.
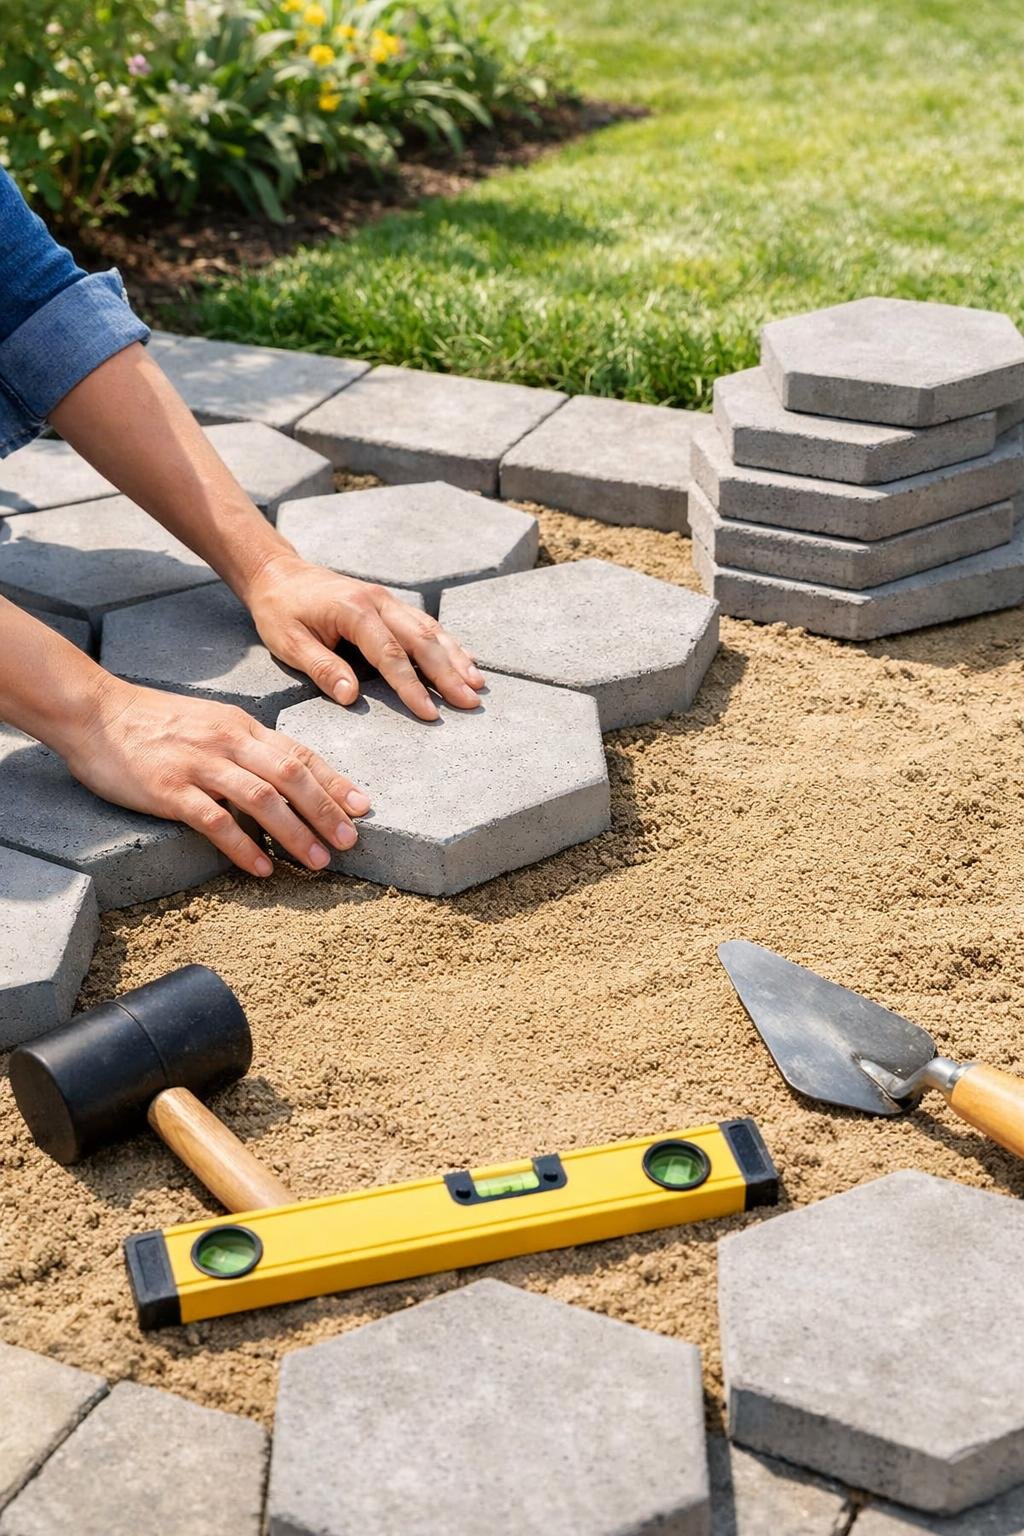
Hexagon pavers look way cooler than plain squares and don’t take extra effort. You can lay out a bold pattern that feels custom—even if you’re just a weekend DIY-er.
Grab interlocking hexagon molds or pre-cast pavers. Mix up tones or switch up the direction for a lively look that hides little mistakes.
Prep a flat, compacted base and use sand or thin-set for support. Set each paver tight and tap with a rubber mallet for a flat surface.
Edge restraints keep the pattern from spreading. Wait about 30 days before sealing to protect the color and make cleaning a breeze.
Expert Tip From MrPlanter: Lay one row dry first to check pattern and fit. Take breaks and measure often so your lines stay straight.
7. Sprinkle in some outdoor-friendly paint to jazz up stamped concrete patterns.
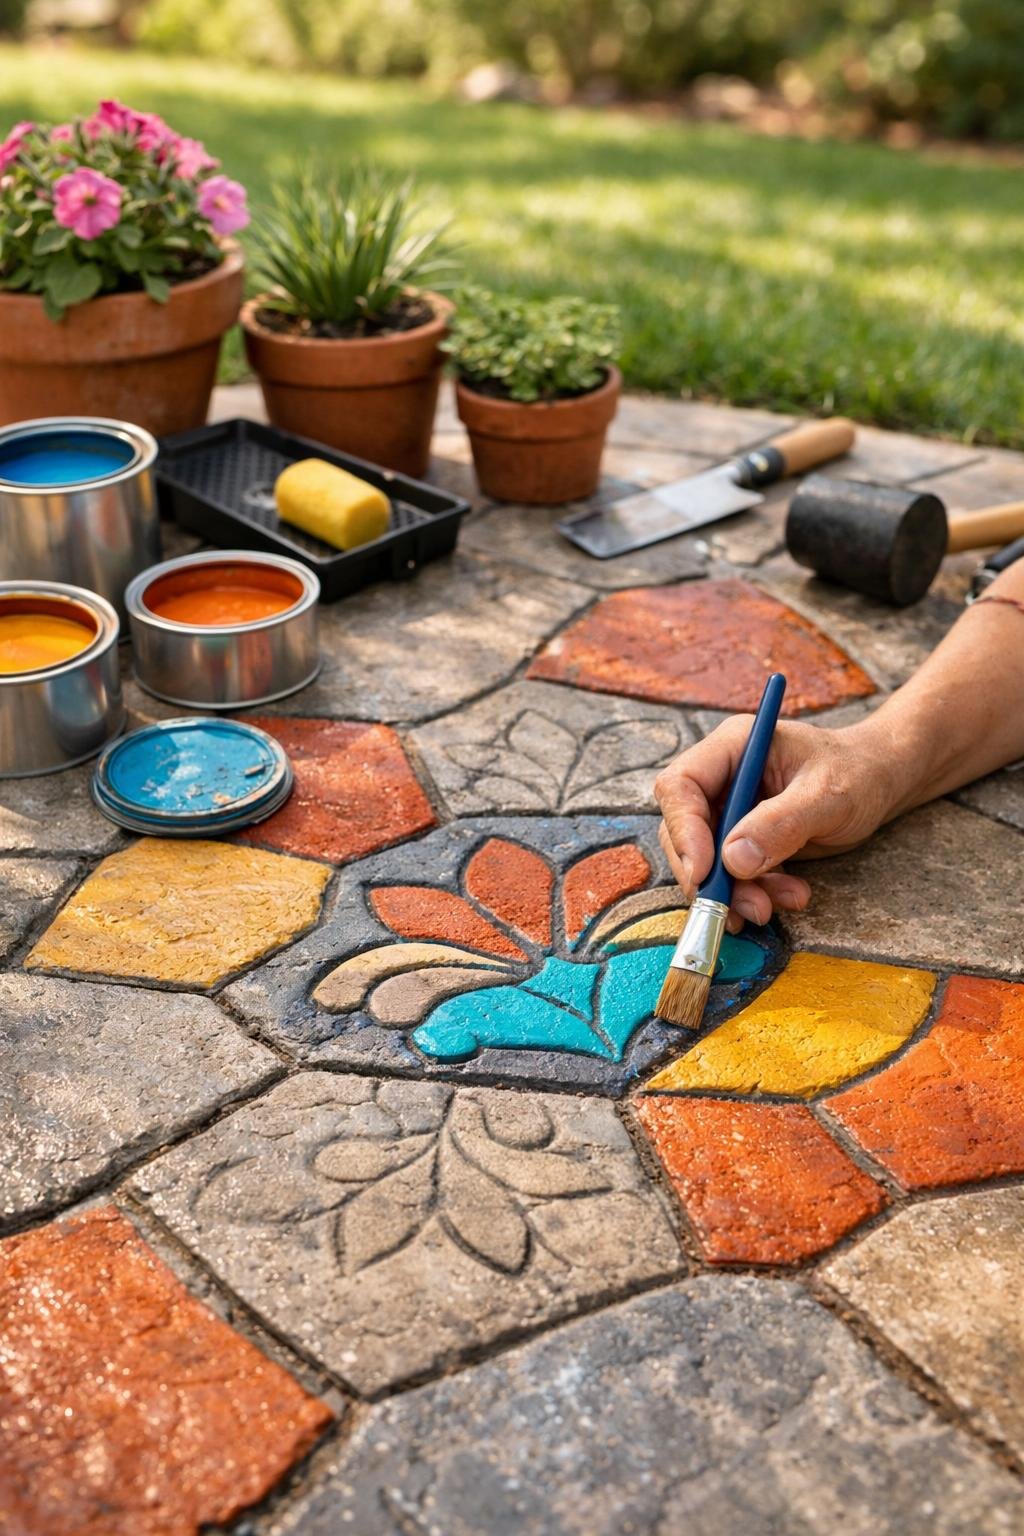
Painted concrete doesn’t have to look tacky. You can make stamped patterns pop by painting just the raised spots or the lines, and it’s honestly pretty fun.
Pick paints made for outdoor concrete and weather. Use a small brush or foam roller to get into the grooves and smooth out flat spots.
Stick to natural colors for a subtle upgrade, or go big with a bold accent for a modern twist. Always test a hidden spot first to see how the color dries.
Work in thin layers and seal the paint with a concrete sealer so it lasts longer. That keeps your colors bright and makes cleanup easy.
Expert Tip From MrPlanter: “Start with one small area to see how the color and finish match your space. If you like it, repeat the look across the patio for a cohesive feel.“
8. Consider pouring your patio in sections if one big pour makes you sweat bullets.
If you’re stressing about timing or tools, pouring in smaller sections is a total game-changer.
Smaller bays let you focus on one area, get a cleaner finish, and avoid rushing before the concrete sets. It also helps prevent big cracks from uneven curing.
You can use control joints or leave small gaps between sections to help the slab move without breaking. Repairs are easier later, too, since you only need to redo a small patch.
If you want, pour over two weekends. Your back (and your friends) will thank you.
Expert Tip From MrPlanter: Pour one test section first so you learn the tools and timing. That small practice pour saves time and stress on the main job.
9. Use rebar or wire mesh reinforcement to keep your concrete crack-resistant and tough.
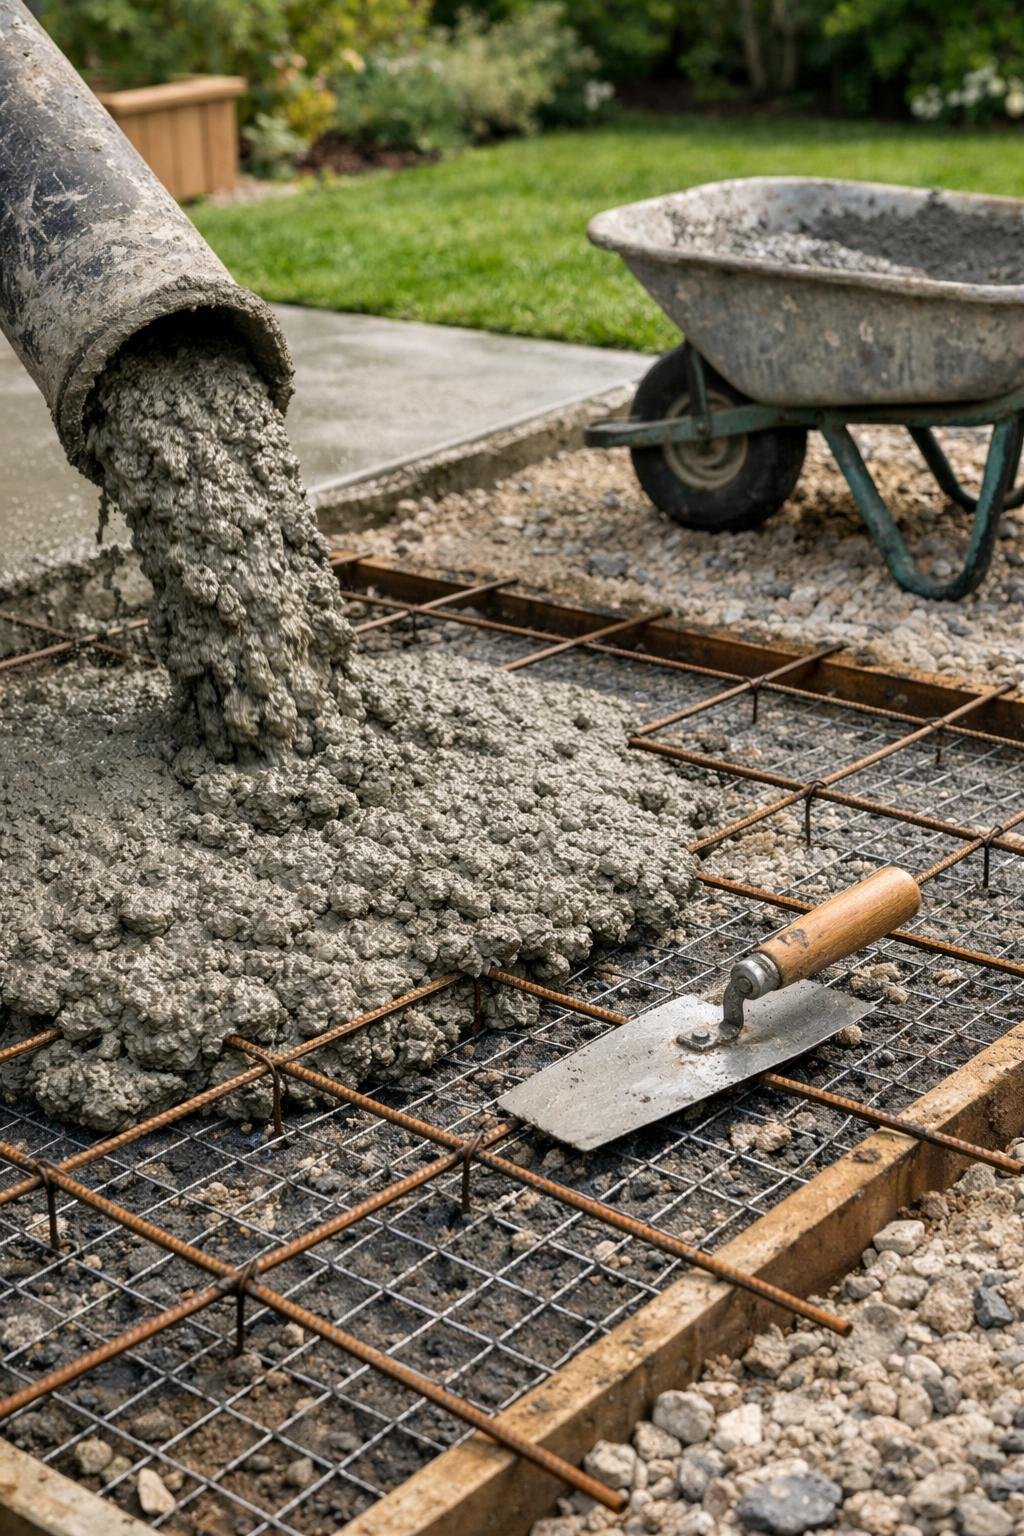
Concrete doesn’t have to crack like an old sidewalk.
Add steel reinforcement before you pour. Rebar gives strong, long support for heavy stuff. Wire mesh helps stop small cracks and is quicker to put down for bigger, thinner slabs.
Keep the rebar or mesh in the middle of the slab—not on the ground or floating on top. Use supports like chairs or wire ties to hold it up. If you expect heavy furniture, space the rebar closer together.
Expert Tip From MrPlanter: “Tie rebar intersections with short wire ties and snip the ends neat. Keep mesh or rebar about one inch below the top surface for best crack control.”
10. Create an inset fire pit area in your patio for that perfect marshmallow-toasting zone.
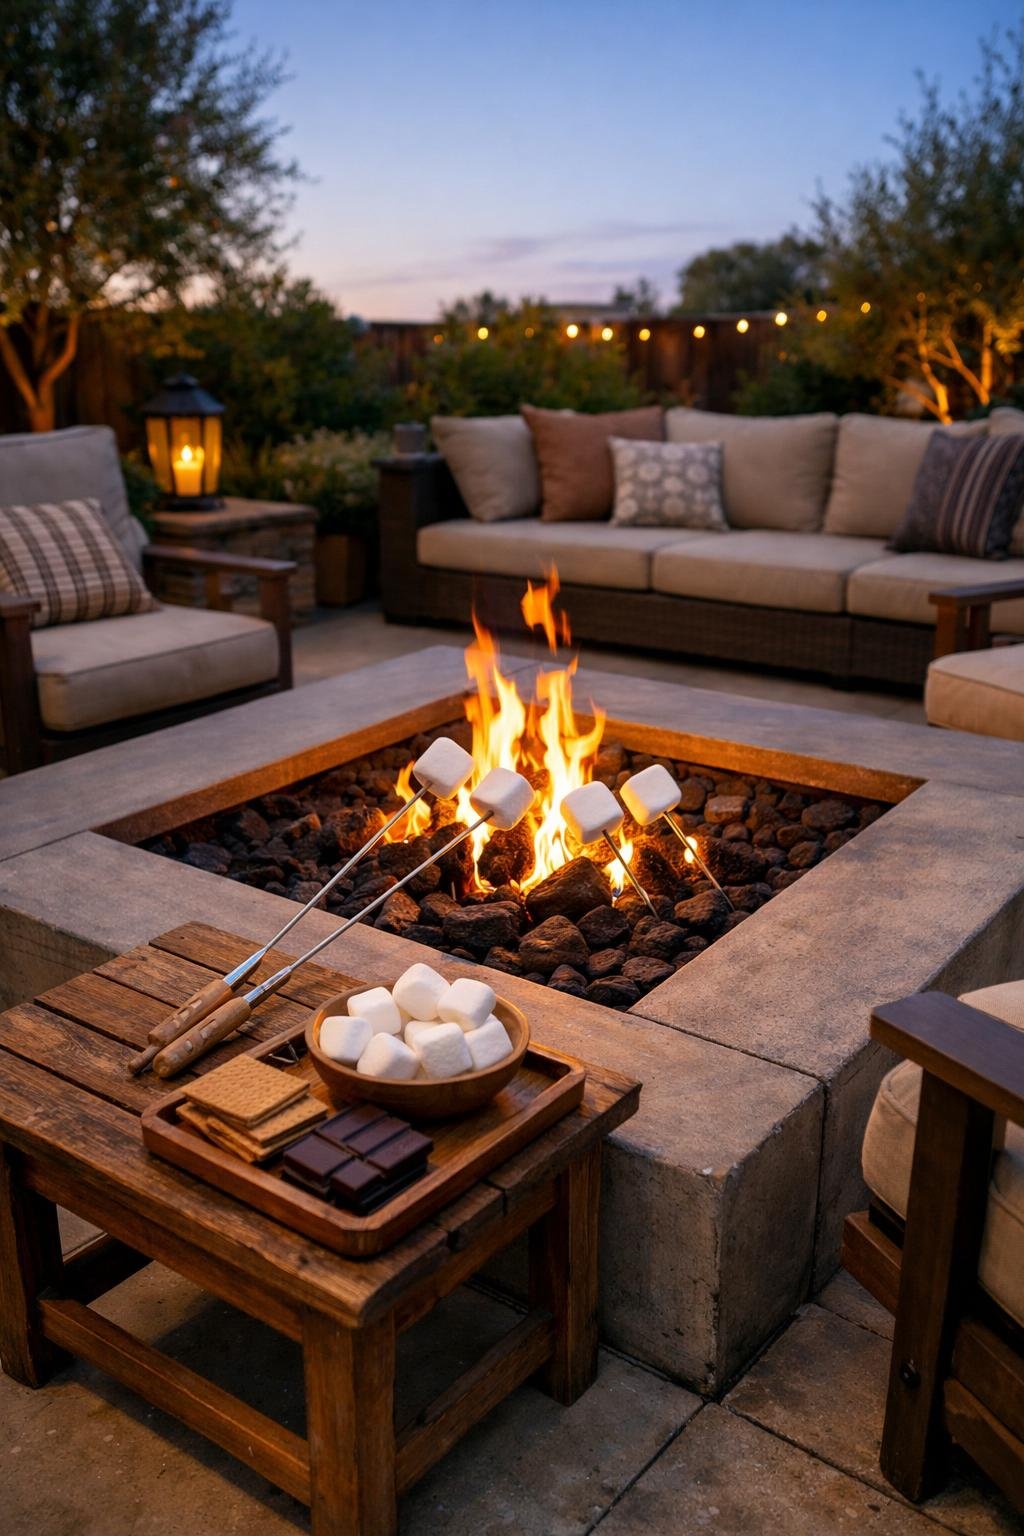
You don’t need a big budget or fancy tools for a cozy fire pit. An inset fire pit fits right into your patio and gives you a safe, tidy spot for s’mores with friends and family.
Plan the size so everyone can sit around it comfortably. Dig a hole, add some gravel, and set a metal fire ring before pouring concrete around it for a clean look.
Use pavers or a decorative border to blend the pit into your patio. Keep chairs a safe distance away and use non-flammable cushions for comfort.
Expert Tip From MrPlanter: “Pick a fire ring rated for your pit size and place a layer of sand or gravel under it. Check local rules and keep a spark screen handy.”
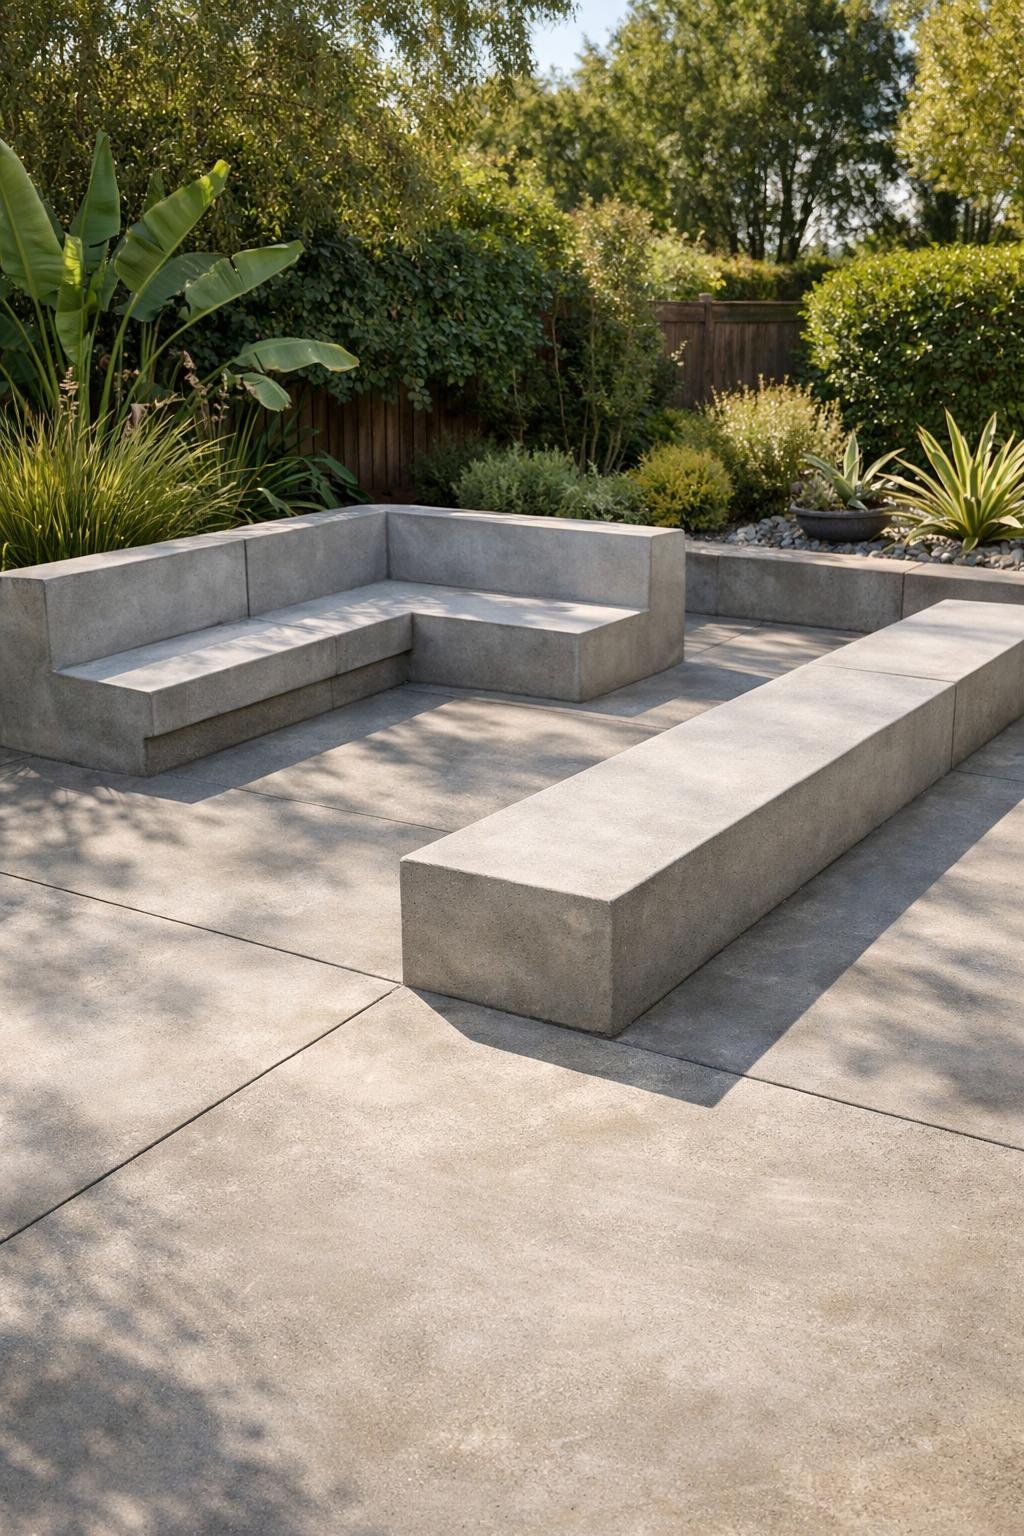
11. Add DIY concrete benches molded right into the patio for instant seating (no furniture drama).
Built-in concrete benches mean you don’t have to drag wet cushions inside every time it rains.
You can cast a bench as part of the patio pour or make a separate mold and set it in place. Either way, the bench becomes part of the patio, so you get sturdy seating that won’t tip or blow away.
Stick to a simple shape—a solid base with a flat top works great. Use rebar or mesh and a slightly richer mix so the bench stays strong and smooth.
Think about height and depth before you pour. Standard seat height is about 17–18 inches, and 15–18 inches deep feels comfy.
Finish the edges with a trowel or a small rubber float for a softer look. You can stain, paint, or add cushions for a pop of color.
Expert Tip From MrPlanter: Make a cardboard mock-up of the bench size to check comfort before you pour. Pour in sections if the patio is large, so the bench cures evenly.
12. Incorporate planters made from concrete blocks to frame your new hangout spot.
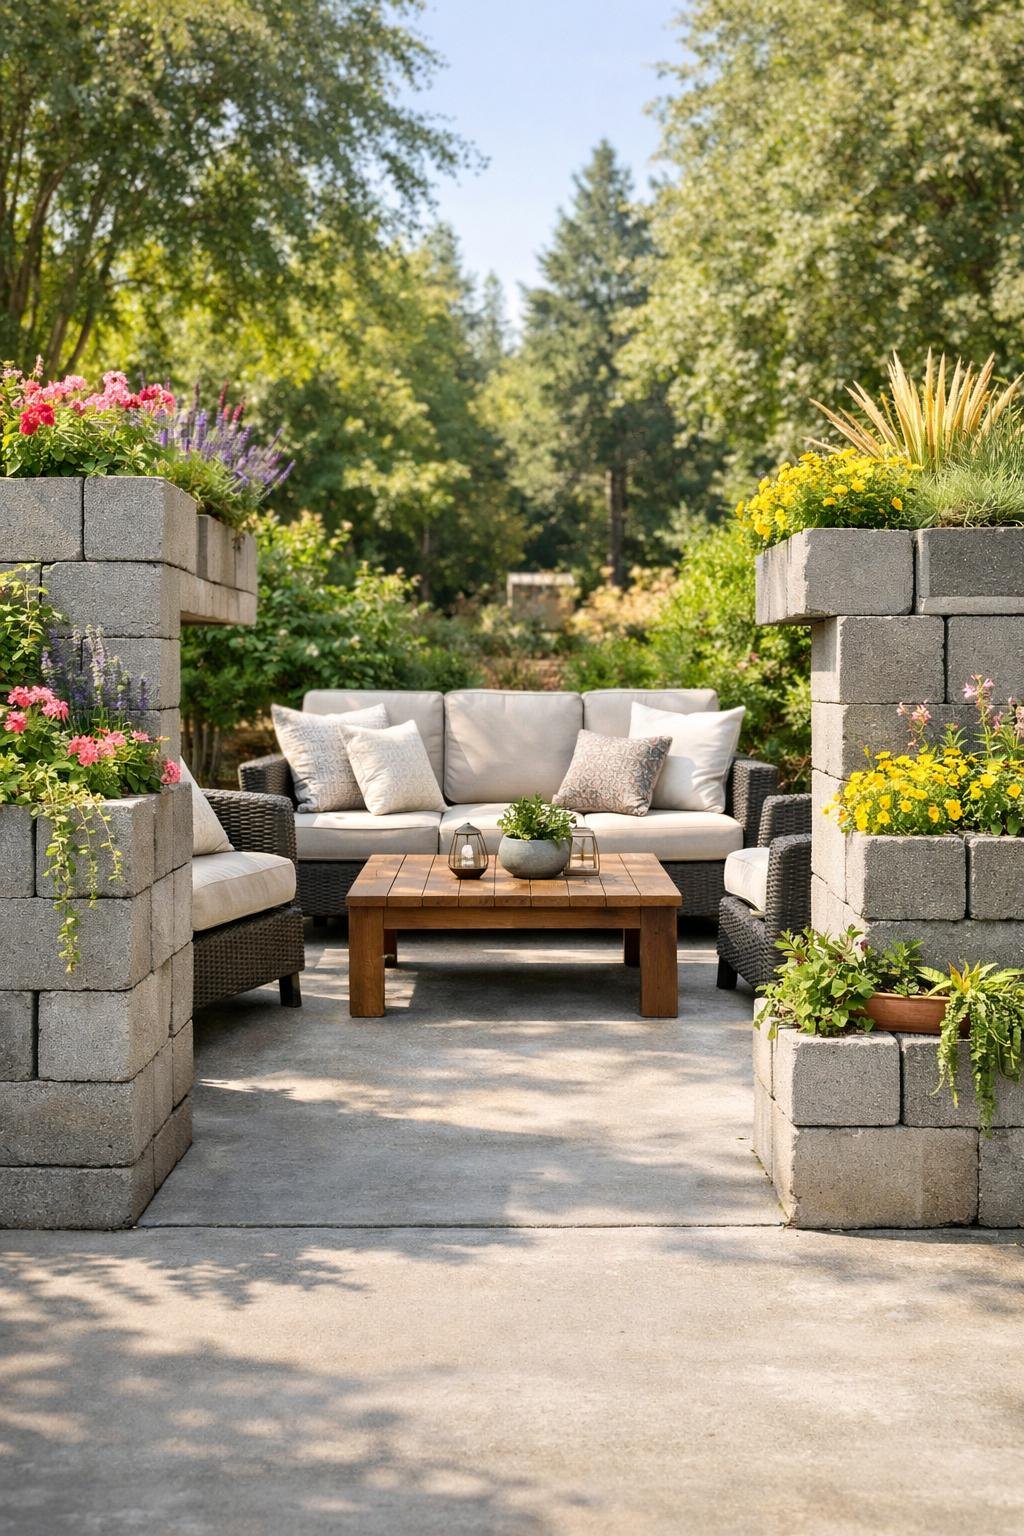
Let’s clear something up: Concrete planters don’t have to look cold or, you know, like you’re building a bunker. You can stack blocks into low walls, raised beds, or chunky corner planters that actually give your patio some real character.
Just flip those blocks so the hollow parts face up or out—makes planting and drainage a breeze. I like to paint mine or toss some gravel inside, and sometimes I line the cores with landscape fabric to keep the dirt where it belongs.
Arrange the blocks around your seating area, fire pit, or even a little dining nook. Suddenly, your outdoor space feels planned out and super cozy.
Mix it up with succulents, herbs, or trailing flowers for some texture and a nice whiff of fresh scent. These blocks are cheap, heavy, and honestly, they’re not going anywhere—even when the wind tries its best.
Expert Tip From MrPlanter: Fill the block cores with potting mix, toss a layer of gravel at the bottom for drainage, and go easy on the watering—especially if you use drought-tolerant plants. Your planters will basically take care of themselves.
13. Use stencils to imprint funky patterns or inspirational quotes—hello, personalized patio.
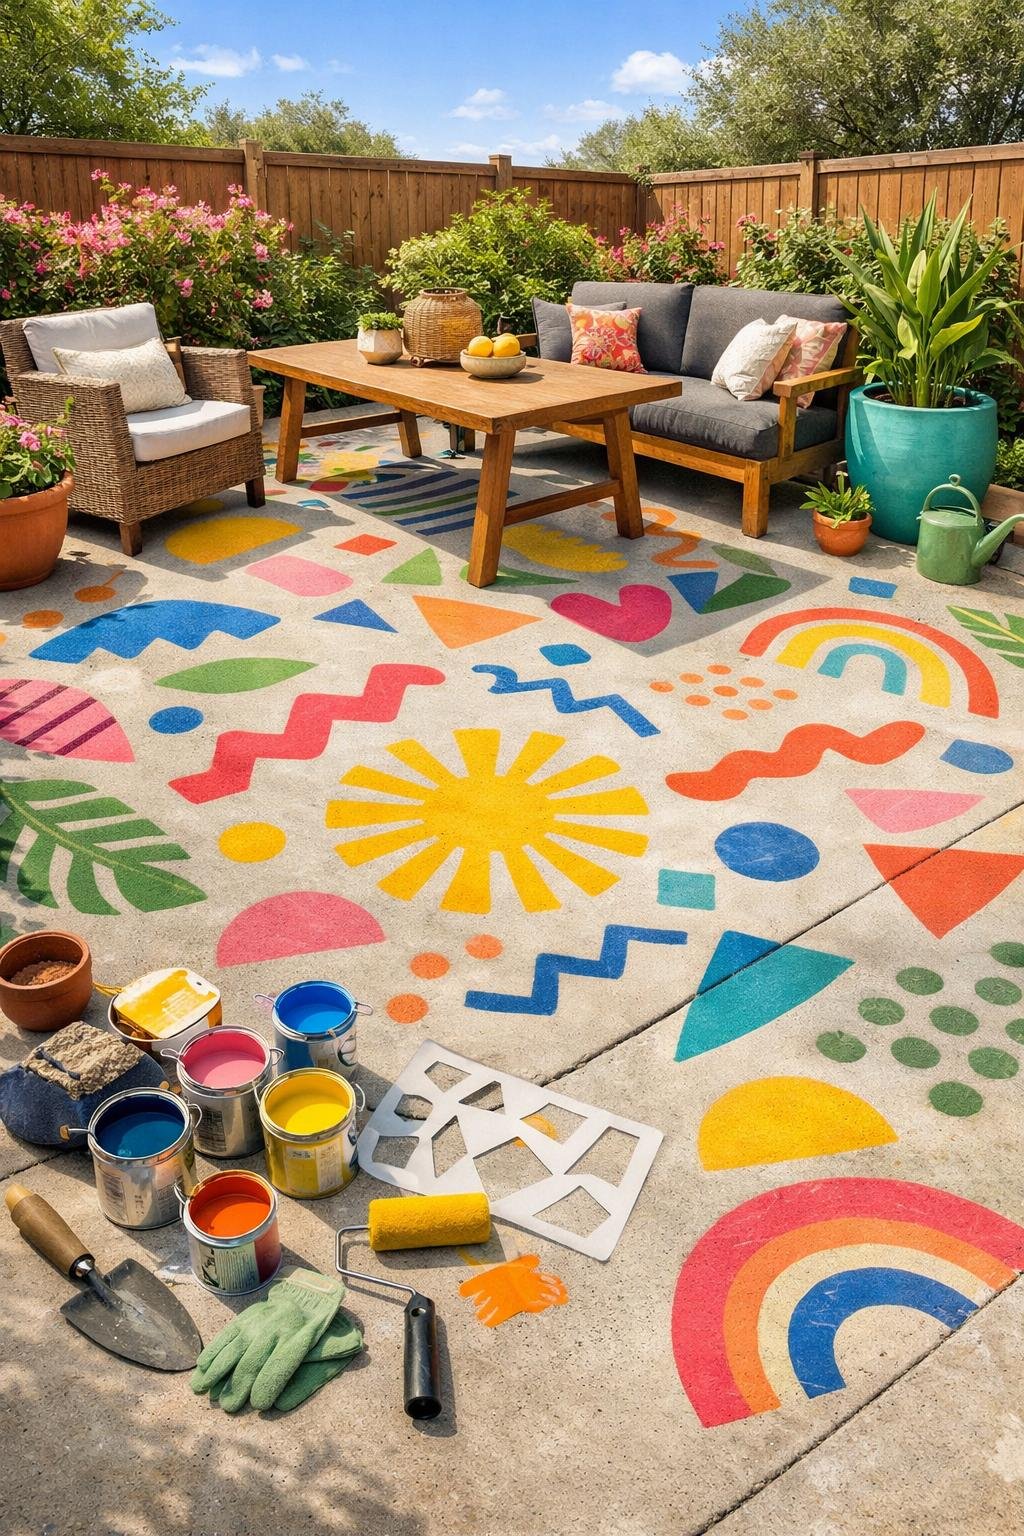
Here’s something wild: One little stencil can turn plain concrete into your new favorite hangout. You can stamp repeating shapes, bold patterns, or honestly, just your favorite quote. It’s a fast way to add personality without breaking the bank.
Grab some weatherproof paint and a reusable stencil. Tape it down, dab paint on with a sponge, then peel it up slow for crisp edges.
If you mess up, don’t stress—just sand and touch up. No one’s looking for perfection here.
Play around with colors and size. Even a simple border or a couple of words can make a big difference if you’re just starting out.
Expert Tip From MrPlanter: Try your stencil on a scrap board first to check the color and alignment. Seal your finished masterpiece with a clear concrete sealer so the weather doesn’t mess with your hard work.
14. Try a stamped concrete method to fake stone or brick without the wallet nightmare.
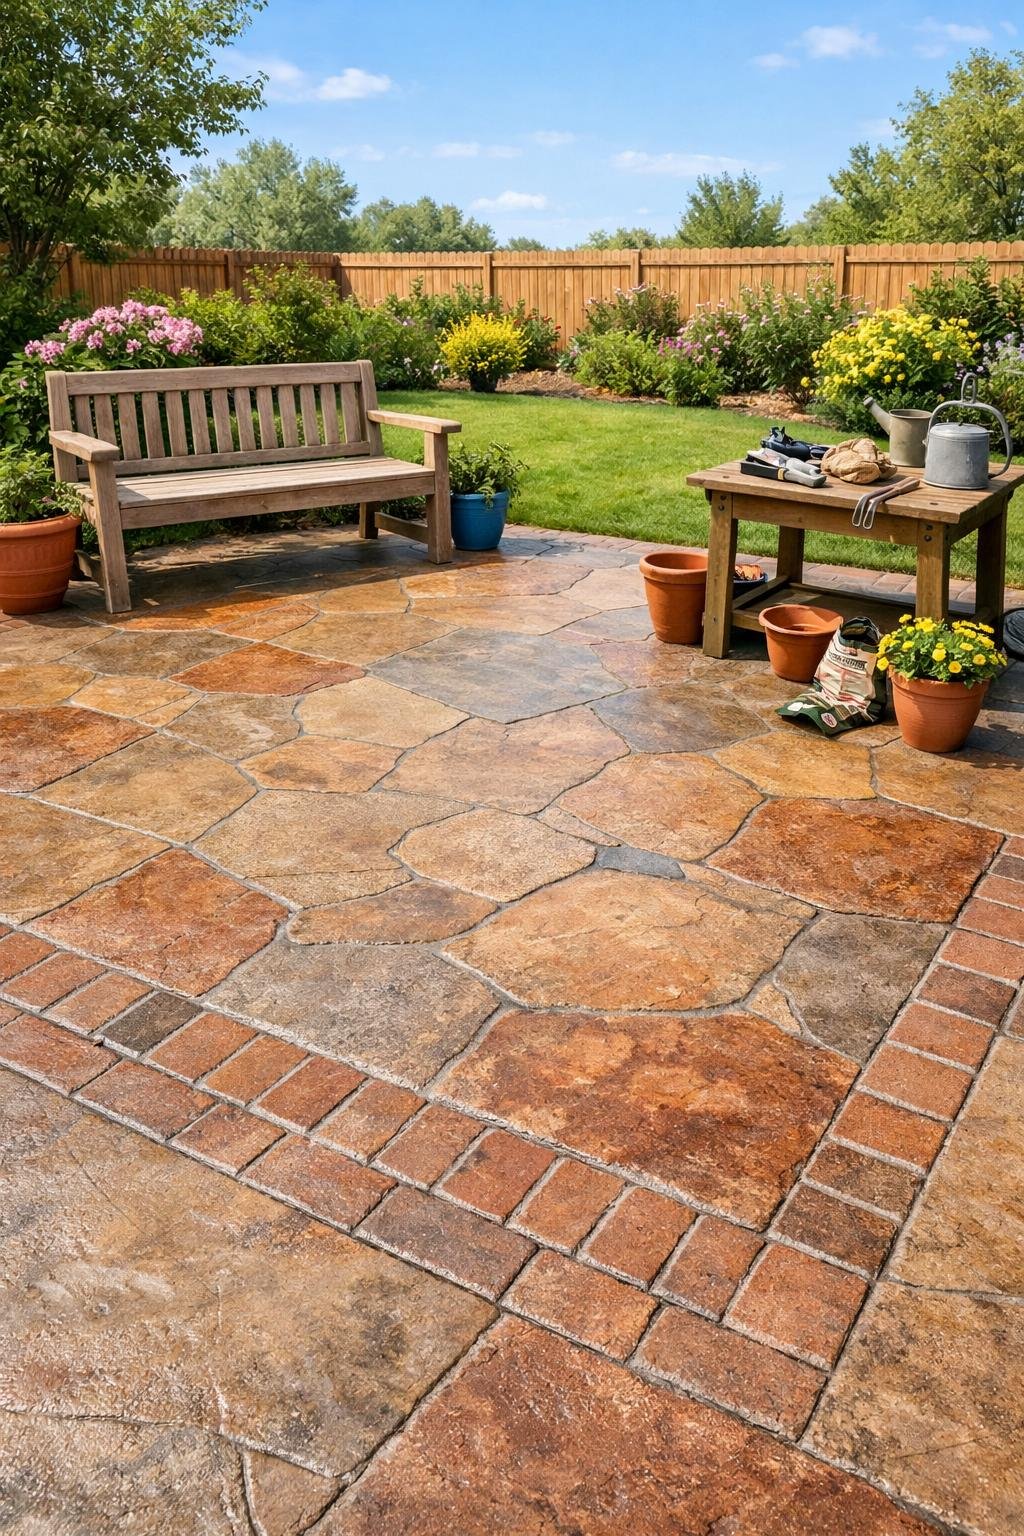
Here’s the truth: You really don’t need real stone to get a fancy patio. Stamped concrete lets you press patterns into wet concrete, so it looks like stone, brick, or even wood—without the scary price tag.
Pick a pattern you love and throw in some color to match your vibe. The process gets a little messy, but you and a buddy can knock it out in a weekend.
Rent stamp mats and grab some release powder so nothing sticks where it shouldn’t. Timing is everything—stamp when the concrete feels firm but still soft enough to leave a good impression.
Expert Tip From MrPlanter: “Try stamping on a small slab first to get the hang of it. Start simple, and you’ll be surprised how fast you get the knack!”
15. Seal your concrete with a water-based sealer to protect it from stains and weather tantrums.
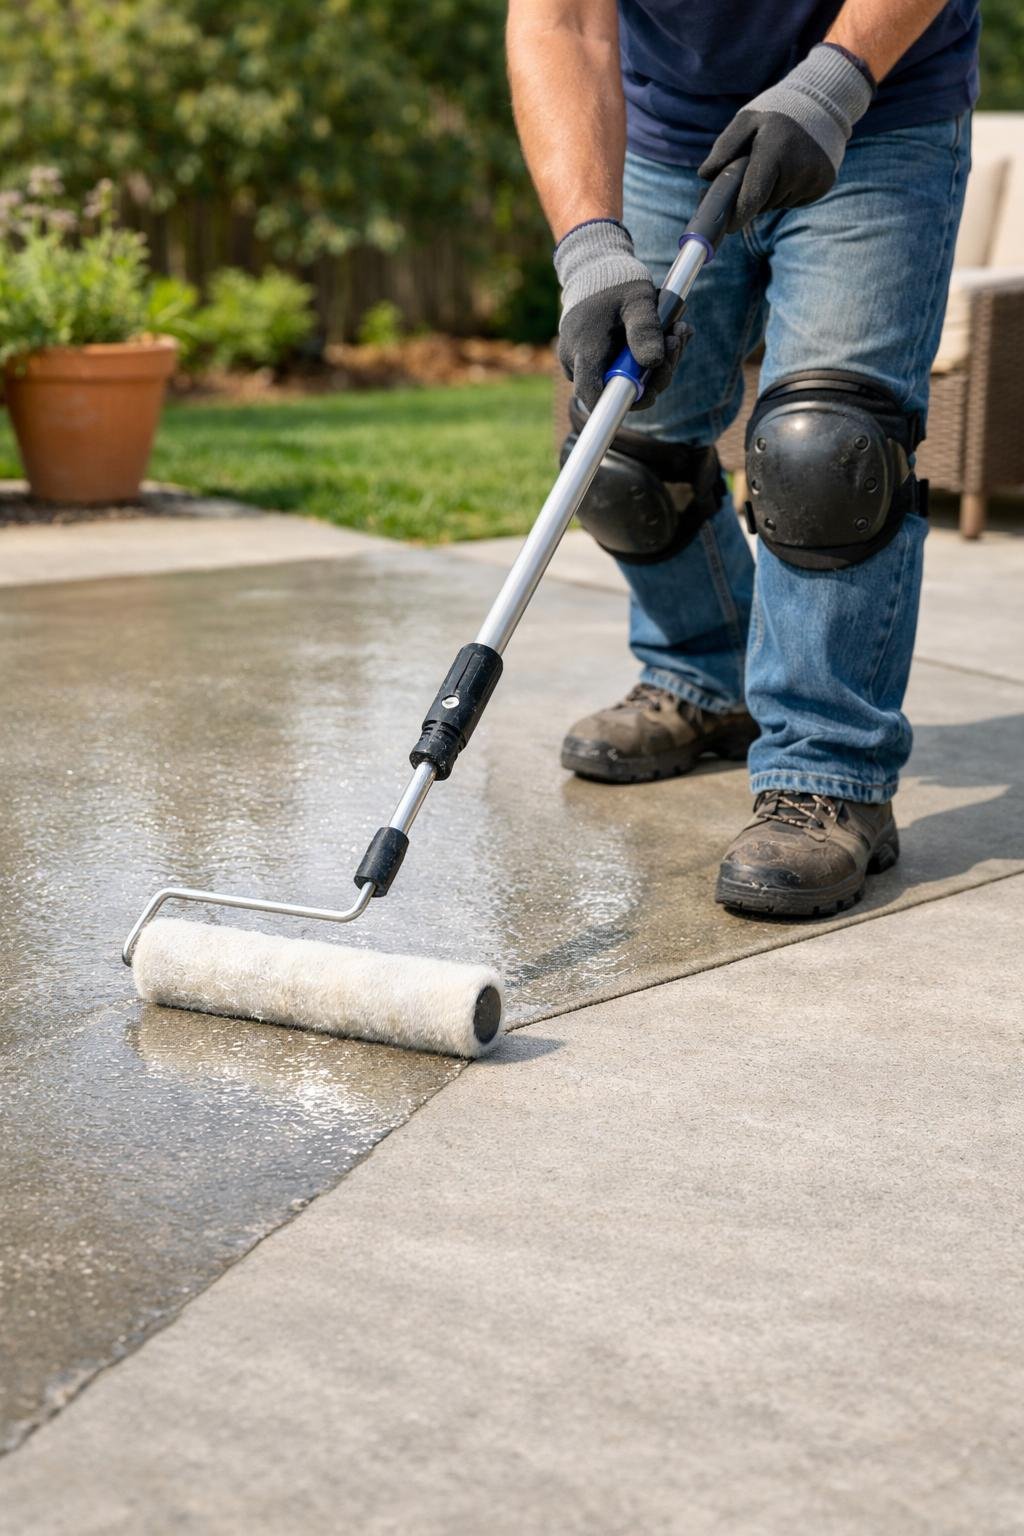
Let’s clear up a rumor: You don’t have to stress about yellowing or those awful, stinky fumes with today’s water-based sealers. They smell mild and keep your patio looking sharp—no headaches, literally or figuratively.
Wait until your concrete is totally cured and squeaky clean, then grab that water-based sealer. This stuff blocks stains, shrugs off rain, and holds color steady even when the sun’s blazing.
Go for a breathable sealer meant for outdoor concrete. That way, any trapped moisture can sneak out instead of causing trouble down the road.
I like using a roller or sprayer, but honestly, just keep your coats thin and even. Thick puddles? Not your friend here.
You’ll want to reapply every couple years—maybe every four if you’re lucky and the weather’s kind. It’s a bit of work, but it saves you from scrubbing and repairs later.
Expert Tip From MrPlanter: “Test the sealer on a small patch first to check the finish. Wait 48 hours before heavy use to let it cure fully.”