Moss walls bring woodland texture to garden boundaries while making plain fences, masonry, and patio walls feel softer. Living moss suits cool, damp shade, while preserved moss gives you rich green color in a protected space with little care.

The best 16 Moss Walls ideas begin with your site conditions, especially shade, moisture, wind, and protection from harsh sun. You can shape moss into a quiet woodland backdrop, a crisp privacy screen, or a small feature near your front door.
1. Preserved Moss Feature Wall on a Covered Patio
A covered patio gives preserved moss the shelter it needs to stay attractive.
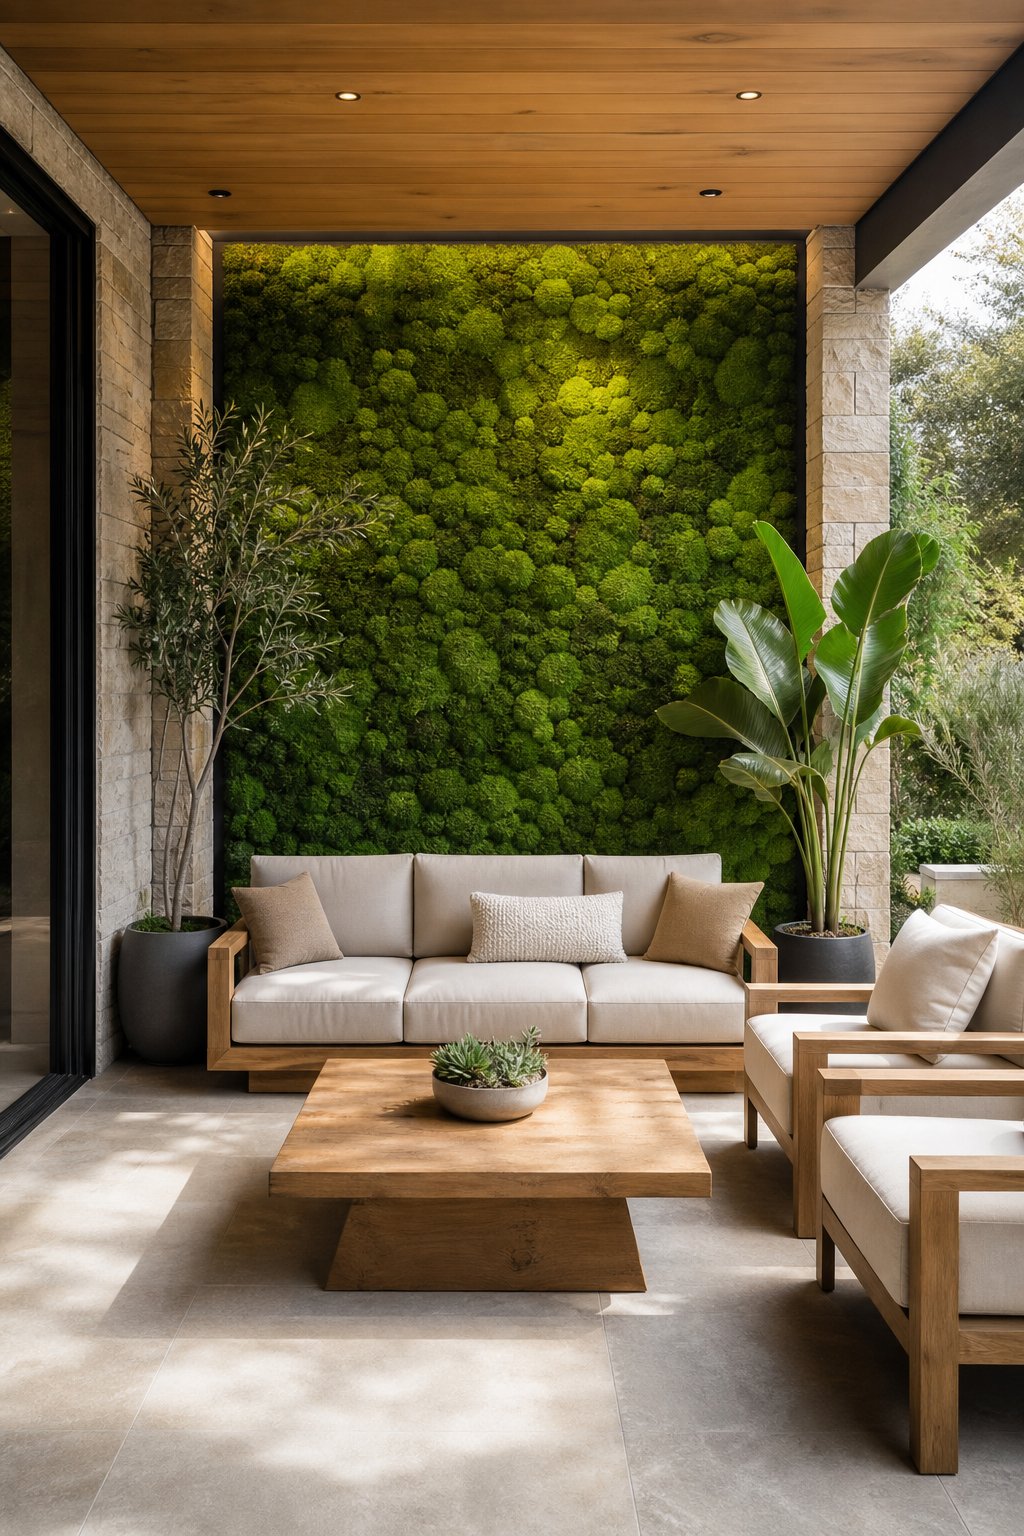
Mount framed panels on a weather-resistant backing behind your seating area, then repeat their green tones with cushions or planters. Preserved sheet moss creates a smooth, soft surface, while reindeer moss adds rounded texture and a little visual bounce. Keep the panels away from sprinklers and direct afternoon sun, which can fade their color. A roof, solid side wall, or deep overhang helps protect the installation from rain and wind. Pairing this idea with other covered patio ideas can help you plan lighting, furniture, and drainage around the wall.
Expert Tip From MrPlanter: “Leave a small air gap behind each panel so damp air doesn’t sit against the wall. Choose outdoor-rated hardware that won’t rust after a rainy season.”
2. Living Moss Wall With Drip Irrigation Beside a Garden Seating Area
A living moss wall works best beside a shaded seating area where irrigation stays easy to inspect.
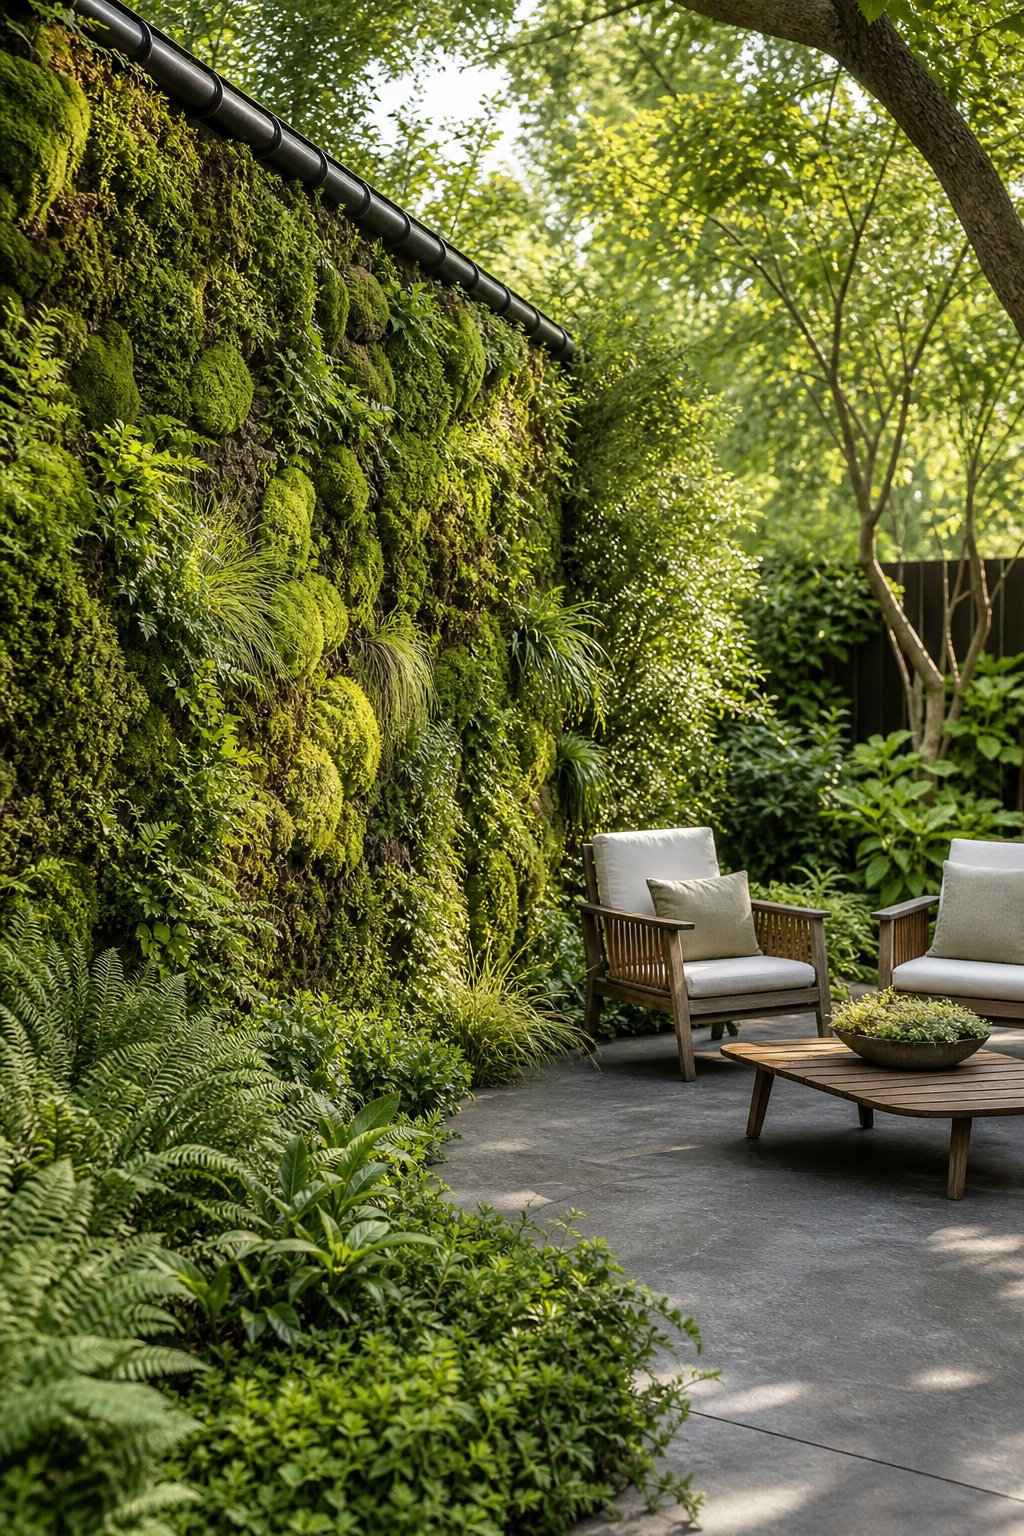
Use a moisture-holding backing, fine misting or drip lines, and a nearby shutoff valve. Moss likes steady moisture, gentle light, and good air movement. Place a bench or two chairs in front of the wall, leaving enough room to reach the tubing. Ferns, hostas, and woodland grasses make natural companions along the base. Check emitters each week for clogs, especially after pruning nearby plants. A simple timer keeps watering regular without turning the wall into a daily chore.
Expert Tip From MrPlanter: “Test the irrigation before you attach the moss. Aim for damp fibers, not water running down the face.”
3. Moss-Filled Gabion Wall for a Shaded Backyard
A gabion wall becomes a woodland boundary when pockets between its stones hold moss and shade plants.
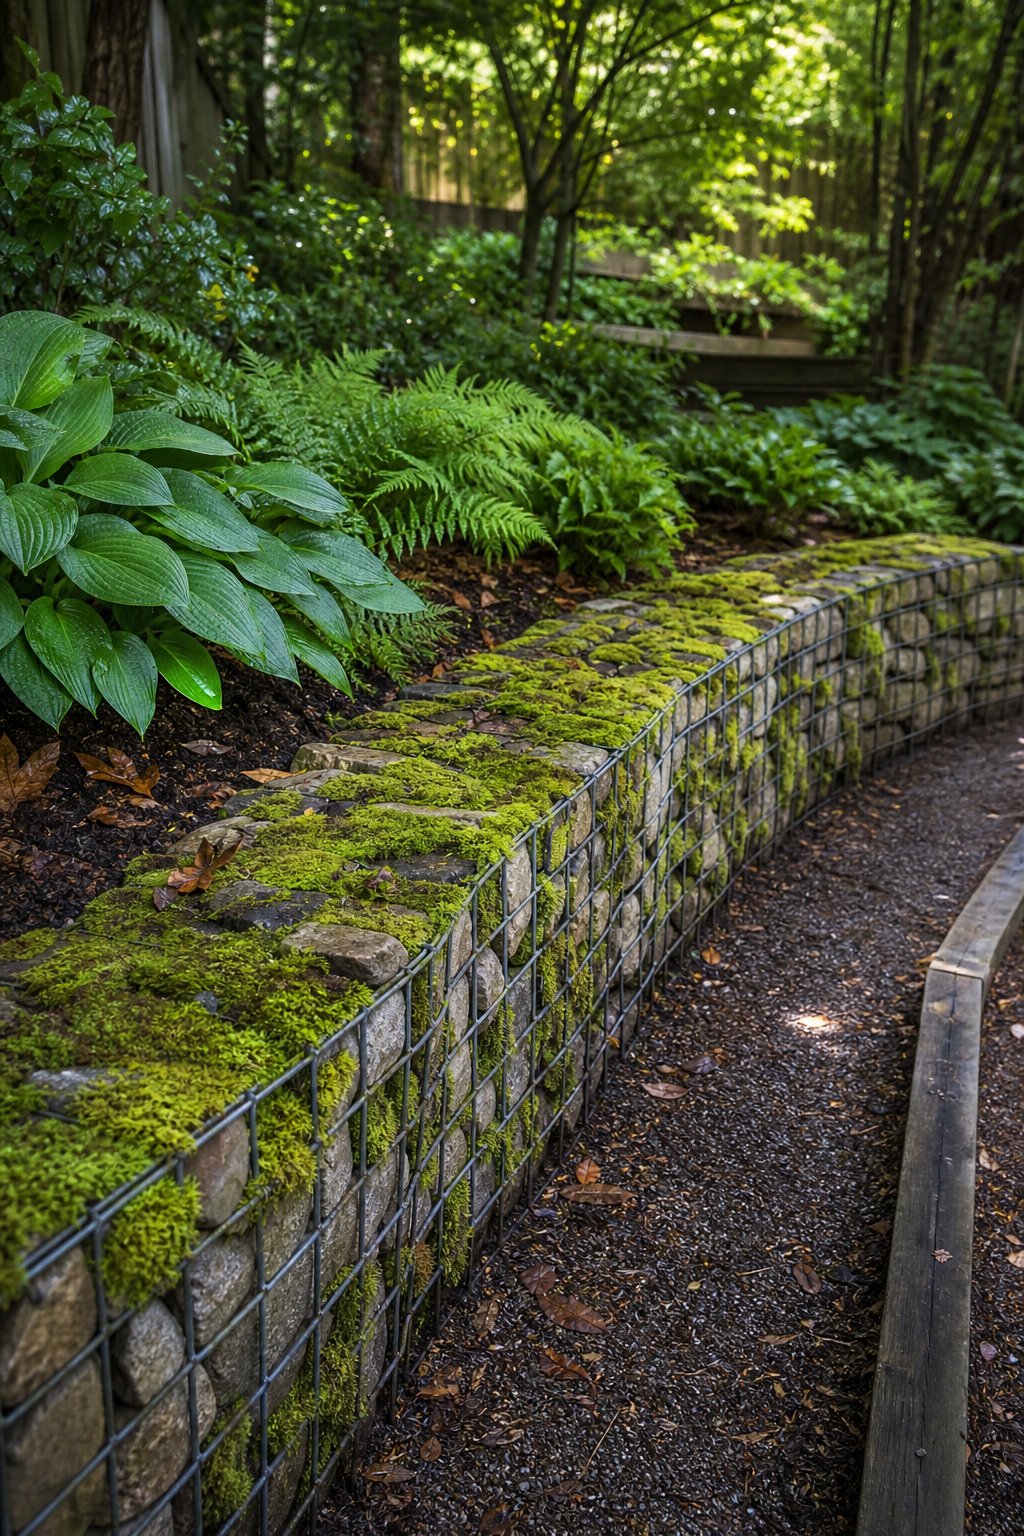
Choose stone with rough faces, then position the wall where rainfall and natural shade support moss growth. Pack selected crevices with damp moss and a small amount of suitable growing material. A curved layout softens the hard wire-and-stone form and guides people through the garden. Add ferns around the base for layered texture, keeping their roots clear of the drainage path. Gabion walls need a stable foundation, so handle grading and drainage before adding any greenery. See these retaining wall ideas for more ways to shape a sloped yard.
Expert Tip From MrPlanter: “Use smaller stones near the front so moss has protected cracks to settle into. Keep the lowest openings clear for runoff.”
4. Vertical Moss Garden on a North-Facing Fence
A north-facing fence offers the cool, dim setting that living moss prefers.
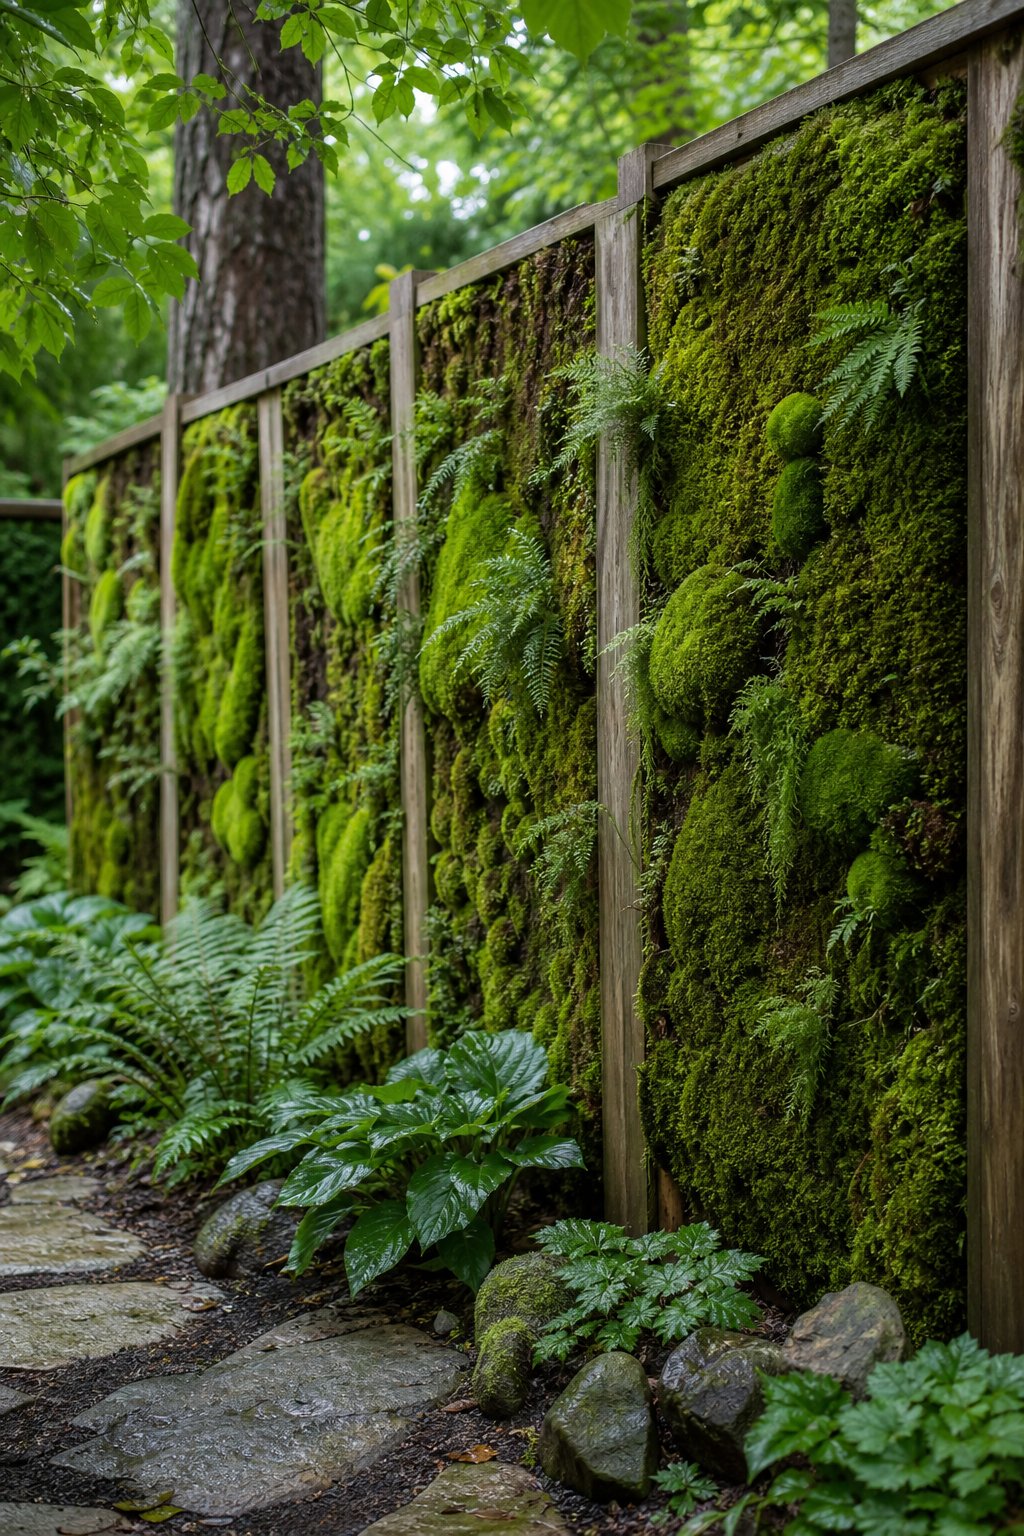
Start with a sound fence and attach a removable moss panel system so moisture doesn’t remain trapped against the boards. North-facing light is helpful, though nearby trees can create extra dryness when their roots compete for water. Use a moisture sensor at the center and lower edge of the panel to spot uneven watering. Let the moss form a broad green field, or add narrow timber battens for a tidy vertical pattern. Leave a service gap at one side for tubing repairs.
Expert Tip From MrPlanter: “Keep the panel slightly off the fence to protect the wood. Inspect the bottom edge first because standing moisture collects there.”
5. Moss-Covered Retaining Wall Along a Woodland Path
A shaded retaining wall along a path gains a soft, aged character as moss fills its cool stone joints.
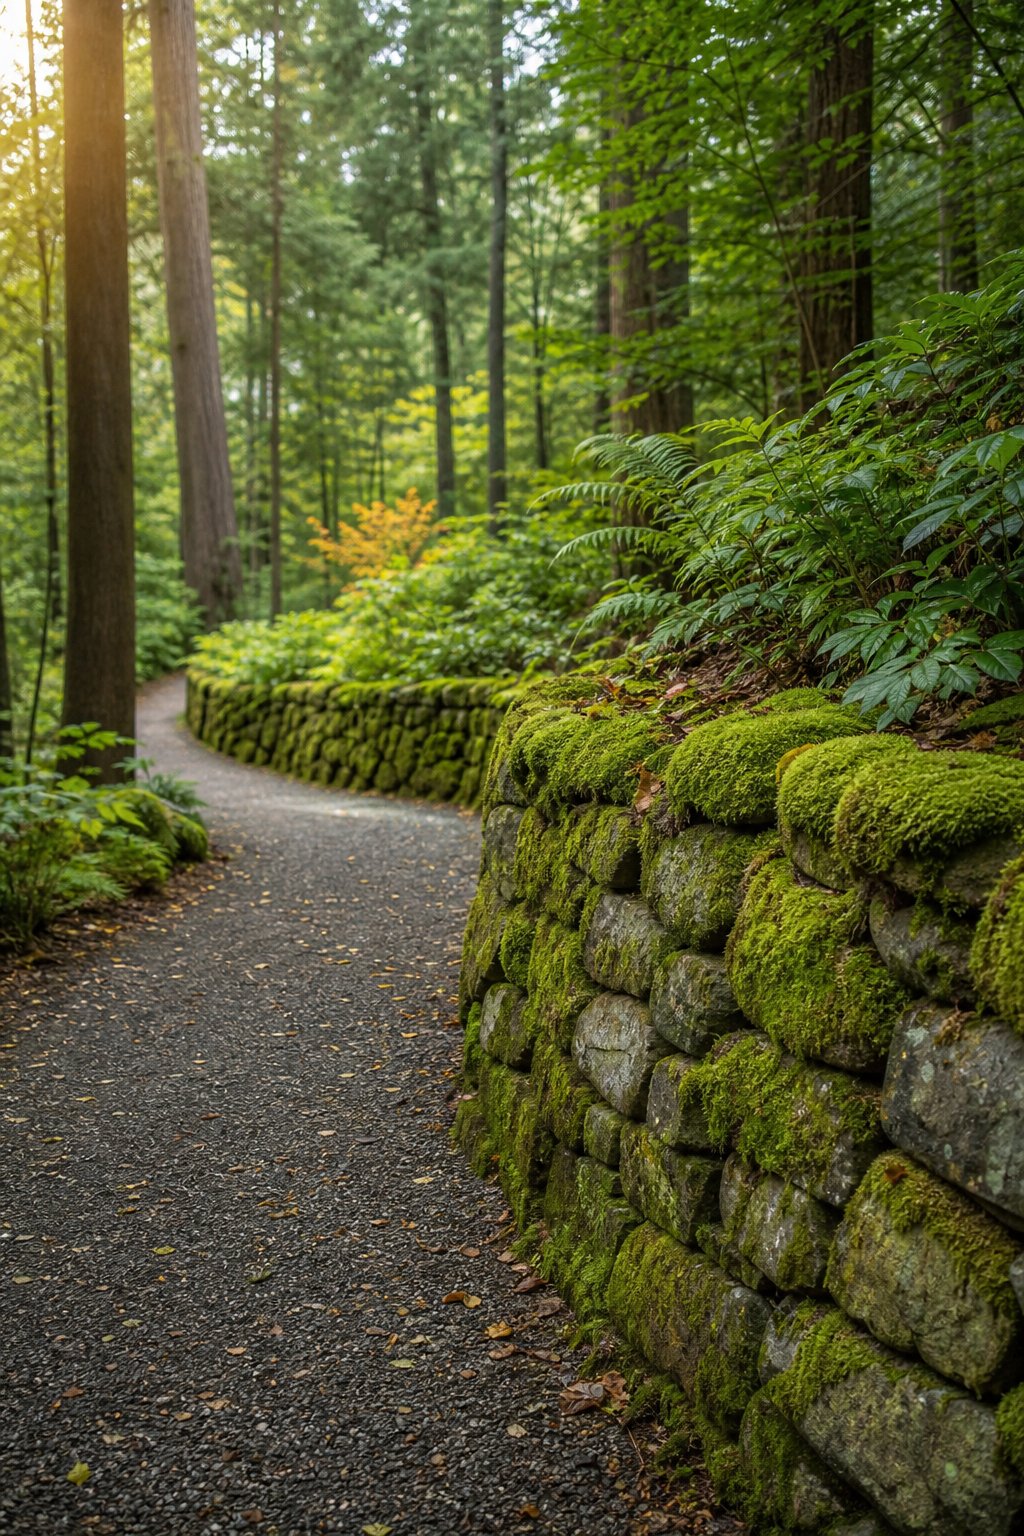
Clean loose debris from the wall, then leave stable, damp surfaces available for natural colonization. Rough stone and older brick give moss more grip than smooth concrete. Keep the path edge clear so visitors don’t brush against wet growth, and direct roof or slope runoff away from the footing. Low path lights bring out the texture after sunset without heating the wall. If the wall supports a slope, inspect cracks and movement before adding plants. A few ferns at the base help the boundary feel connected to the surrounding trees.
Expert Tip From MrPlanter: “Brush only loose dirt from the stone and leave established moss undisturbed. Avoid pressure washing, which strips away the small footholds moss needs.”
6. Framed Sheet Moss Panels on a Front Porch Wall
Framed sheet moss panels turn a plain front porch wall into calm, green entry art.
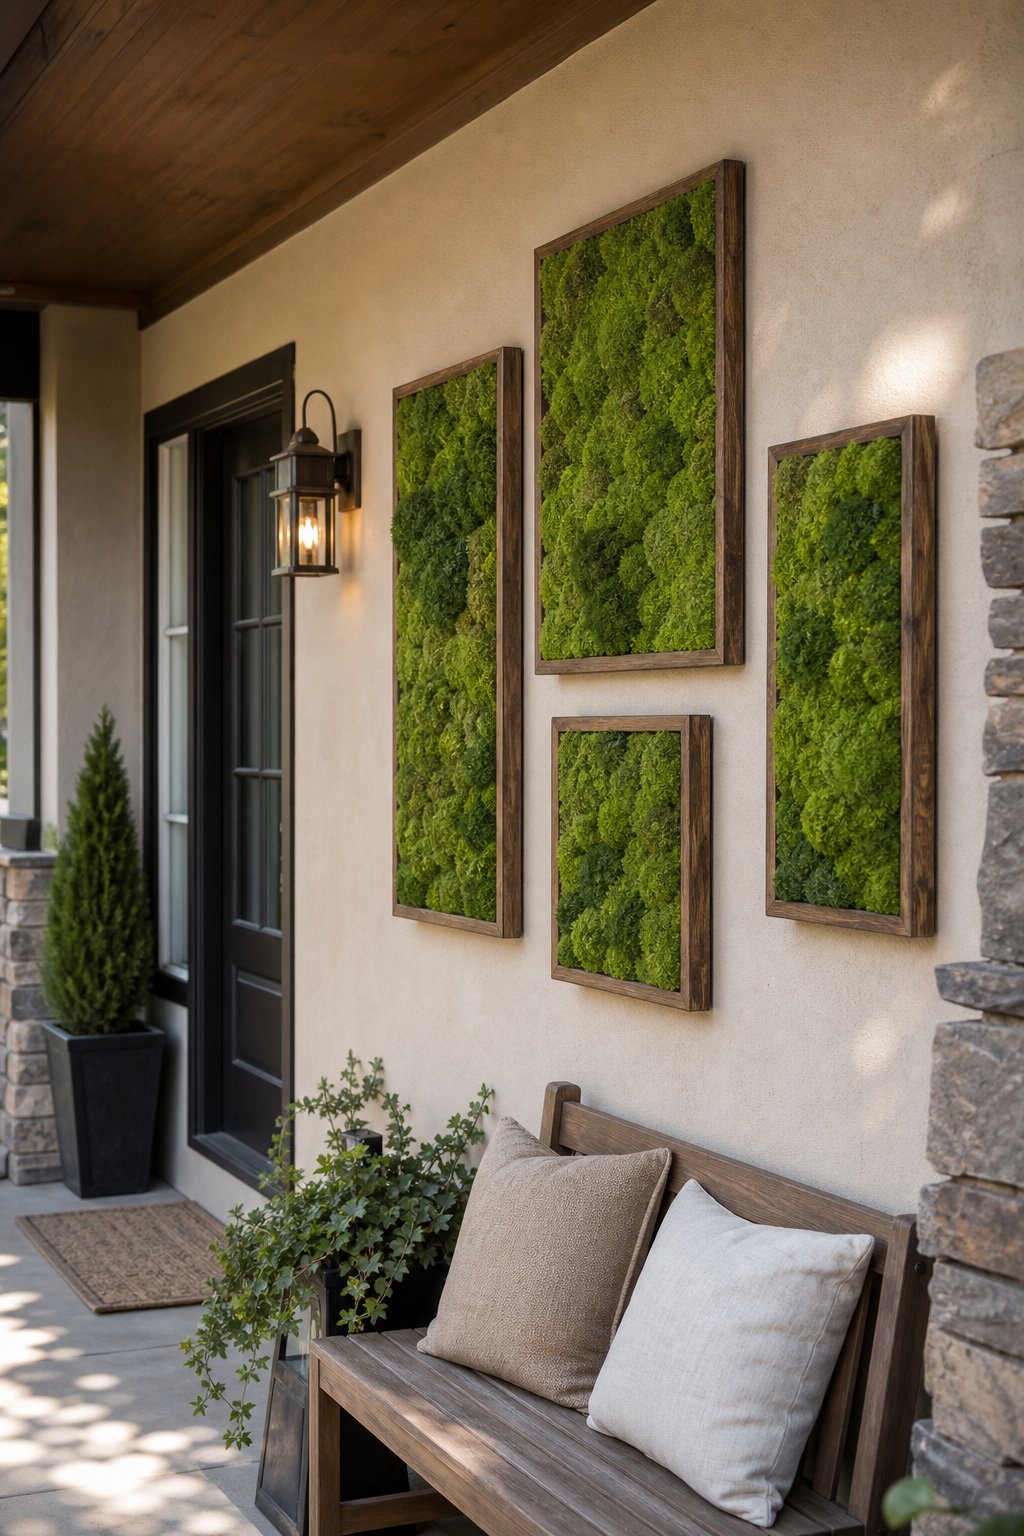
Arrange two or four panels in a clean grid, then use dark frames against pale siding for clear contrast. Preserved sheet moss keeps the look neat and avoids irrigation near your door. Choose a protected wall that stays dry during storms, and leave space around the frames for cleaning and repainting. Small house numbers or a metal sconce can sit beside the panels without crowding them. For a welcoming entry, combine this wall with practical front porch landscaping ideas such as low pots and a clear walkway.
Expert Tip From MrPlanter: “Measure the wall and mark every frame before drilling. A level top line makes several small panels look like one planned installation.”
7. Moss and Fern Wall Around a Backyard Water Feature
A water feature creates the damp, shaded microclimate that helps a natural moss-and-fern wall thrive.

Place the wall where spray reaches nearby stone without soaking the structure. Ferns soften the upper and lower edges, while moss fills cracks and flat sections. Use a waterproof liner behind any planted backing, and keep pump access visible for routine cleaning. Choose a quiet recirculating basin so water movement adds sound without creating heavy splash. This pairing suits a small courtyard or a larger woodland corner. For more layout ideas, explore backyard pond ideas with waterfall before fixing the wall height.
Expert Tip From MrPlanter: “Keep moss out of the pump intake and basin water. Trim ferns away from the service hatch so maintenance stays quick.”
8. Reindeer Moss Address Sign at the Front Entry
A reindeer moss address sign gives your front entry a soft green marker that guests can spot quickly.
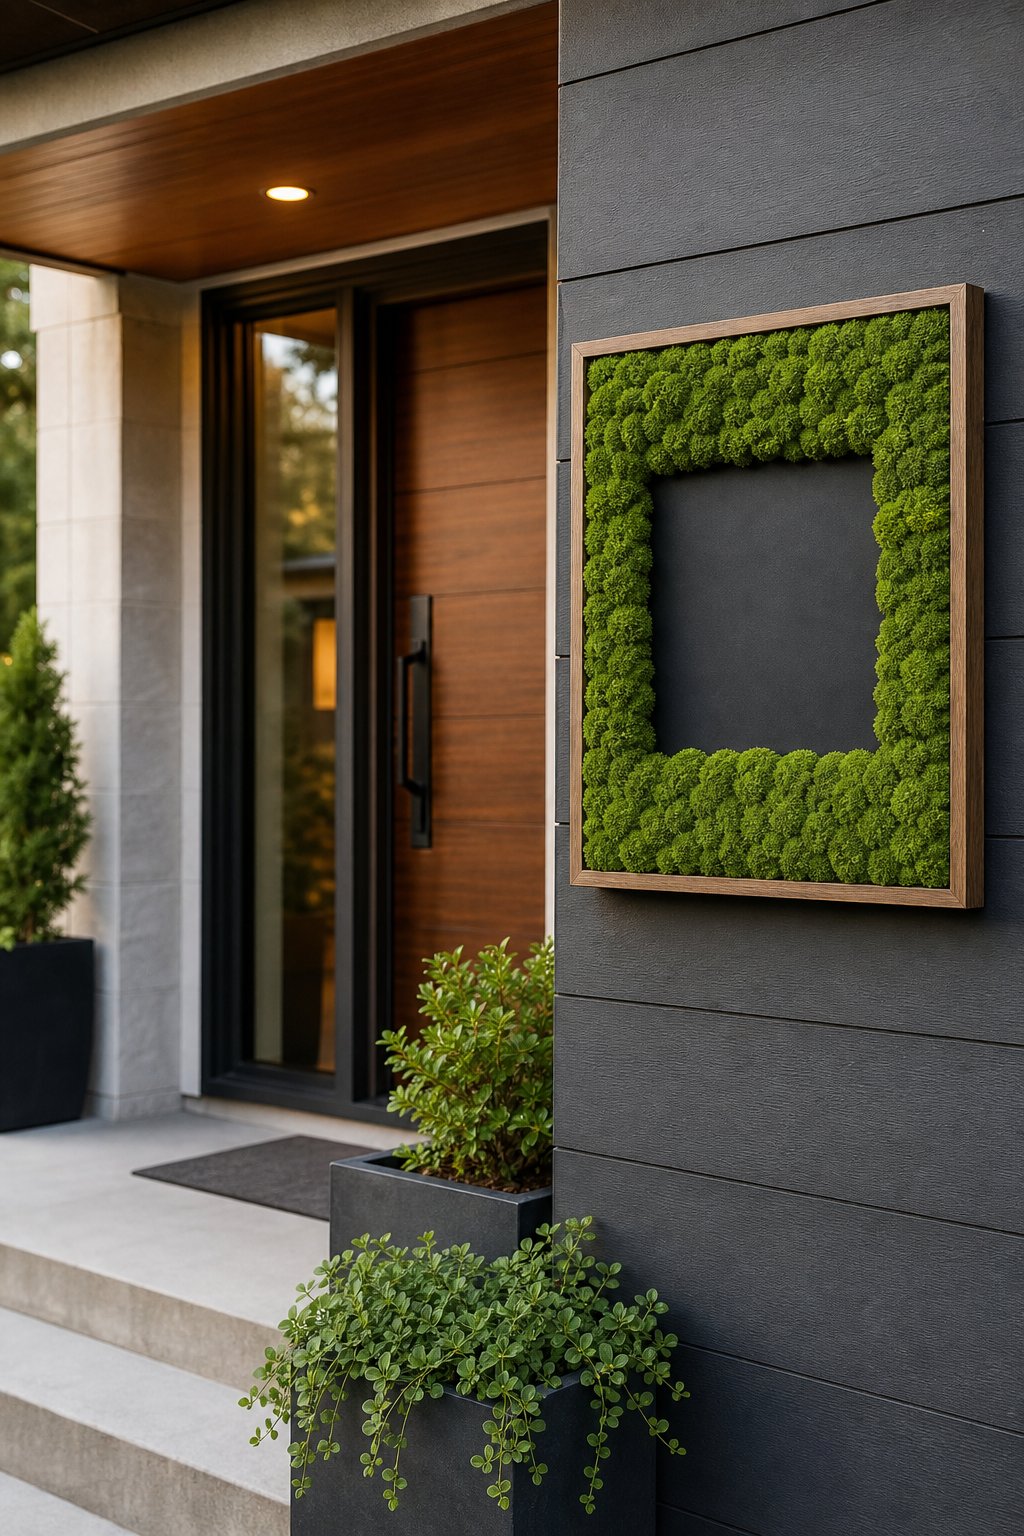
Mount the sign beside the door or along the walkway at eye level. Use clear metal or acrylic numbers with strong contrast, and keep the sign sheltered from direct rain. Reindeer moss is preserved, so it needs no watering, trimming, or soil. A shallow wood frame makes the display feel garden-friendly, while a black frame suits a modern facade. Add a small downlight if evening visibility matters. Keep the sign large enough to read from the street without making the entry feel crowded.
Expert Tip From MrPlanter: “Pick numbers with a simple shape and generous spacing. Dust the moss with a soft brush, and keep the sign away from sprinklers.”
9. Moss Mosaic Wall With Stone and Driftwood Accents
A moss mosaic gives you a garden wall with pattern, depth, and a little natural theater.
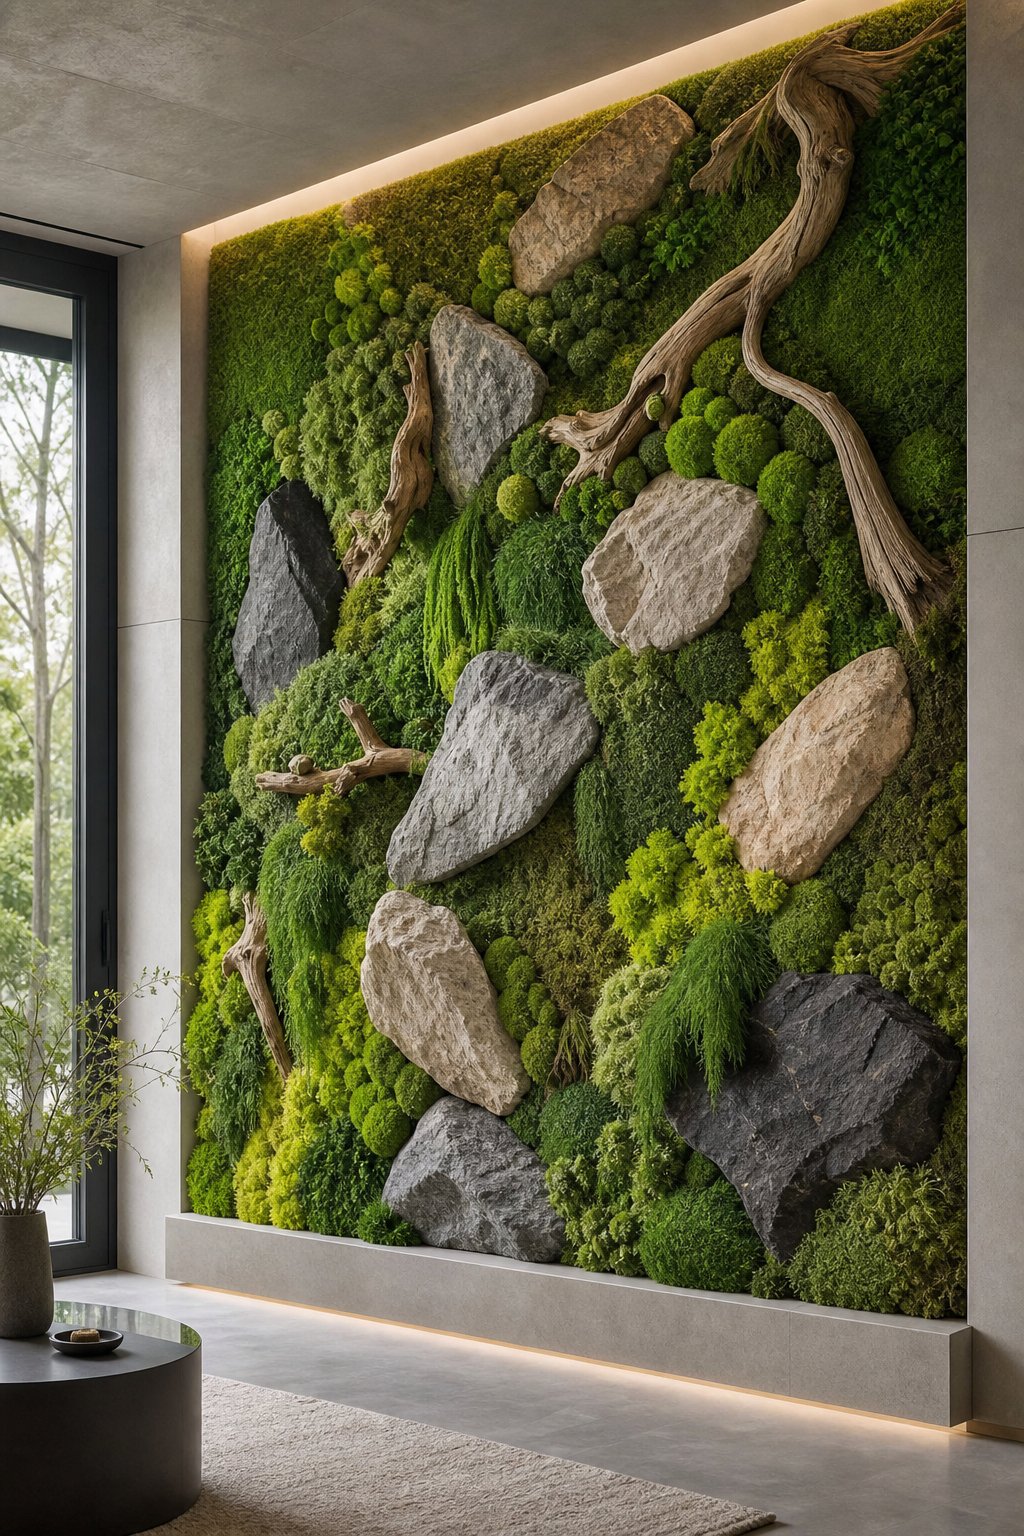
Build the composition on a firm panel, using moss as the main field and stone or driftwood as narrow accent bands. Repeat one shape, such as a wave or arch, so the mix feels intentional. Use lightweight, sealed driftwood for a mounted display, and avoid pieces that hold rain against the backing. A mosaic works well beside a shed, at the end of a path, or behind a bench. Keep the palette restrained, with two moss textures and one hard accent material.
Expert Tip From MrPlanter: “Lay every piece on the ground before mounting it. Photograph the arrangement so you can rebuild the pattern after adhesive and fasteners are ready.”
10. Moss-Faced Privacy Screen Between Garden Zones
A moss-faced privacy screen separates garden spaces while keeping the boundary soft and inviting.
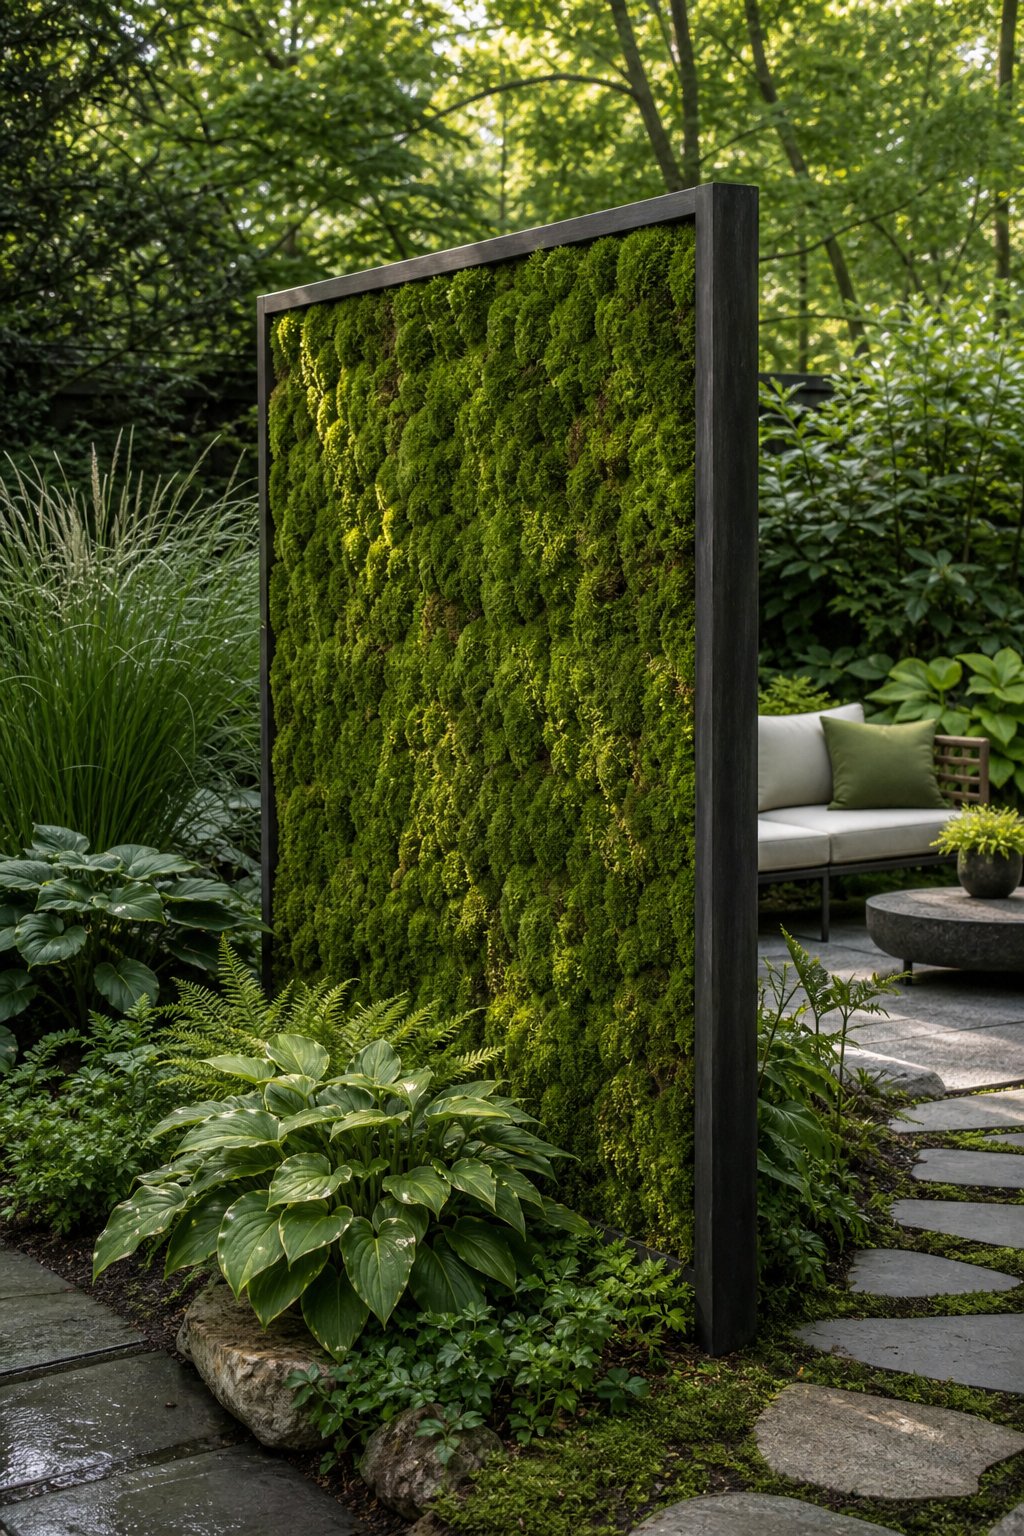
Use a slatted frame with a moss panel on one side, or cover both sides when people move around the screen. The structure needs solid posts, a protected backing, and room for air to pass around its edges. Set it between a dining area and a planting bed, or hide bins and tools behind it. Add a narrow opening or offset the panels so the screen guides movement without creating a hard stop. Compare the proportions with these garden fencing ideas for privacy seekers before choosing its height.
Expert Tip From MrPlanter: “Anchor the screen below the frost line where local building practice requires it. Keep moss panels clear of soil splash from nearby beds.”
11. Shaded Brick Wall With Naturally Established Moss
A shaded brick wall can develop a rich moss finish when its surface stays cool, damp, and stable.
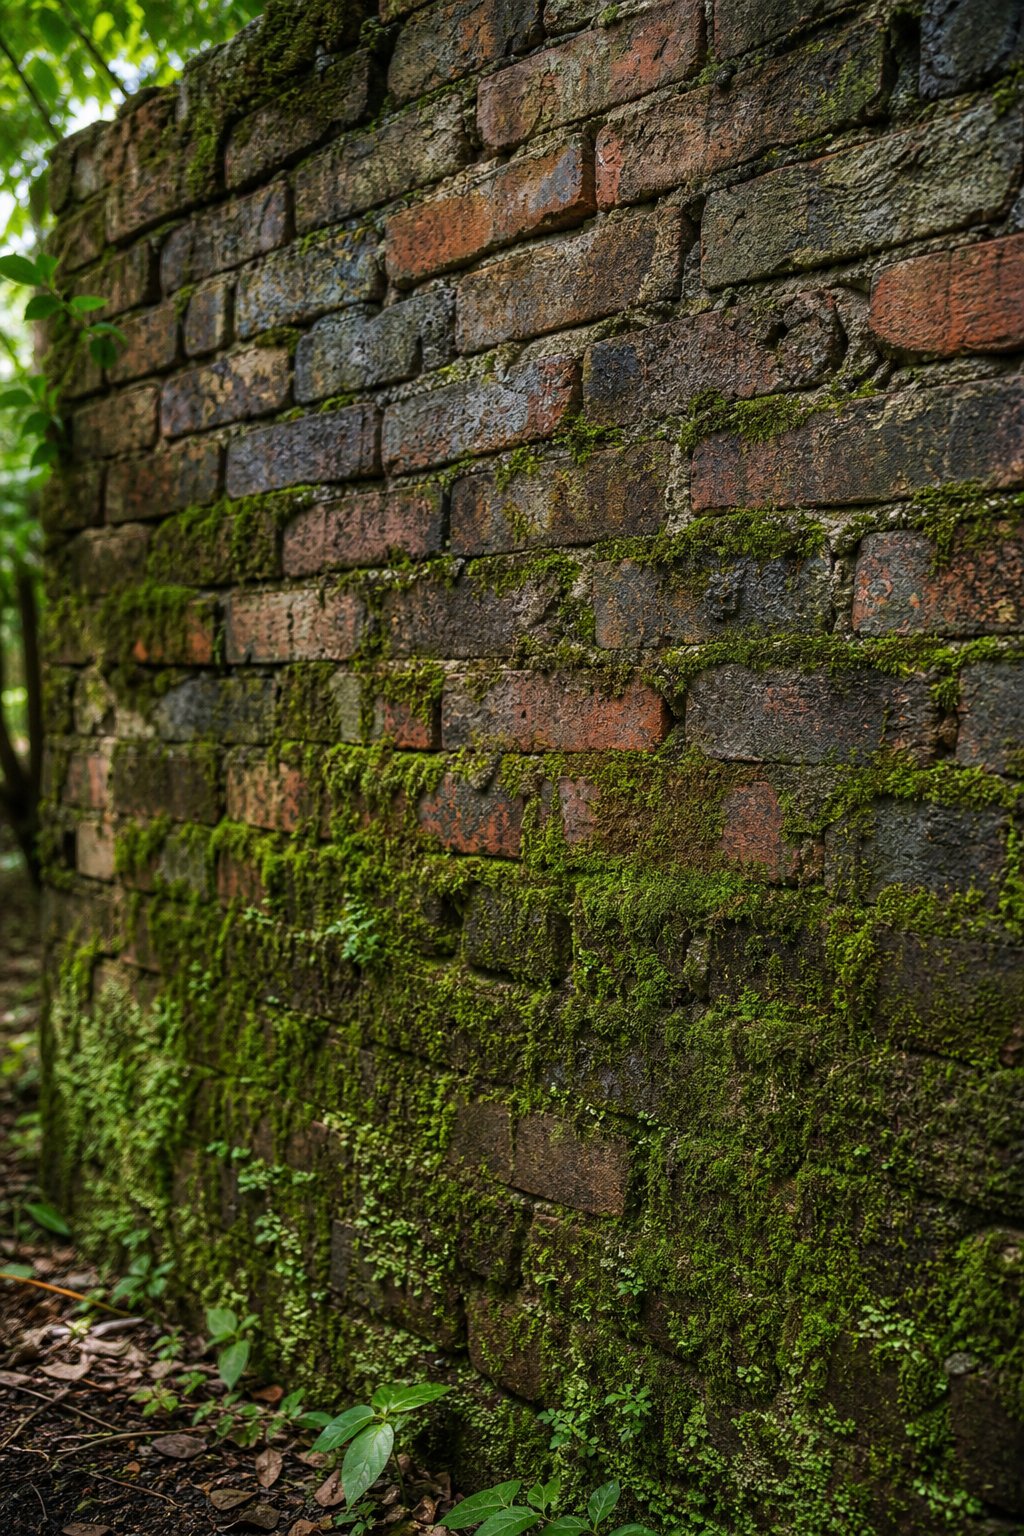
Choose a wall away from strong sun and remove only loose weeds or damaged mortar. Trees, fences, and tall shrubs can provide shade, though roots and branches should stay clear of the masonry. Avoid sealing the face if you want moss to establish, and keep gutters from dumping concentrated water onto one spot. Natural growth looks best when you allow irregular edges and leave a few bricks visible. Check the mortar each year for crumbling areas that need repair.
Expert Tip From MrPlanter: “Test a small patch before encouraging growth across the wall. If mortar turns powdery, repair it first and keep the moss on sound surfaces.”
12. Moss-Wrapped Garden Arch at a Woodland Entrance
A moss-wrapped garden arch turns a woodland entrance into a gentle threshold with a strong sense of place.
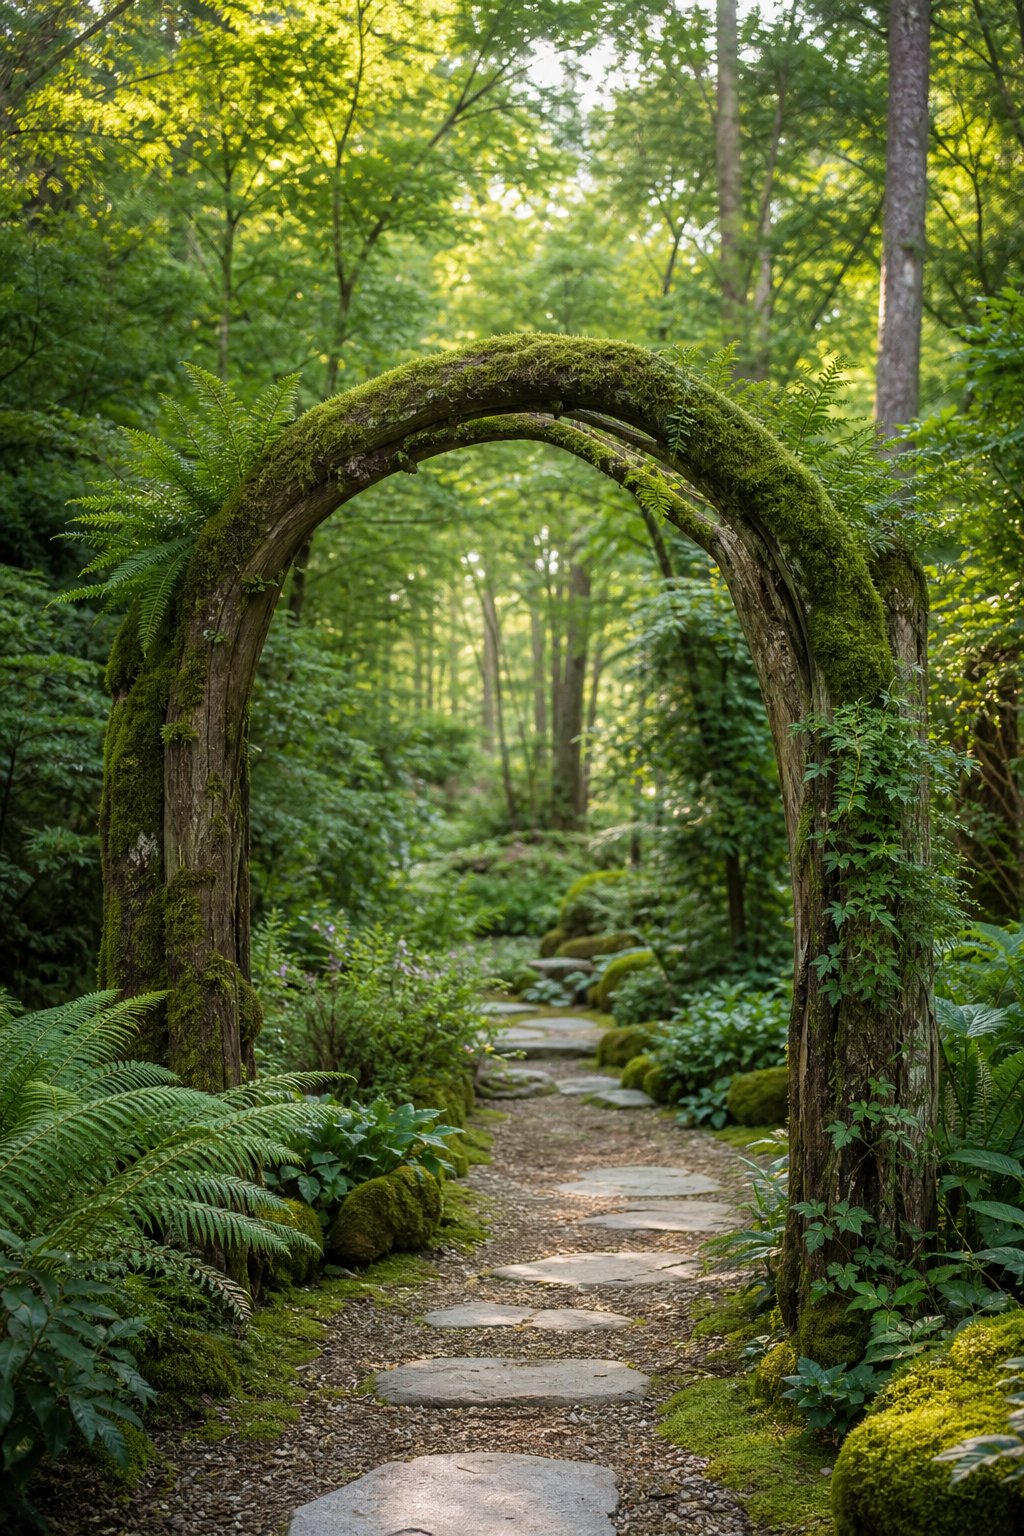
Build the arch from rot-resistant wood, then attach preserved moss panels to the shaded inner faces. This keeps the green texture visible as you walk beneath it and protects the moss from severe weather. Living moss works when the arch sits in cool shade with reliable moisture, though irrigation needs careful placement overhead. Let vines frame the sides, leaving the opening clear for people and garden carts. A curved path beyond the arch makes the entrance feel deeper without requiring a large structure.
Expert Tip From MrPlanter: “Keep the arch wide enough for tools and wheelbarrows. Seal exposed wood before adding moss so repairs don’t disturb the finished surface.”
13. Geometric Preserved Moss Panels in an Outdoor Kitchen
Geometric preserved moss panels add color and texture behind an outdoor kitchen while staying clear of cooking heat.
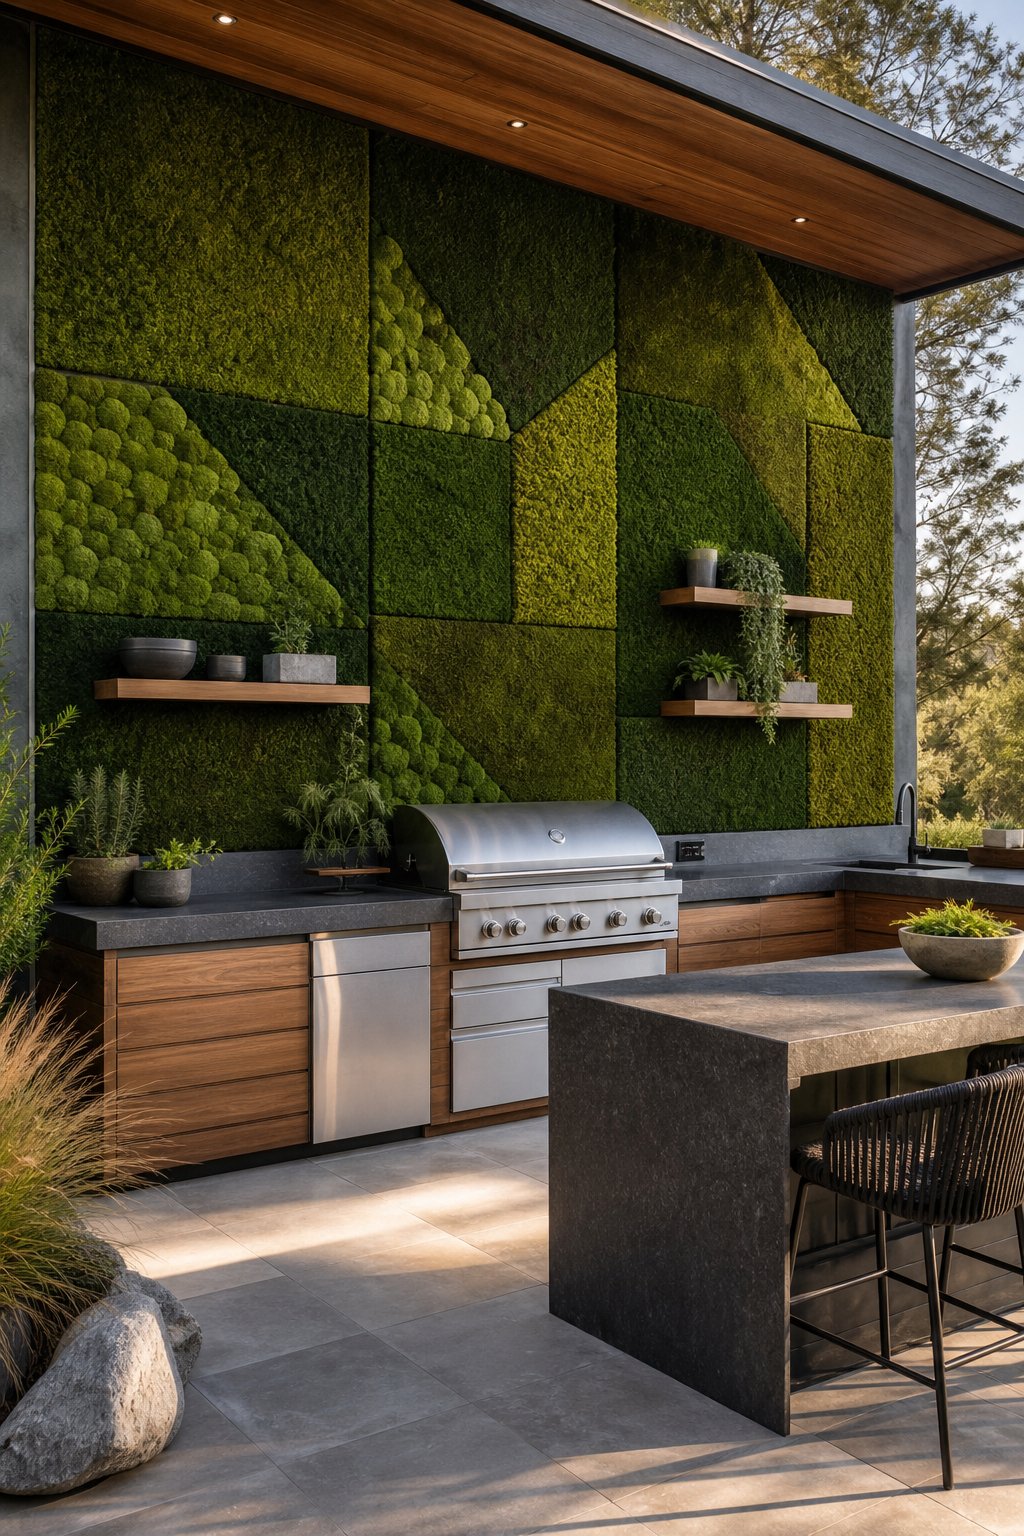
Place the panels on a wall behind the dining counter or beside the grill, following local clearance rules for heat and combustible materials. Use triangles, arches, or staggered rectangles to echo the kitchen’s counter lines. Preserved moss handles a protected area well, though grease and smoke require careful placement. Keep the wall away from the grill hood outlet, and choose a surface that wipes clean around the panel edges. Pair dark cabinetry with medium green moss for a clear, tailored garden-cooking backdrop.
Expert Tip From MrPlanter: “Leave the hottest zone around the grill open and easy to clean. Mount the moss on a removable panel so you can service the kitchen wall later.”
14. Moss Wall Backdrop for a Courtyard Dining Nook
A moss wall makes a courtyard dining nook feel enclosed and calm without adding a heavy solid boundary.
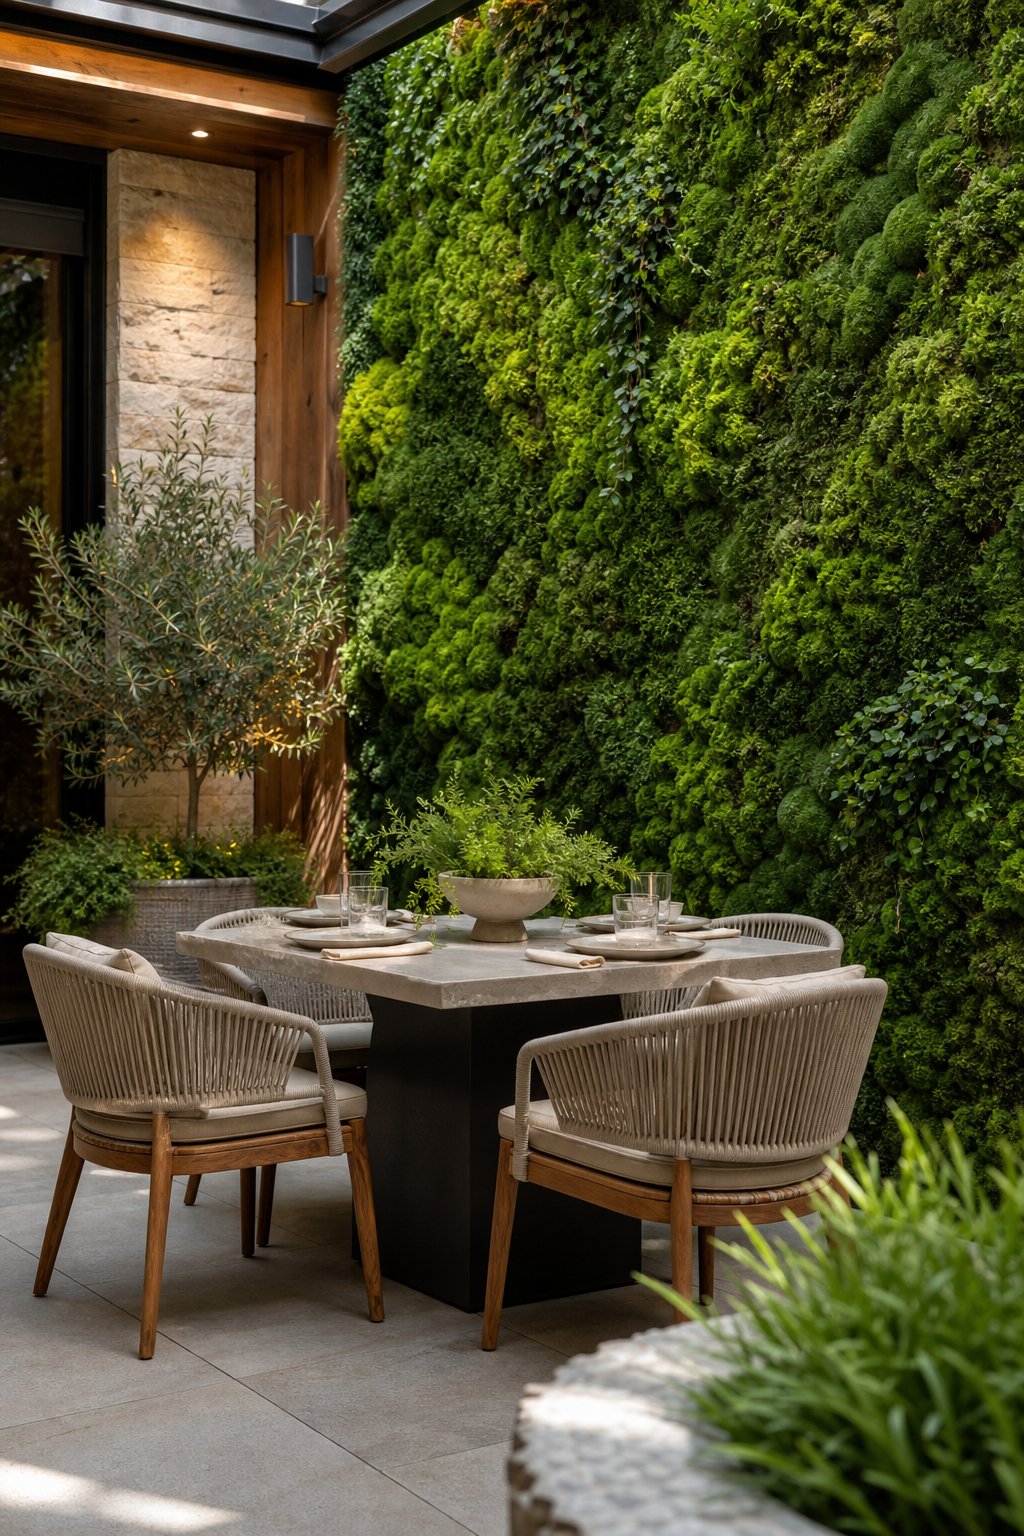
Cover the wall behind the table with preserved moss, then add warm lighting above the seating area. The green surface gives plain stucco or concrete a softer finish and helps define the dining zone. Choose a deep frame or side trim to keep the panels visually crisp. Leave enough clearance for chairs to move and for you to reach the wall during cleaning. If the courtyard is small, use one broad panel instead of several busy shapes. These patio decorating ideas can help coordinate textiles, lighting, and table placement.
Expert Tip From MrPlanter: “Keep the table centered on the panel, not the room, if the walls are uneven. A narrow ledge below the moss protects it from chair bumps.”
15. Moss-Lined Concrete Block Planter Wall
A concrete block planter wall gains warmth when moss follows its joints and frames the plants above it.
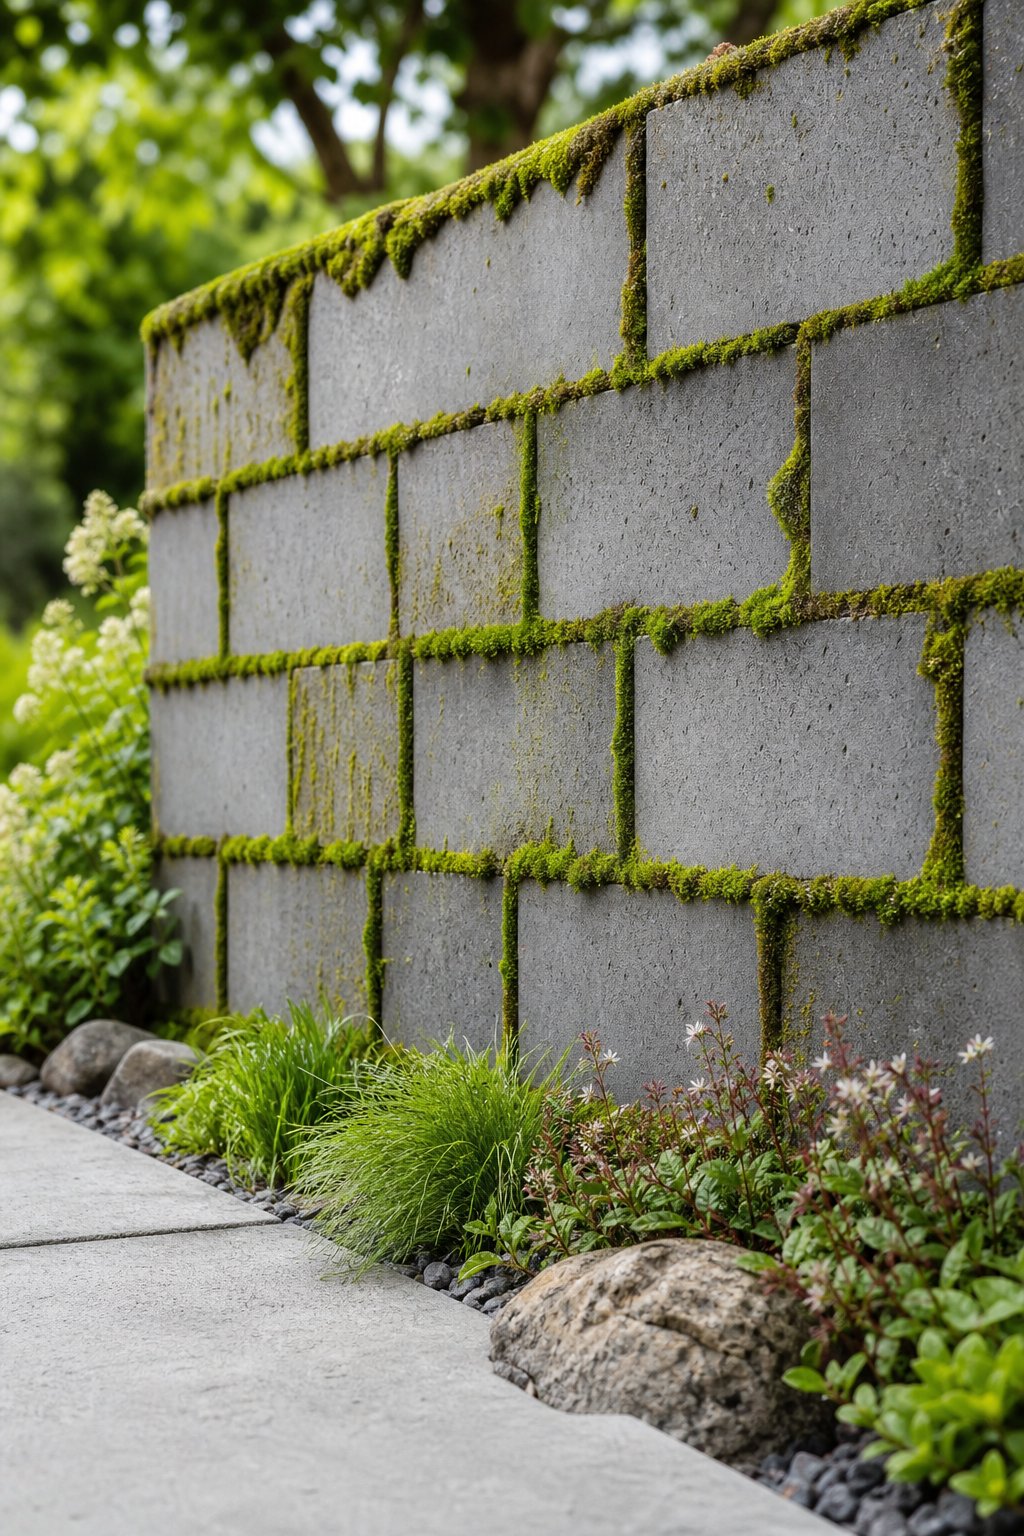
Use the wall’s natural grid as a guide, placing moss in selected joints instead of covering every block. This pattern keeps the structure visible and makes the greenery look established. Shady planting beds, downspouts with controlled flow, and porous block surfaces support growth. Keep soil below the wall cap so erosion doesn’t bury the lower moss. If you want a cleaner result, attach narrow preserved moss strips to a separate face panel. The approach fits modern yards and simple vegetable garden boundaries.
Expert Tip From MrPlanter: “Mark the joints that receive shade through the afternoon before planting. Keep fertilizer away from the moss because salts can dry its surface.”
16. Moss and Bark Accent Wall Behind a Garden Bench
A moss and bark accent wall gives your garden bench a textured backdrop that feels at home among trees.
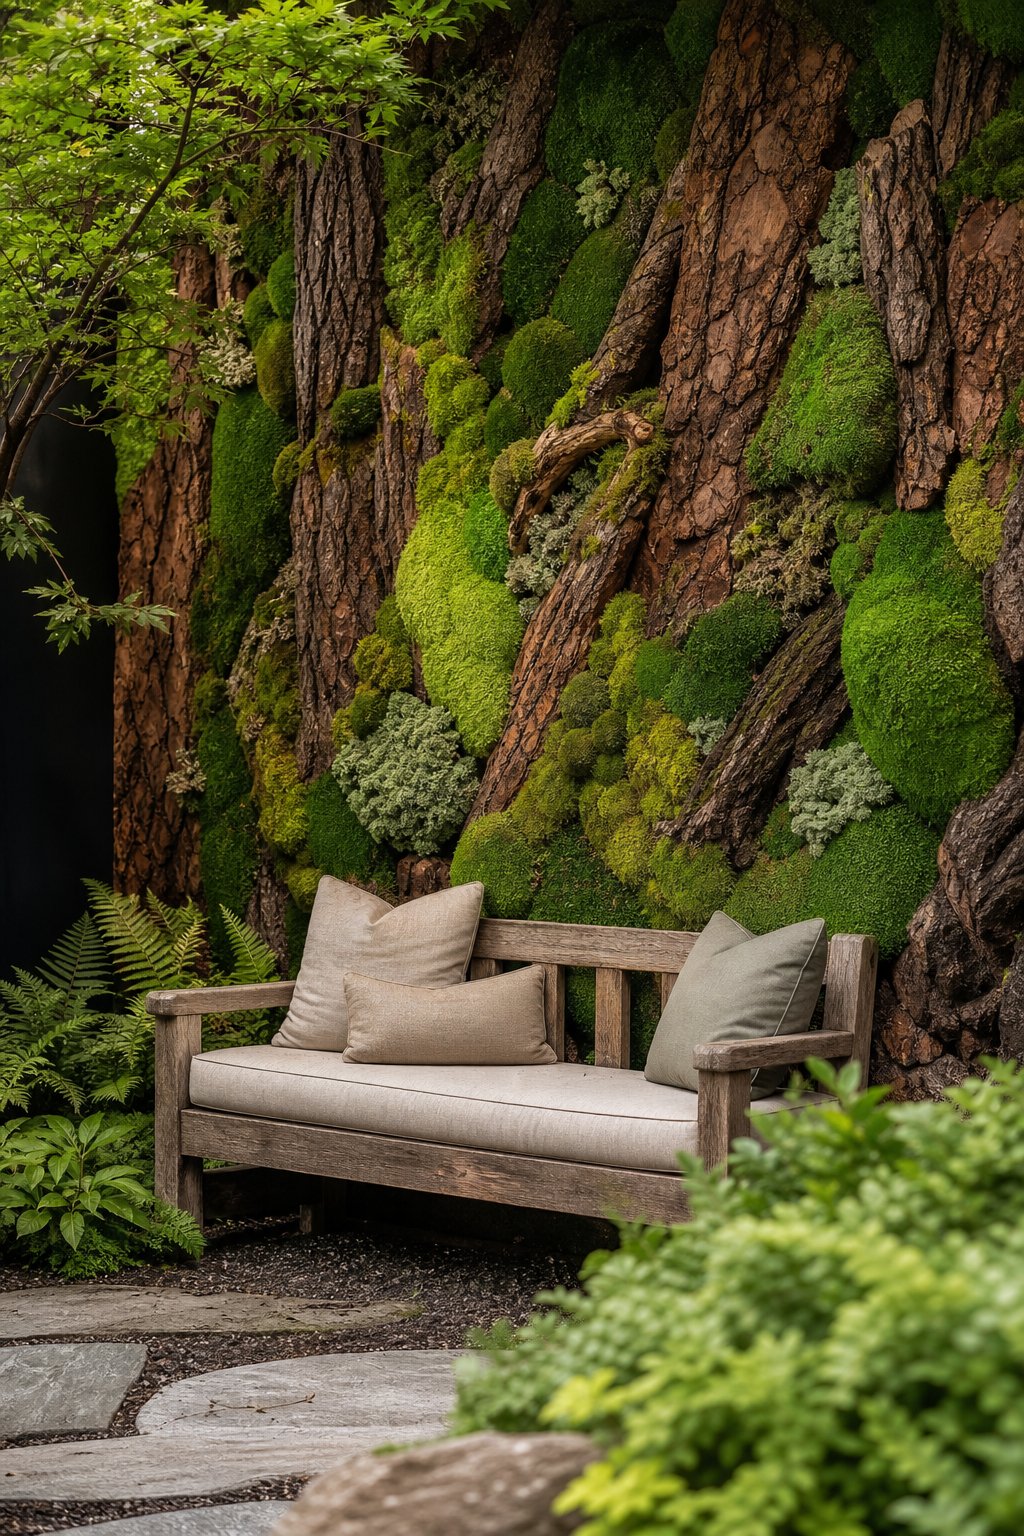
Combine broad preserved moss areas with vertical bark pieces to create contrast behind the seat. Mount both materials on a sturdy panel, then place the bench far enough forward for comfortable sitting and easy sweeping. This idea works beside a path, beneath a porch roof, or at the back of a shaded planting bed. Use bark with a dry, firm surface and secure every piece against wind. A small side table or lantern completes the resting spot without hiding the wall.
Expert Tip From MrPlanter: “Round sharp bark edges before mounting them near the bench. Leave the lower panel several inches above soil and mulch to limit splash.”
How to Choose Between Living and Preserved Moss
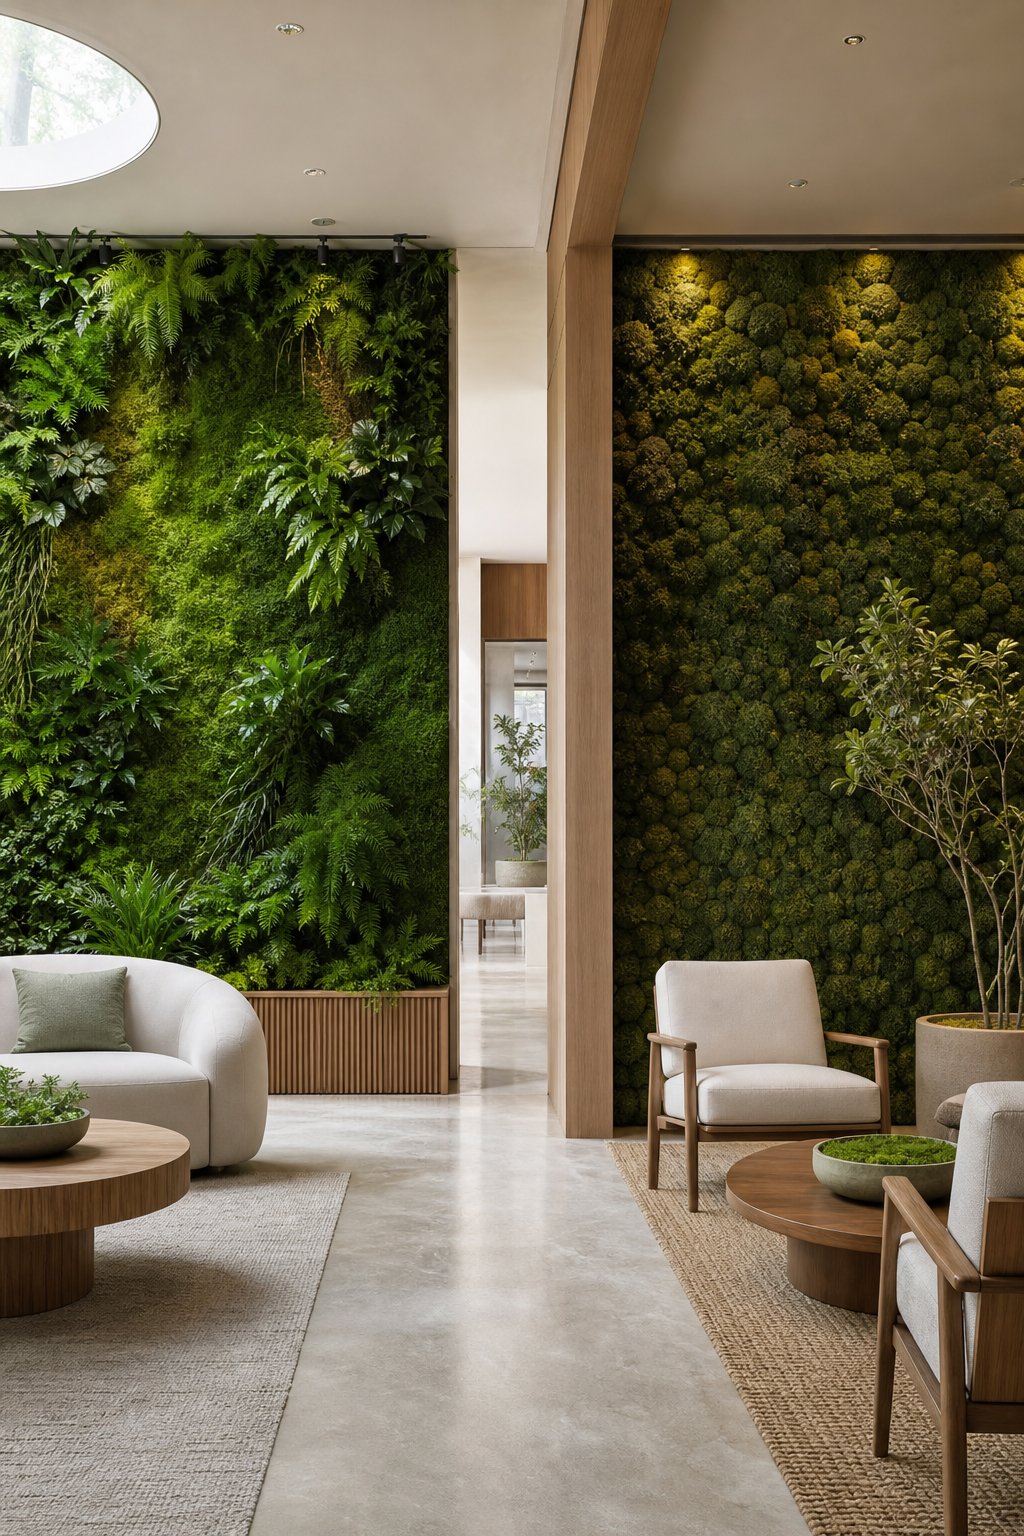
Which Moss Wall Type Works Outdoors?
Living moss suits a cool, shaded garden with steady moisture and a workable irrigation route. Preserved moss fits a covered patio, porch, entry wall, or protected courtyard where you want stable color and no watering. Faux moss works for exposed spots where weather would damage preserved fibers and conditions are too dry for living growth.
Choose the wall system after checking light, rainfall, wind, and access to water. A removable panel makes repairs easier for either type, especially on fences and screens.
What Shade and Moisture Levels Does Living Moss Need?
Living moss needs indirect light, damp air or regular moisture, and a surface that holds water without staying flooded. Morning shade with filtered daylight works well; hot afternoon sun dries the fibers quickly. Test the site for a week by checking the wall at midday and late afternoon.
Drip lines or fine mist can provide steady moisture, though the exact schedule depends on weather and the backing material. Good airflow helps prevent stagnant, sour-smelling wetness.
Where Does Preserved Moss Make Sense in a Covered Garden Space?
Preserved moss makes sense where a roof or deep overhang blocks rain and strong sun. It suits decorative boundaries that you want to enjoy without plumbing, timers, or regular watering. Keep it away from grill heat, sprinkler spray, and places where furniture will rub against the surface.
Reindeer moss provides rounded texture, sheet moss creates a flatter finish, and mixed panels give you a more varied surface. Ask for outdoor suitability from the supplier before installation, because preserved moss treatments differ.
Installation and Care Essentials

How Do You Protect a Moss Wall From Sun, Wind, and Heavy Rain?
Protect moss with a roof, shade structure, side screen, or carefully placed tree canopy. Direct sun fades preserved moss and dries living moss, while strong wind loosens fibers and increases water loss. Heavy rain can saturate backing materials and stain nearby masonry.
Secure panels with corrosion-resistant fasteners, keep water from pooling behind them, and inspect edges after storms. A removable face panel lets you dry or repair the wall without dismantling the whole boundary.
Which Backing Materials Are Best for Outdoor Moss Walls?
Use a rigid, moisture-resistant backing such as exterior-grade composite board, sealed plywood, or a purpose-built planting panel. Living systems need a backing that holds moisture while allowing drainage and airflow. Preserved systems need a dry, stable face with a protected rear surface.
Seal cut edges, raise the panel above soil, and leave a service gap behind it. Attach the finished panel to sound posts, masonry anchors, or a properly framed fence.
How Can You Encourage Natural Moss Without Damaging Masonry?
Encourage natural moss by improving shade and moisture while leaving stable brick or stone surfaces undisturbed. Remove loose dirt with a soft brush, control roof runoff, and avoid harsh cleaners or pressure washing. Moss prefers rough, slightly weathered surfaces with small cracks for attachment.
Check mortar before encouraging growth. Repair powdery joints first, then allow moss to return to sound areas while keeping drainage openings clear. A small test patch helps you judge the wall’s response before treating a larger boundary.