As an Amazon Associate, MrPlanter.com earns from qualifying purchases.
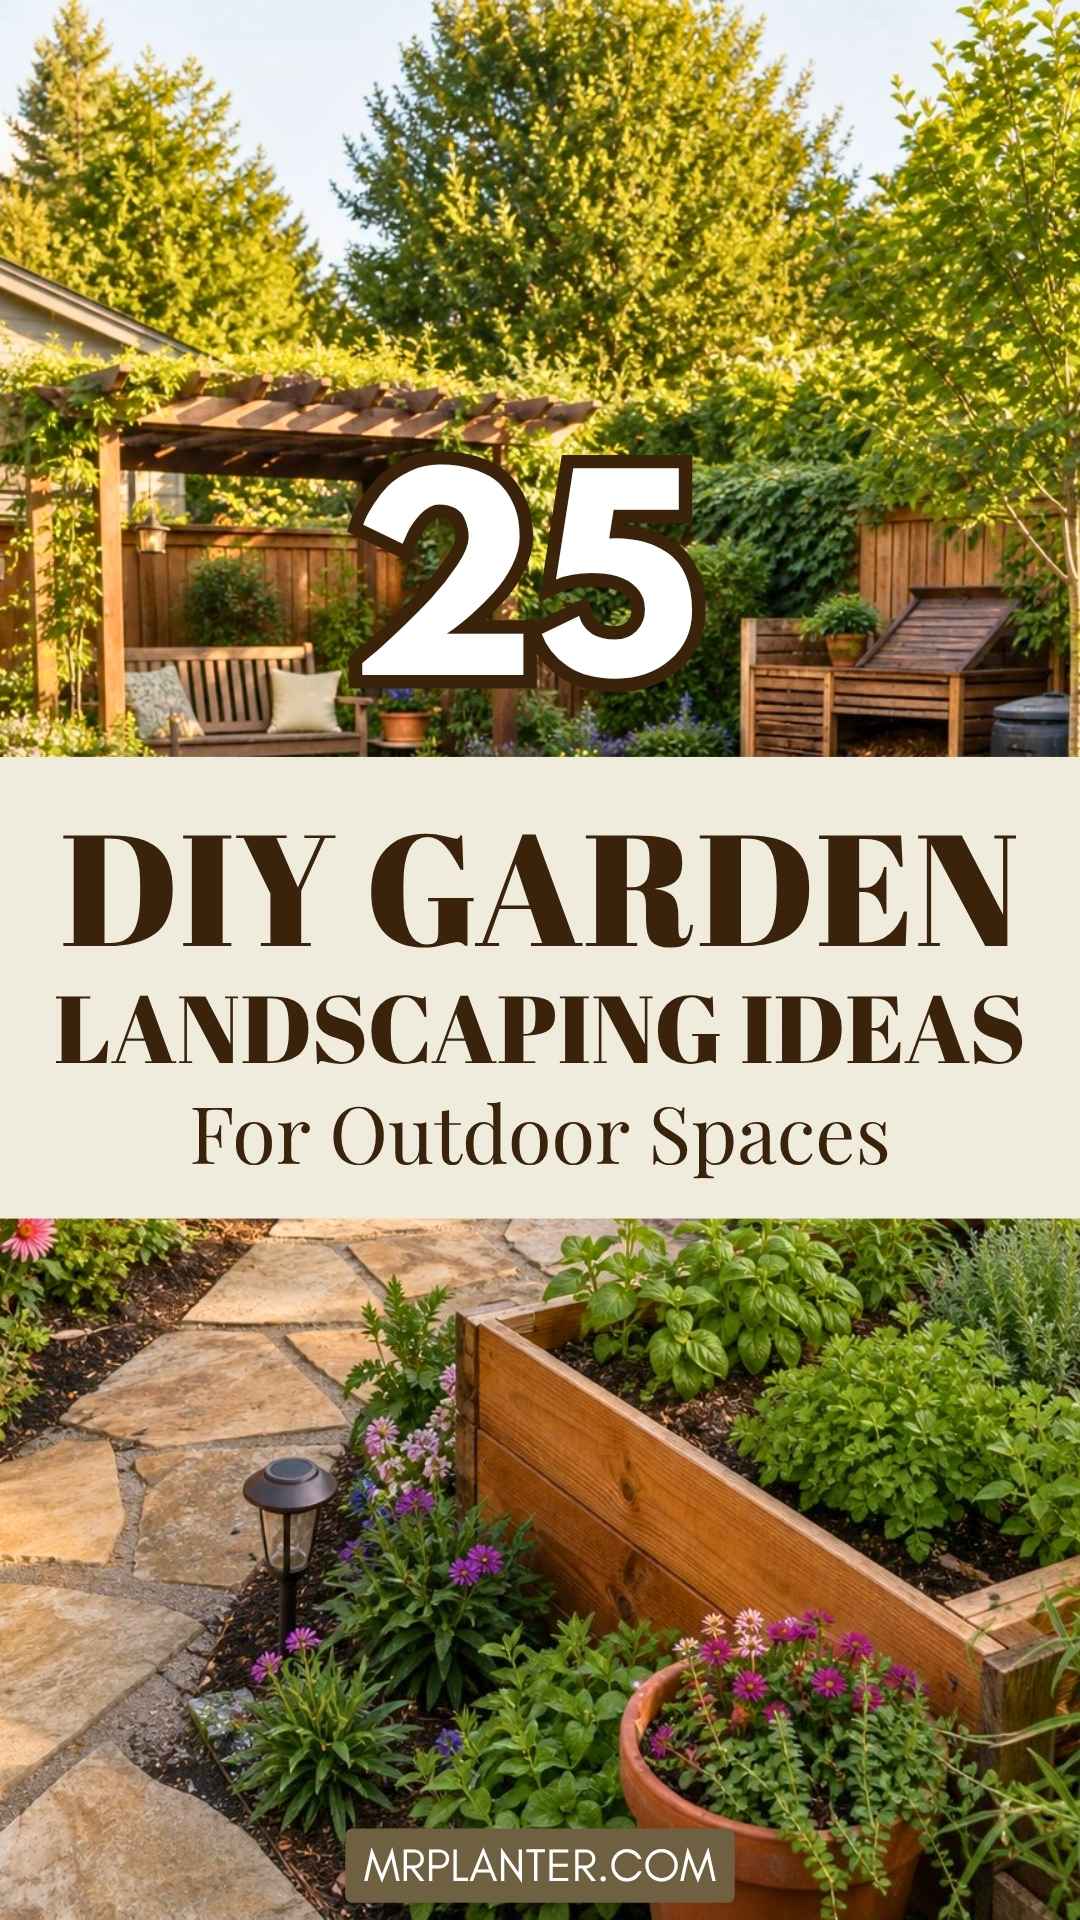
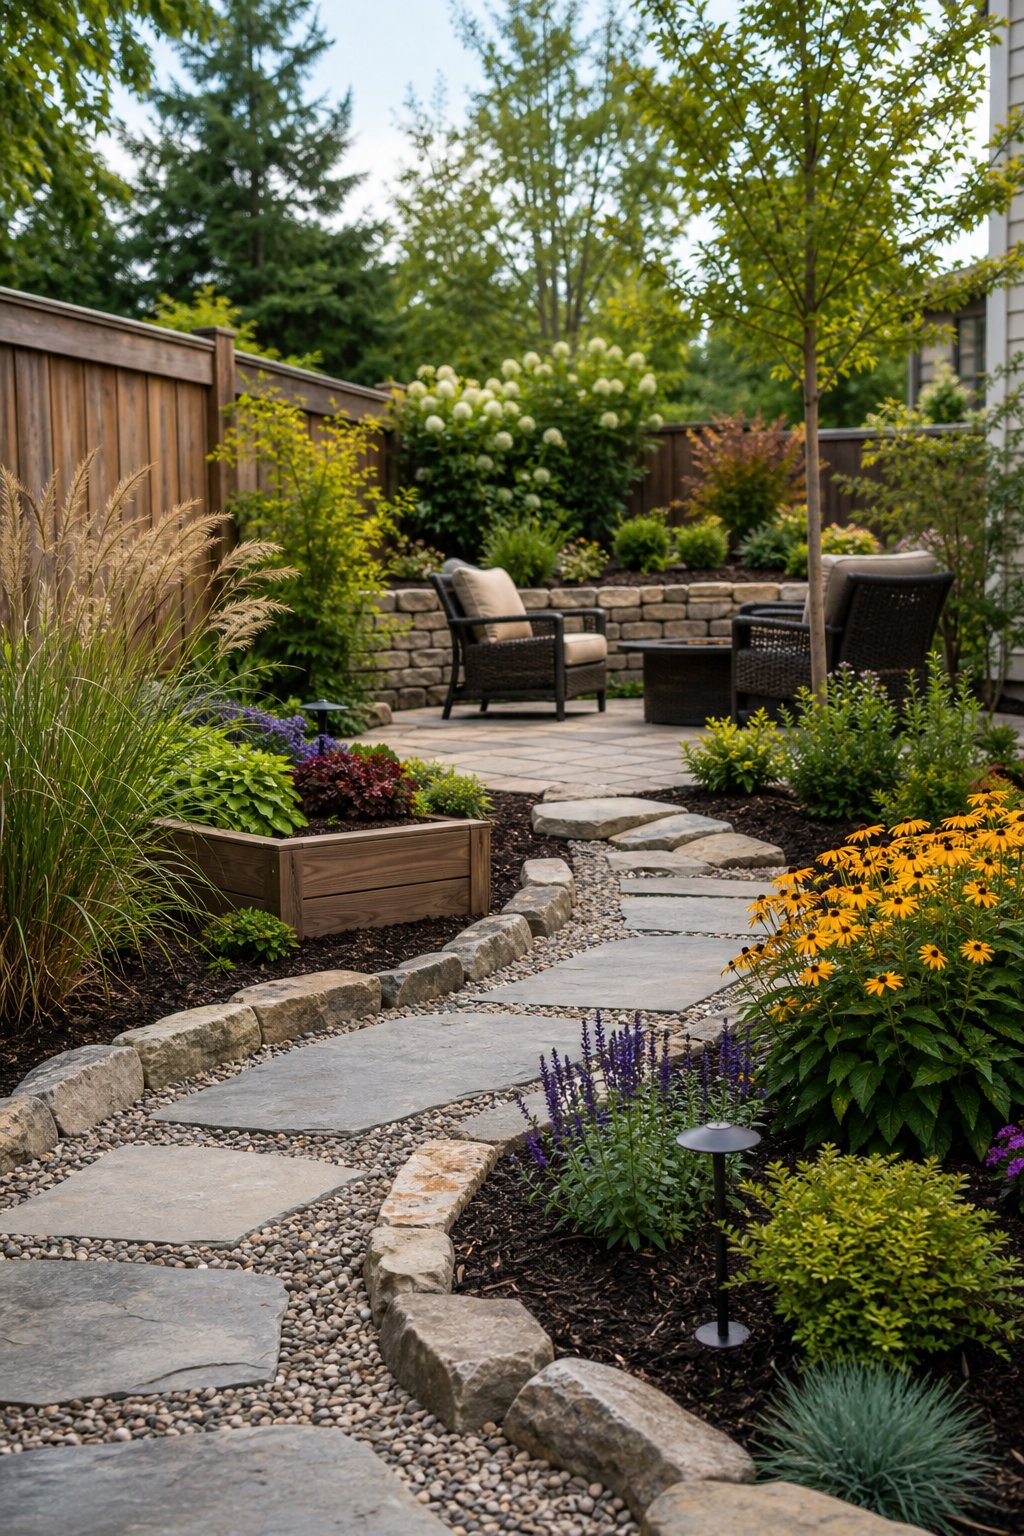
You don’t need a giant yard or a contractor’s budget to make your outdoor space feel special. With a few basic tools, reclaimed materials, and plants suited to your sunlight, you can create useful garden features that look personal rather than packaged.
These 25 DIY garden landscaping ideas help you add paths, planting space, water features, seating, lighting, and wildlife-friendly details without taking on a full yard renovation.
Pick one project that solves a real problem first, such as poor drainage, a bare fence, or a lack of seating. Once that project is working, you can add smaller decorative touches that make the garden feel like your own.
1. Build Cedar Raised Garden Beds With Corner Posts
A flat garden can feel like a wrestling match with weeds and soggy soil. Cedar raised beds give you neat planting areas, better control over soil, and a comfortable working height.
Cut cedar boards to your preferred length, then join each corner with sturdy cedar posts and exterior-rated screws. A 4-by-8-foot bed gives vegetables plenty of room, while a 2-foot-wide bed works well beside a fence. Set the frame on level ground, loosen the soil beneath it, and fill it with compost mixed with quality topsoil. Leave enough space between beds for a wheelbarrow.
Untreated cedar handles outdoor moisture well, and adding a simple cap rail gives you a place to sit while harvesting. Avoid sealing the inside with products that may leach into growing soil.
Expert Tip From MrPlanter: “Keep your beds no wider than four feet so you can reach the middle without stepping on the soil. Add corner posts that rise a few inches above the boards for a clean, finished look.”
2. Create A Reclaimed-Brick Garden Path
A muddy shortcut across your yard has a talent for turning clean shoes into gardening souvenirs. A reclaimed-brick path gives you a firm walkway and adds warm color between planting beds.
Mark the route with stakes and string, keeping the curves broad enough for a wheelbarrow. Remove grass and soil to a depth of about six inches, then add compacted gravel followed by a thin layer of leveling sand. Lay the bricks in a running bond, basket weave, or simple straight pattern. Tap each brick with a rubber mallet, check the slope, and sweep sand into the joints.
Look for bricks with similar thicknesses, though small variations add charm. Keep the path slightly higher than nearby soil so rainwater does not collect on the surface.
Expert Tip From MrPlanter: “Lay out your bricks dry before digging so you can spot gaps and awkward cuts. A gentle slope away from the house keeps the walkway safer after rain.”
3. Install A Pallet Wall Vertical Garden
A blank fence can look a little lonely, especially when it faces your patio every day. A pallet wall vertical garden turns that unused surface into a leafy display for herbs, flowers, or compact vegetables.
Choose a clean pallet with a safe treatment stamp, sand rough boards, and attach landscape fabric across the back and bottom. Staple it tightly so potting mix stays in place. Add drainage openings, fill the slats with potting mix, and plant from the bottom upward.
Herbs such as thyme, basil, and oregano work well, while strawberries and trailing flowers soften the edges.
Secure the pallet to a fence or wall with heavy-duty brackets, allowing room for the weight of wet soil. Water slowly from the top and check the lower pockets during hot weather.
Expert Tip From MrPlanter: “Let the pallet garden rest flat for a few weeks while roots grow in. It will stay much more stable when you raise it upright.”
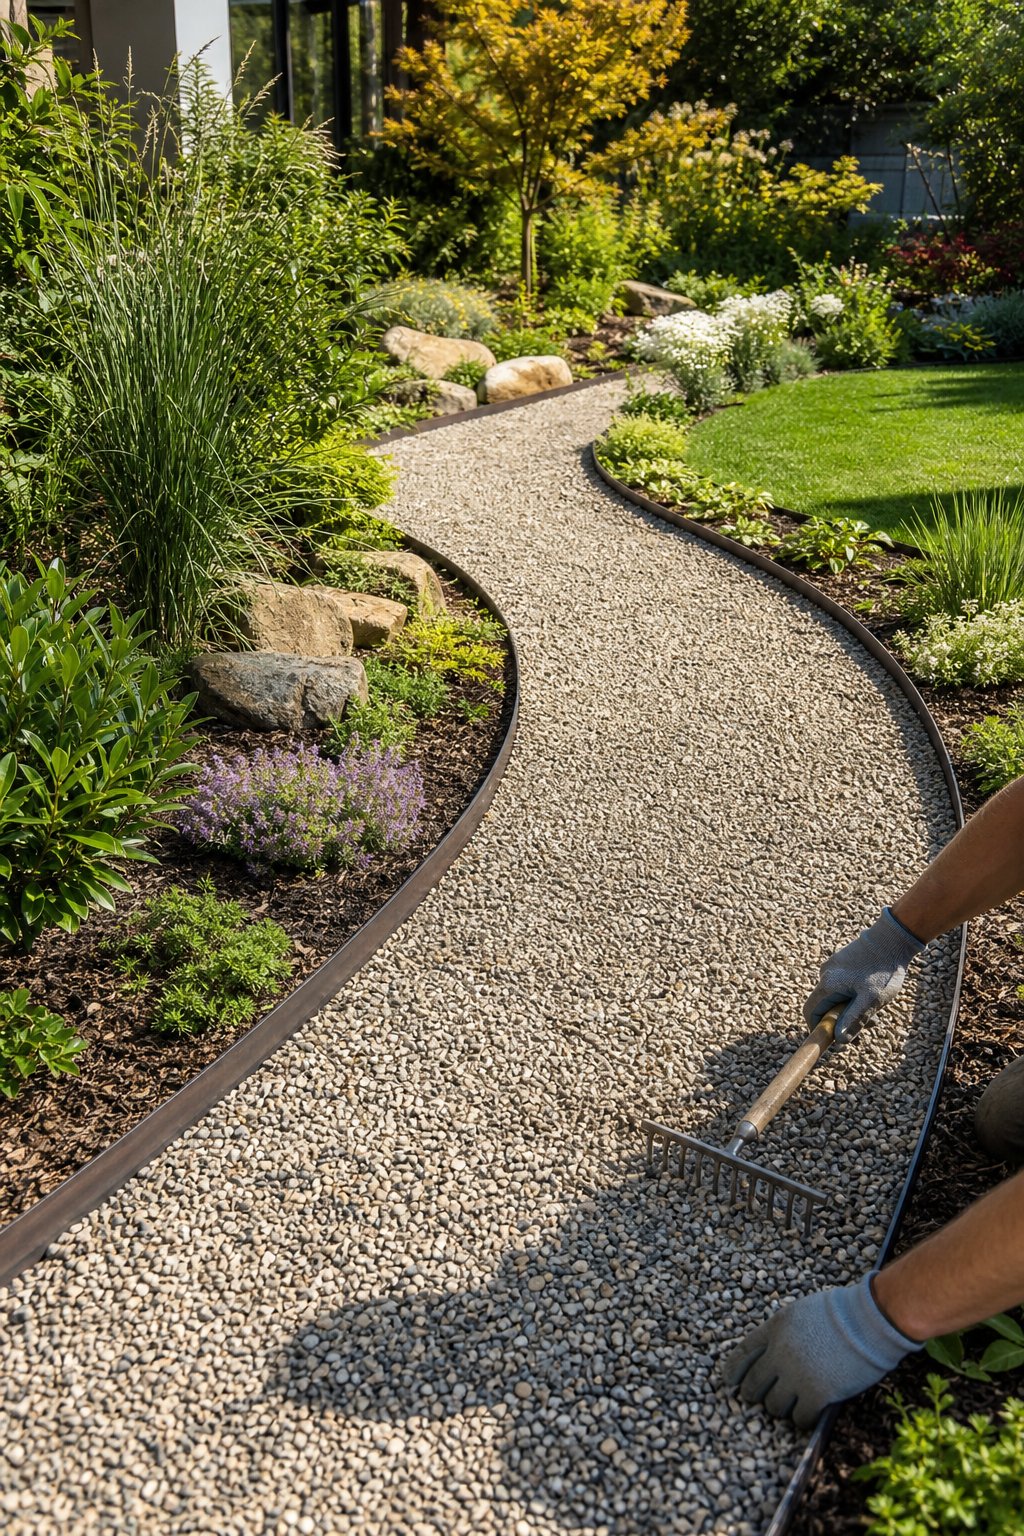
4. Make A Gravel Path With Steel Edging
Gravel paths have one small personality flaw: they enjoy wandering into lawns and flower beds. Steel edging keeps the stones in place and gives your garden a crisp, modern outline.
Remove the path’s sod and soil, then compact a base of crushed stone. Add landscape fabric if weeds are a problem, leaving enough room for gravel depth. Set flexible steel edging along both sides, using stakes to hold the curves. Fill the center with a compactable gravel or smooth pea gravel, depending on whether you prefer a firm walking surface or a softer look.
Steel edging develops a natural patina, while black powder-coated edging provides a sharper finish. Keep the path at least 30 inches wide for comfortable walking and about 36 inches wide where you carry tools.
Expert Tip From MrPlanter: “Use compactable gravel on slopes because loose pea gravel tends to slide. Add a thin top layer of decorative stone for color without sacrificing stability.”
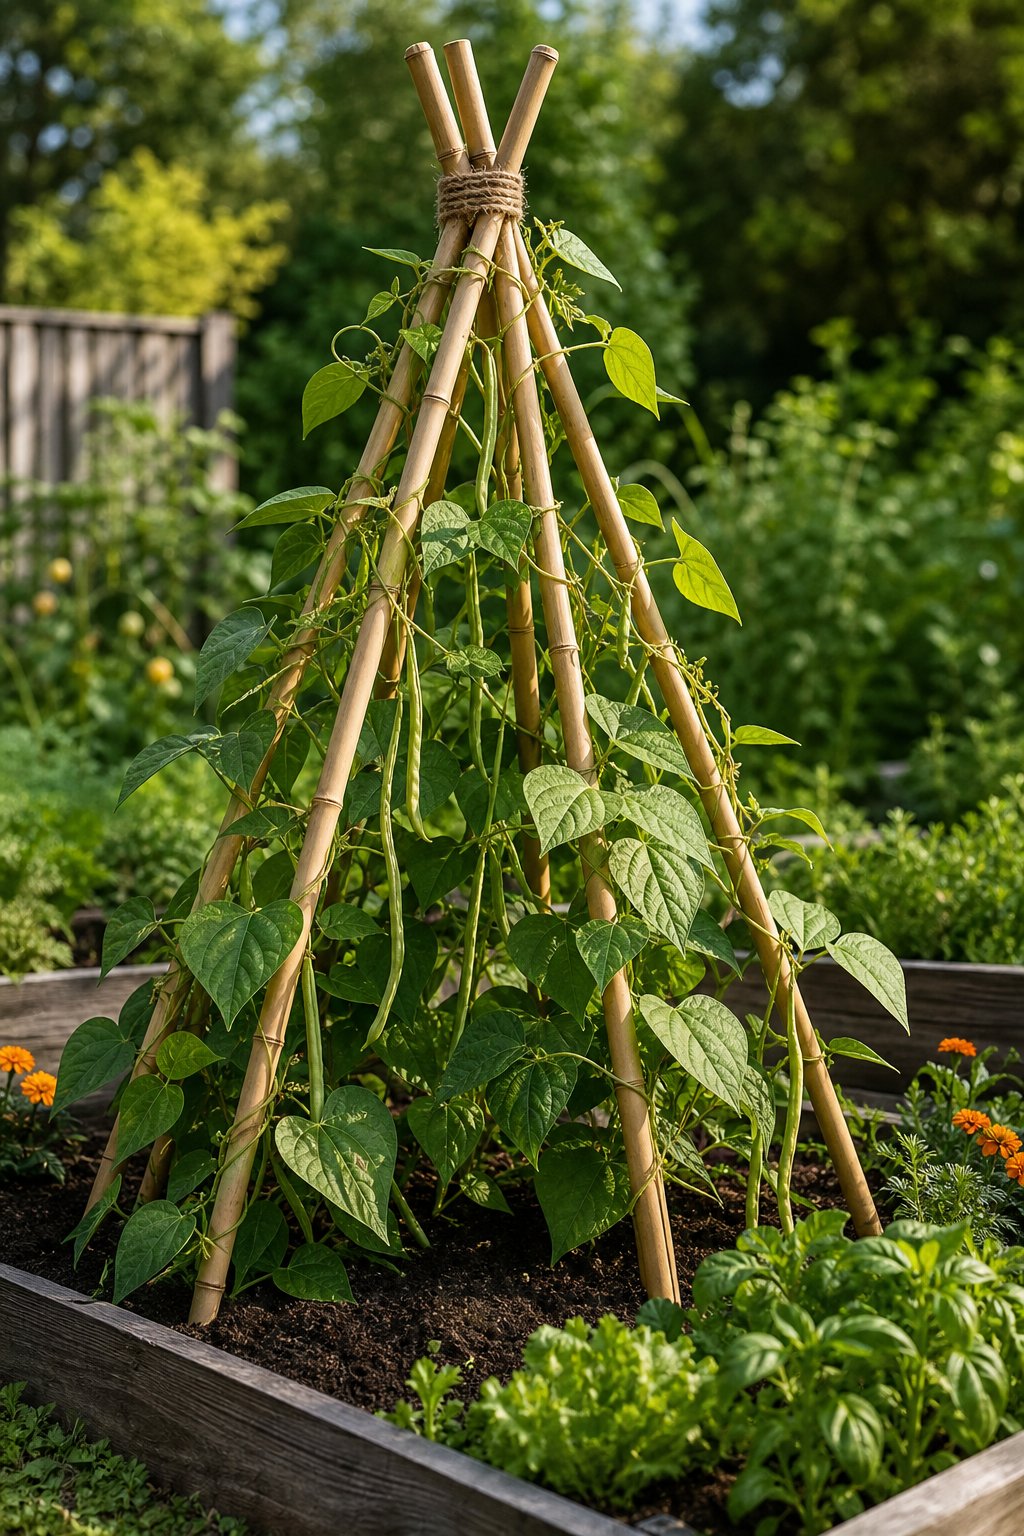
5. Build A Bamboo Teepee Trellis For Climbing Beans
Climbing beans don’t need a fancy mansion, though they may act like they do once they reach the roof. A bamboo teepee trellis creates a simple support system and adds height to a vegetable bed.
Gather six to eight bamboo poles about six to eight feet long. Push the lower ends into the soil in a circle, then tie the tops together with garden twine. Run extra twine around the poles in horizontal rings so young vines have something to grab. Plant bean seeds around each pole and guide the first shoots by hand.
Place the teepee where it receives several hours of sun and won’t shade smaller crops. Strong bamboo lasts longer when its ends stay above standing water, so choose well-drained soil.
Expert Tip From MrPlanter: “Tie the top with a knot you can loosen later, because vines make repairs surprisingly difficult. Leave one opening wide enough for easy picking.”
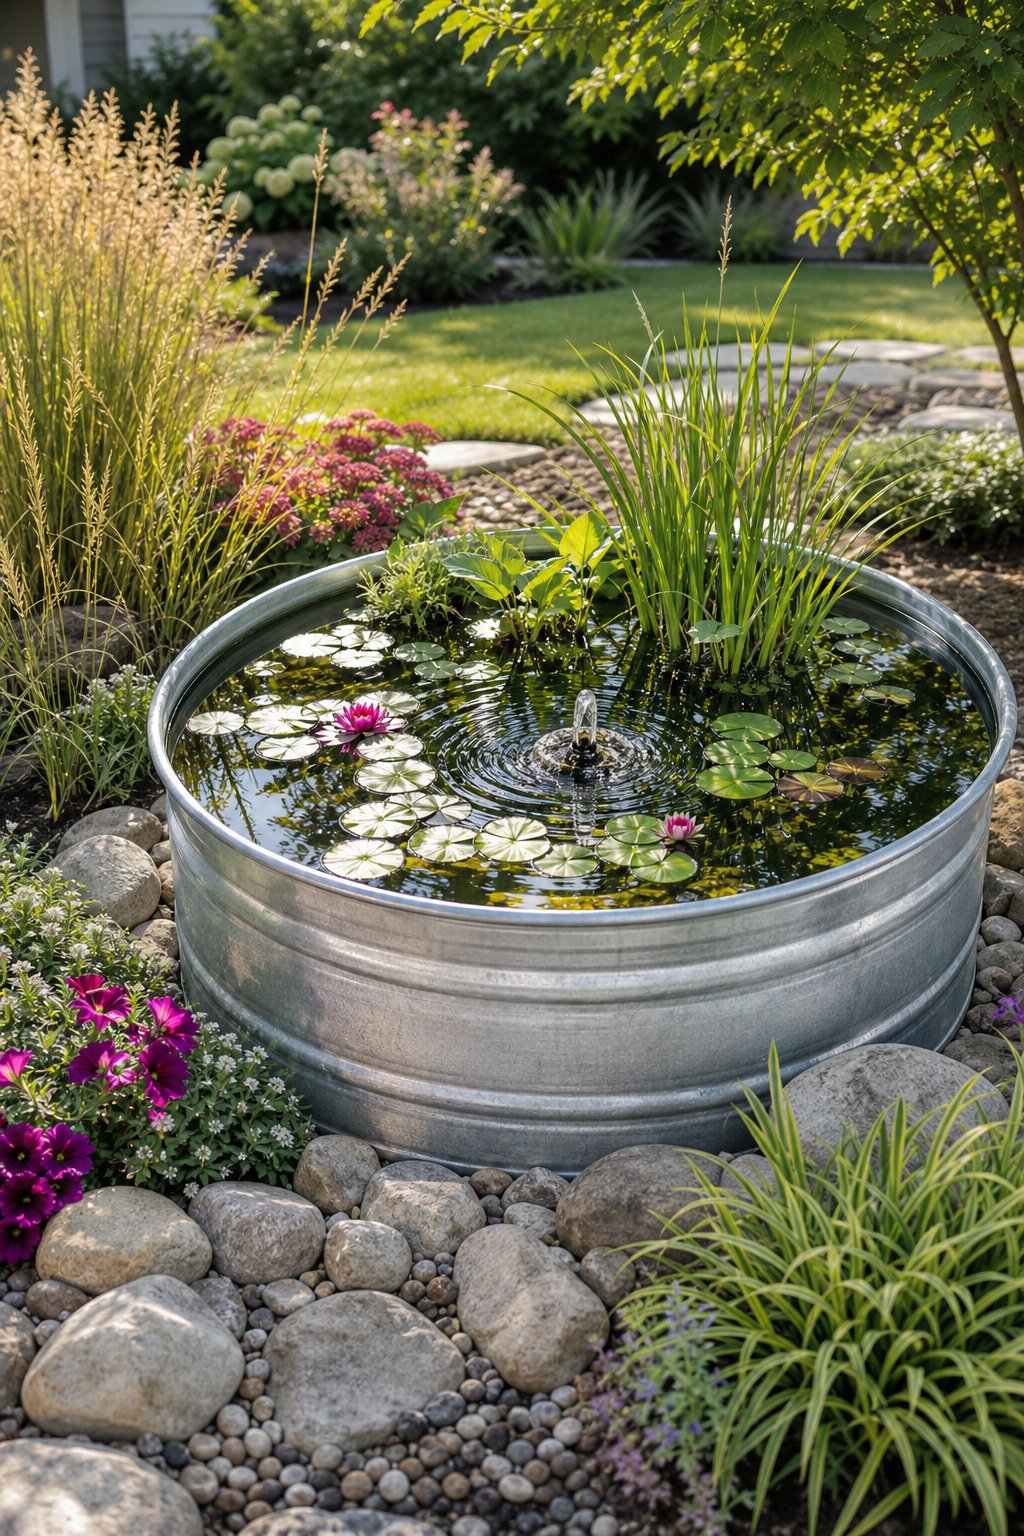
6. Add A Stock-Tank Container Water Garden
A stock tank can hold water, plants, and a surprising amount of backyard drama. This container water garden adds a calm focal point without the digging required for a full pond.
Set the galvanized tank on firm, level ground and rinse it before filling. Add water plants in pots, using bricks or upside-down containers to place some plants at different depths. Choose hardy options such as dwarf water lilies, rushes, or floating plants suited to your climate. A small solar bubbler keeps water moving and discourages mosquitoes.
Place the tank where it gets morning sun and some afternoon shade. Remove fallen leaves regularly, and never add fish unless the tank is large enough and properly maintained for them.
Expert Tip From MrPlanter: “Use aquatic planting baskets instead of loose soil so the water stays clearer. A few stones around the rim help blend the tank into nearby beds.”
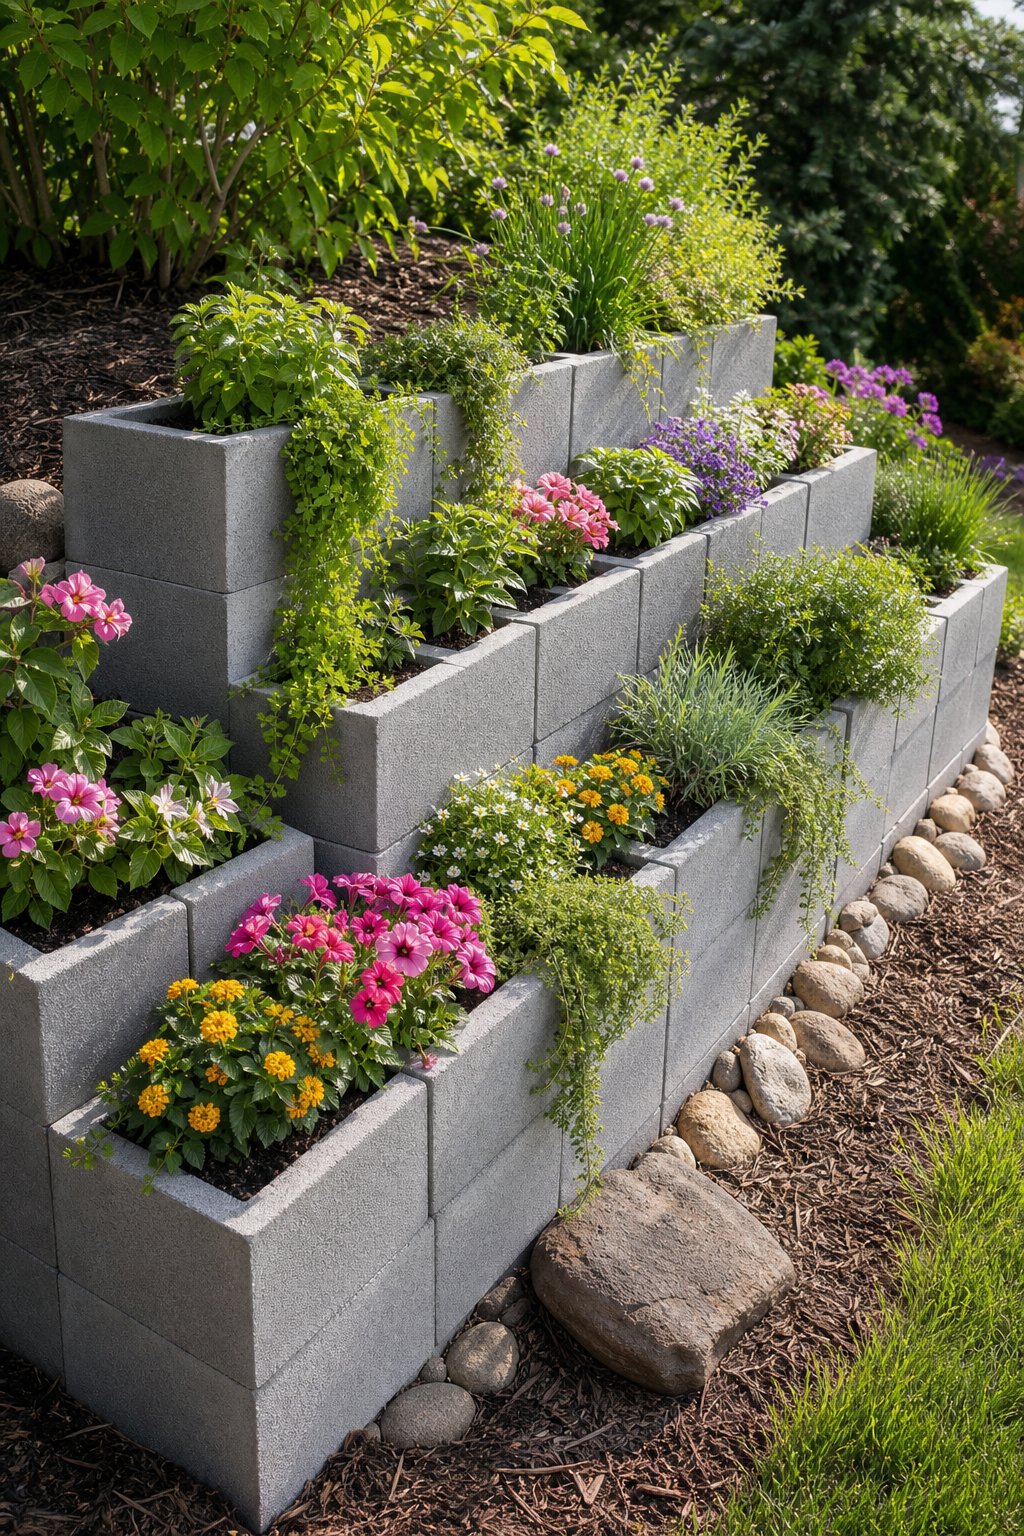
7. Create Cinder Block Tiered Planters
Cinder blocks are usually associated with construction, not roses, yet they make sturdy tiered planters with very little cutting. Their openings also double as small planting pockets.
Arrange blocks in two or three stepped levels on compacted ground. Use landscape fabric inside the openings when soil might spill, then fill them with potting mix.
Plant trailing flowers in the outer holes and herbs or succulents in the upper tiers. For larger planting areas, place boards or pavers across supported blocks to form shelves.
Check that the stack is stable before adding soil and water. Paint the blocks with outdoor masonry paint if you want a softer color, or let their gray finish contrast with bright flowers.
Expert Tip From MrPlanter: “Stagger each row like bricks in a wall instead of lining every joint up. That small change makes the planter much less likely to shift.”
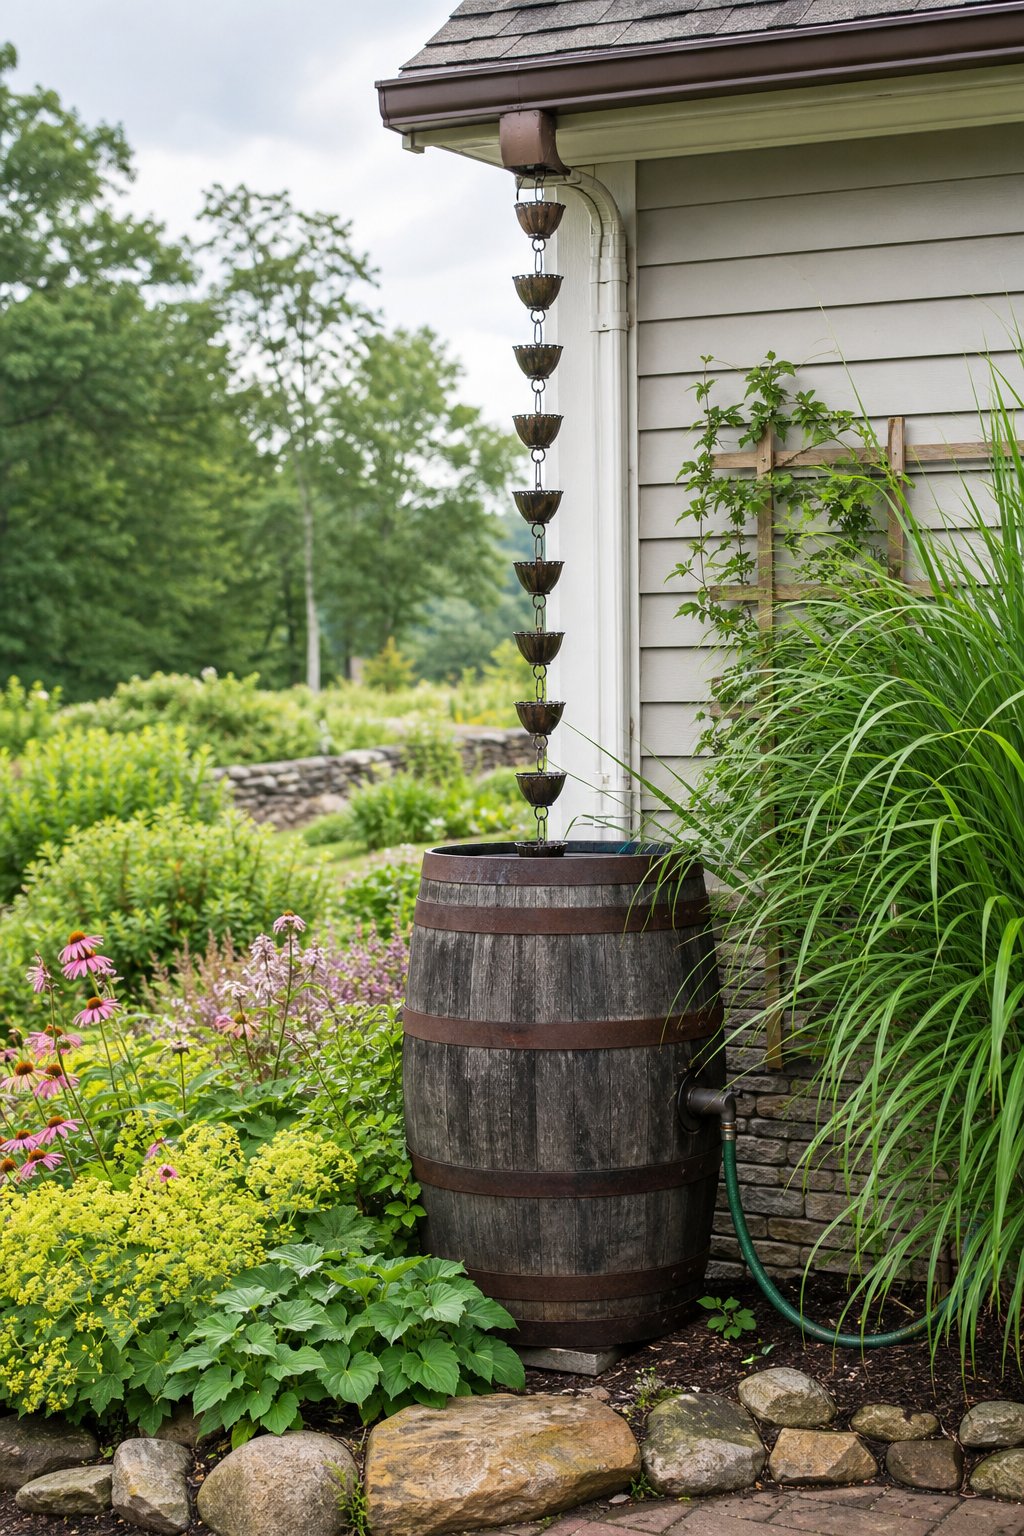
8. Install A Rain Barrel With A Rain Chain
Rainwater falling from a downspout can become a free garden resource instead of a muddy puddle. A rain barrel paired with a rain chain also gives a plain corner some gentle movement.
Place the barrel on a strong, level platform so the spigot clears your watering can. Connect the downspout with a diverter, or position the rain chain so water lands directly in the barrel opening. Add a tight lid or mesh screen to keep out mosquitoes, leaves, and curious animals. Use the stored water on ornamental plants, shrubs, and trees rather than edible crops unless your collection setup is approved for that use.
Install an overflow hose that sends extra water away from your foundation. Empty the barrel before freezing weather if your local climate produces hard frosts.
Expert Tip From MrPlanter: “Raise the barrel on concrete blocks that can carry its full weight. Water gets heavy quickly, so a wobbly stand is no joke.”
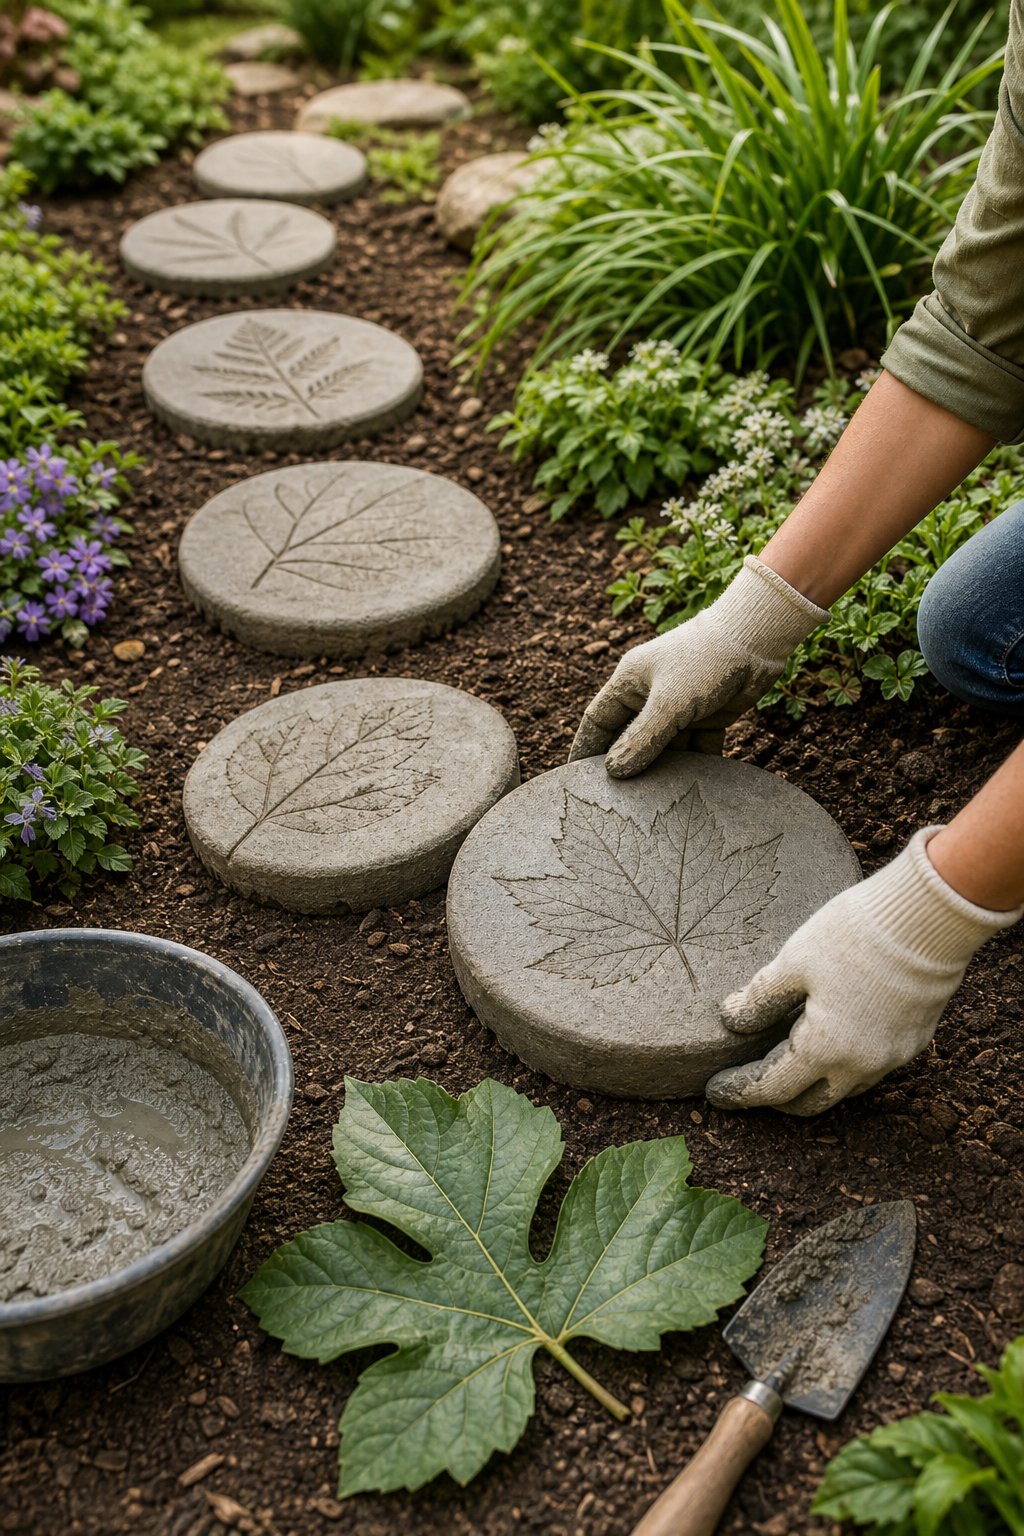
9. Make Concrete Stepping Stones With Leaf Imprints
Plain concrete stepping stones work perfectly, though they can look a little serious. Leaf imprints give each stone a soft garden pattern using leaves you already have nearby.
Mix ready-to-use concrete in a disposable tub, following the package directions. Press clean leaves face-down into the bottom of a shallow mold, then add the concrete and smooth the back. After the stone cures, peel away the leaves to reveal the veins. Use rubber gloves, and keep the mold on a flat surface while the concrete sets.
Make stones at least two inches thick for foot traffic. Space them by placing your foot naturally from one stone to the next, then set them on compacted sand or soil.
Expert Tip From MrPlanter: “Choose sturdy leaves with clear veins, such as maple or fern fronds. Spray the mold lightly with cooking oil so the cured stone releases more easily.”
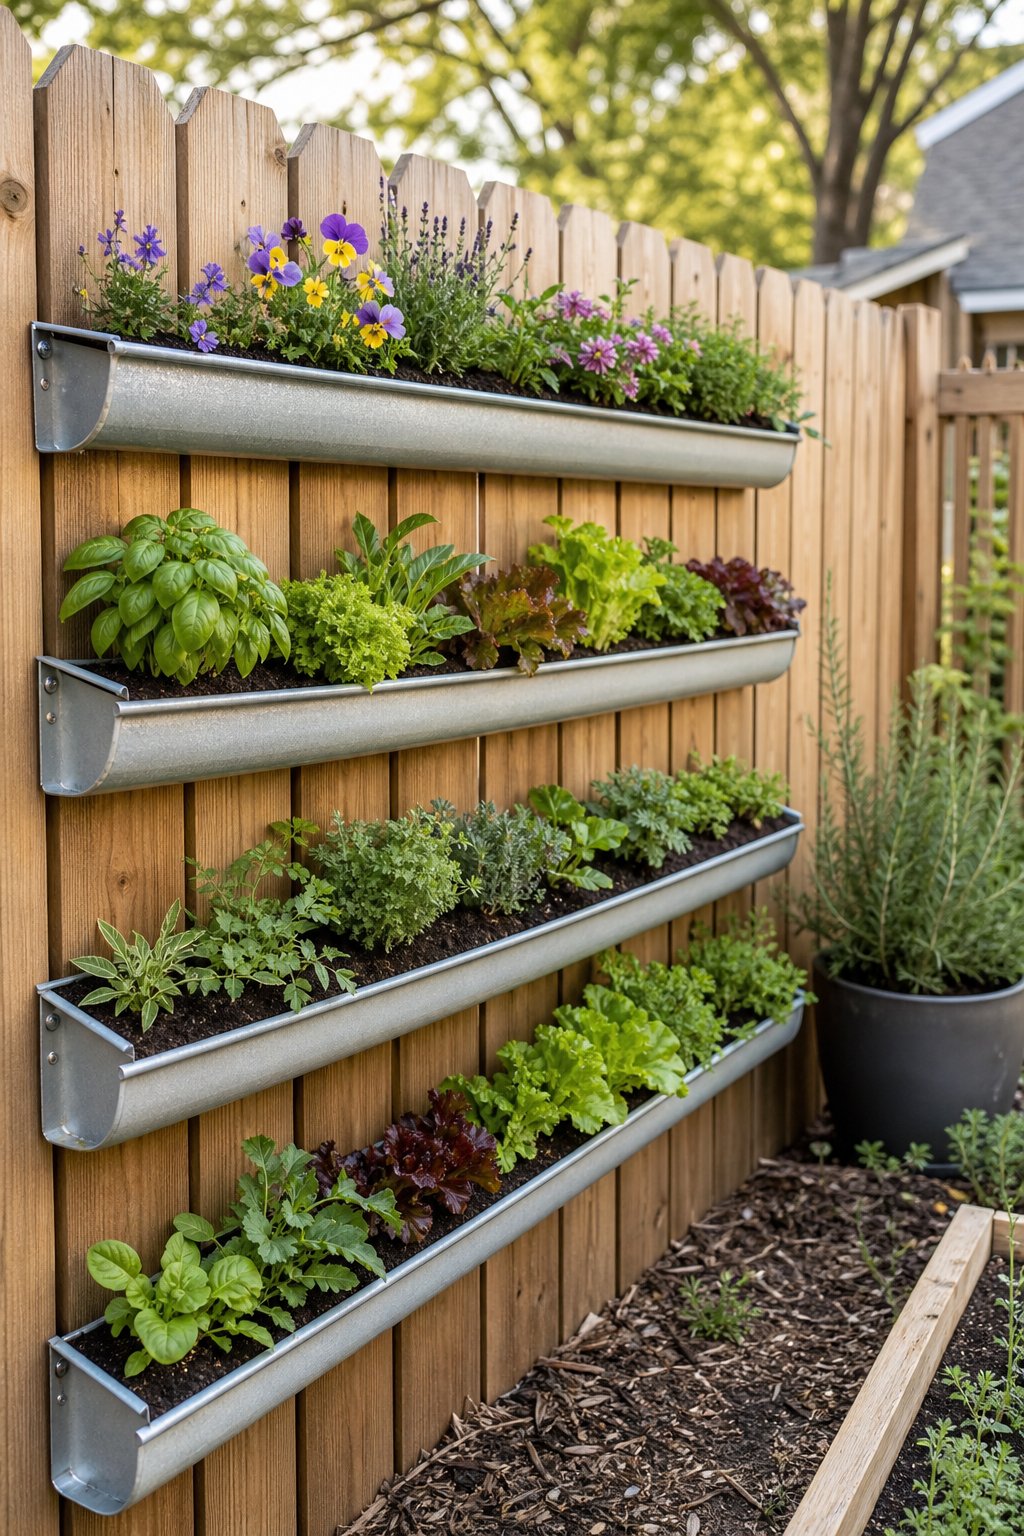
10. Build A Gutter Garden Along A Fence
A fence can protect your privacy while quietly stealing valuable growing space. Mounting gutters along it lets you grow shallow-rooted plants without crowding the ground.
Use vinyl gutters or coated metal gutters, and drill drainage holes along the bottom. Attach them to the fence with brackets spaced according to the manufacturer’s instructions. Keep each row slightly staggered so water doesn’t pour onto the plants below. Fill with lightweight potting mix and grow lettuce, radishes, herbs, strawberries, or annual flowers.
Leave enough clearance between tiers for sunlight and watering. Avoid placing edible crops where runoff from treated wood or an unknown surface can enter the soil.
Expert Tip From MrPlanter: “Cap each gutter end firmly, then test for drainage before planting. A slow leak is much easier to fix while the gutter is still empty.”
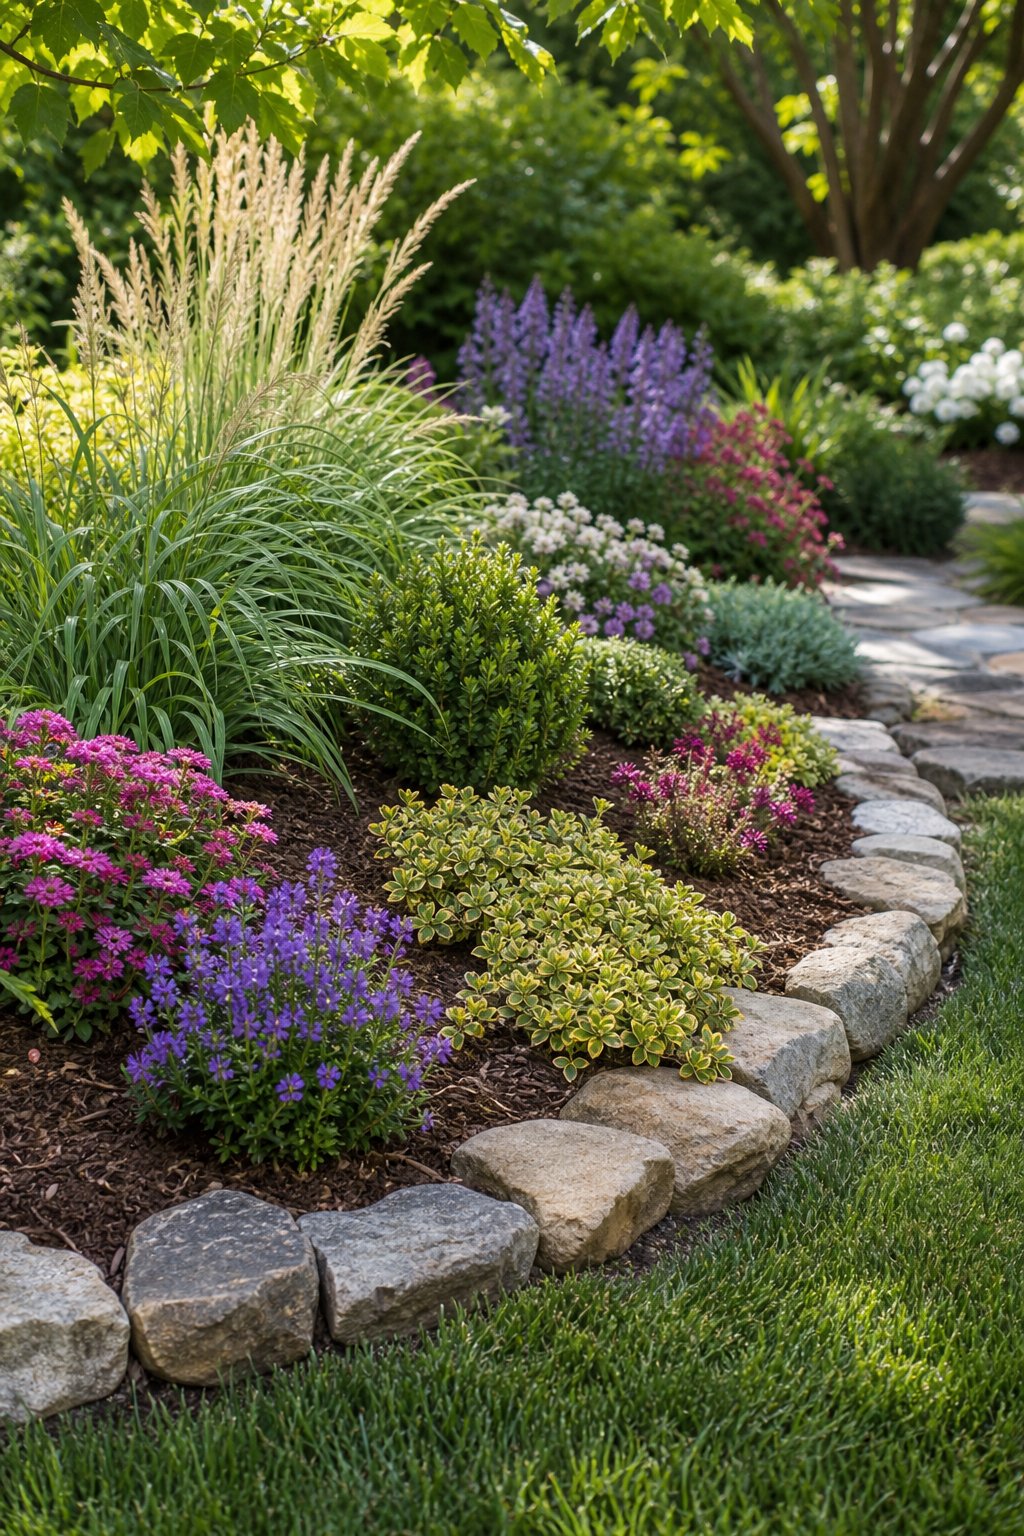
11. Edge Flower Beds With Fieldstone
Flower beds sometimes lose their shape after one energetic rainstorm. Fieldstone edging holds the soil back while giving your planting areas a natural, relaxed border.
Mark the bed with a hose so you can test the curve before digging. Remove a shallow trench, add a layer of sand or crushed stone, and set the largest stones first. Fit smaller stones into the gaps, keeping the top edge fairly even. Dry-stacking lets you change the bed later, while mortar creates a firmer wall.
Choose stones that match colors already found around your home. Keep the edging low near lawns so a mower can pass safely, and use a deeper trench where soil slopes toward the grass.
Expert Tip From MrPlanter: “Set each stone with its flattest face outward and its widest side down. The border will look natural and stay steadier through wet weather.”
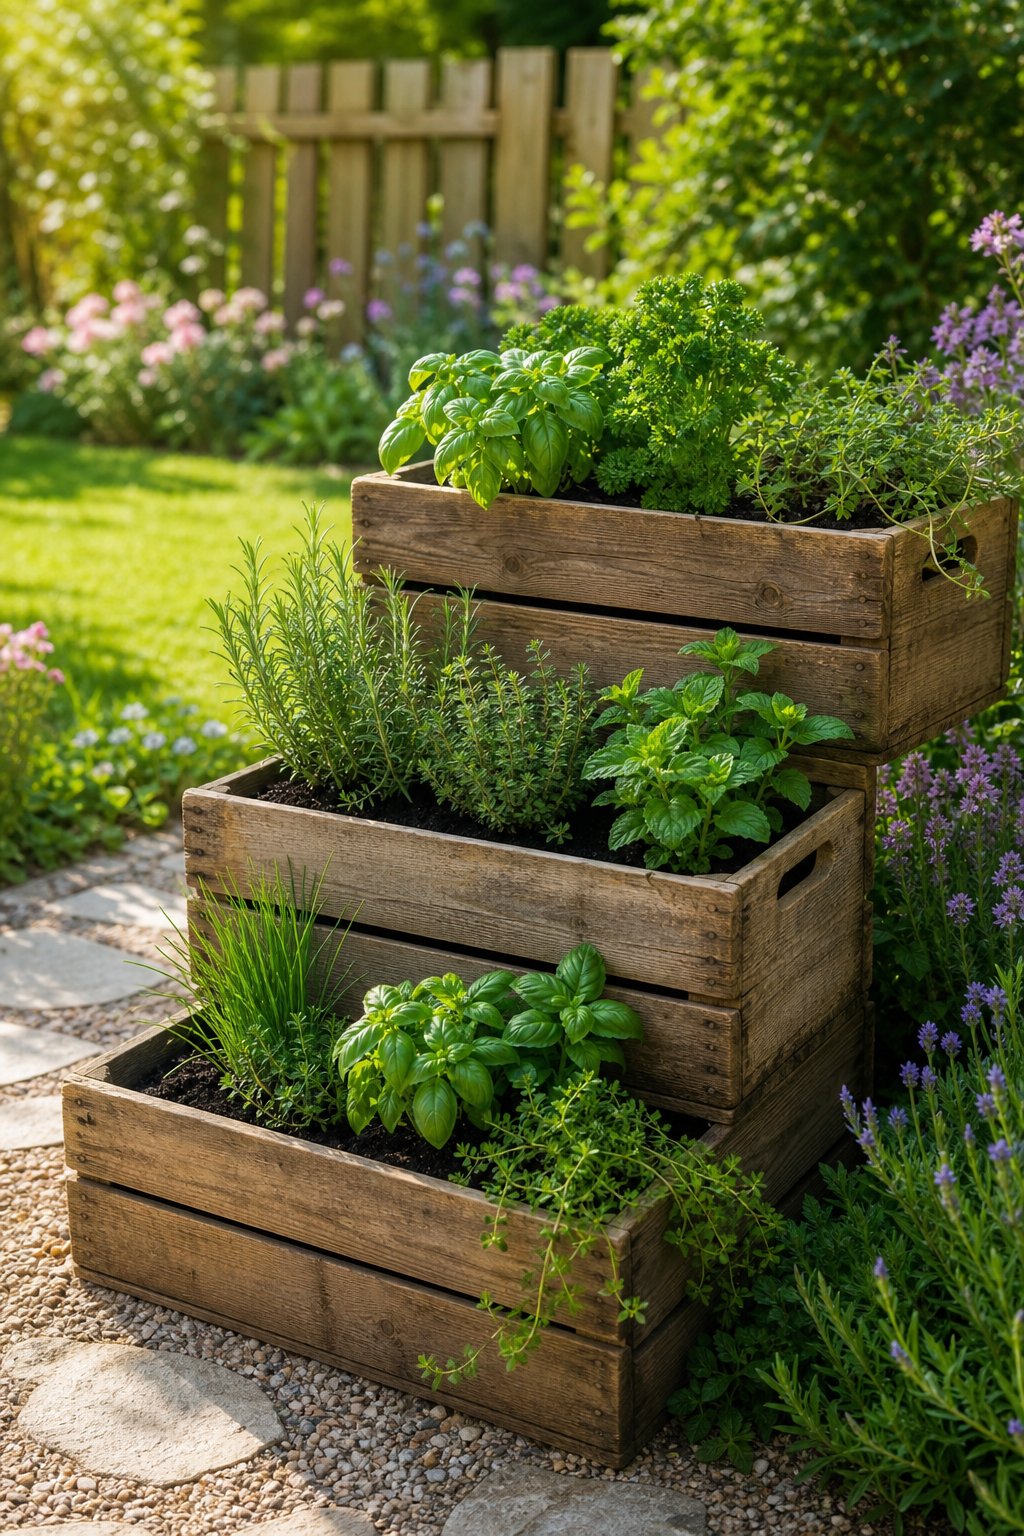
12. Turn Wooden Crates Into A Tiered Herb Garden
Fresh herbs are wonderful until they hide behind one another like shy guests at a party. Wooden crates make a tiered herb garden that keeps each plant visible and close to the kitchen.
Use sturdy crates, sand splinters, and seal the exterior with an outdoor finish. Stack them in a stable staircase shape, securing the back edges with screws or brackets. Line the inside with landscape fabric, add drainage holes if needed, and fill with a well-draining potting mix. Put rosemary, sage, and thyme in the upper or driest crates, while basil and parsley enjoy more regular moisture.
Set the garden near the kitchen where you will actually harvest it. Give mint its own container because its roots spread with enthusiasm.
Expert Tip From MrPlanter: “Keep the crate stack low enough to water without a ladder. A short herb garden gets used far more than one placed across the yard.”
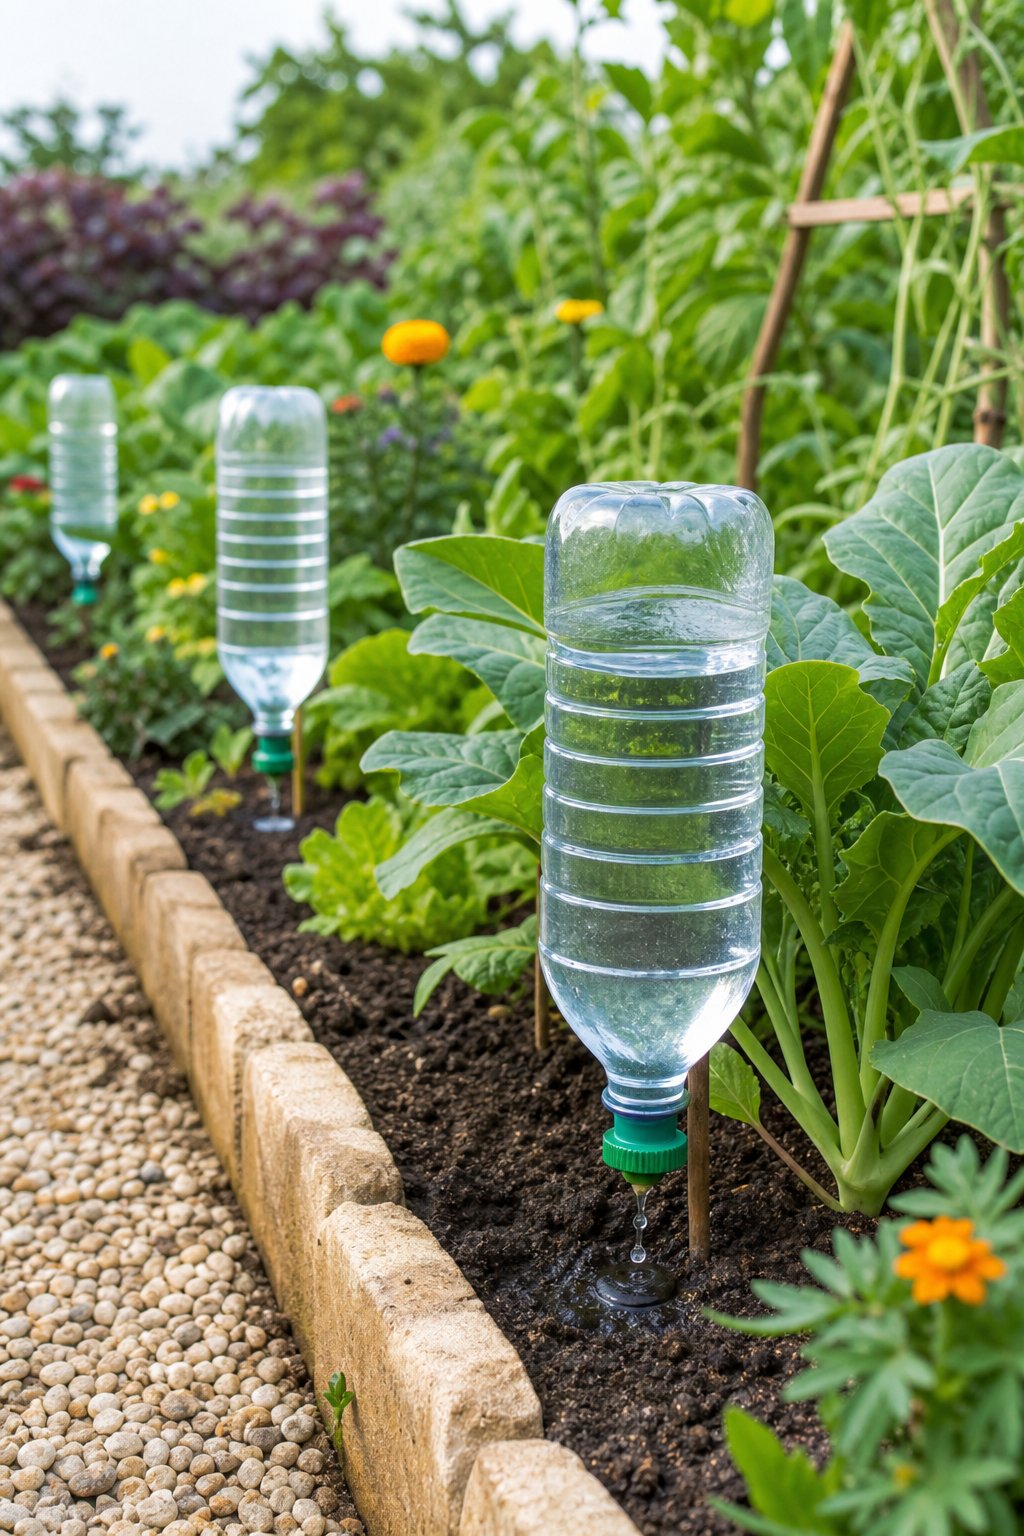
13. Set Up Plastic-Bottle Drip Irrigation
Plants in containers can look perfectly happy in the morning and deeply offended by afternoon. A plastic-bottle drip system releases water slowly when you can’t stand nearby with a hose.
Rinse a bottle, poke one or two tiny holes in its cap, and fill it with water. Turn it upside down beside the plant, pushing the cap a few inches into the soil. For a steadier setup, bury the bottle neck in a small terracotta drip spike or use a commercial bottle adapter. Test the flow for a day before leaving it unattended.
Larger bottles last longer, while smaller bottles suit pots. Clean the system often so algae and soil don’t block the openings.
Expert Tip From MrPlanter: “Start with one tiny cap hole, then add another only if the soil stays dry. Slow watering is safer than turning the pot into a miniature swamp.”
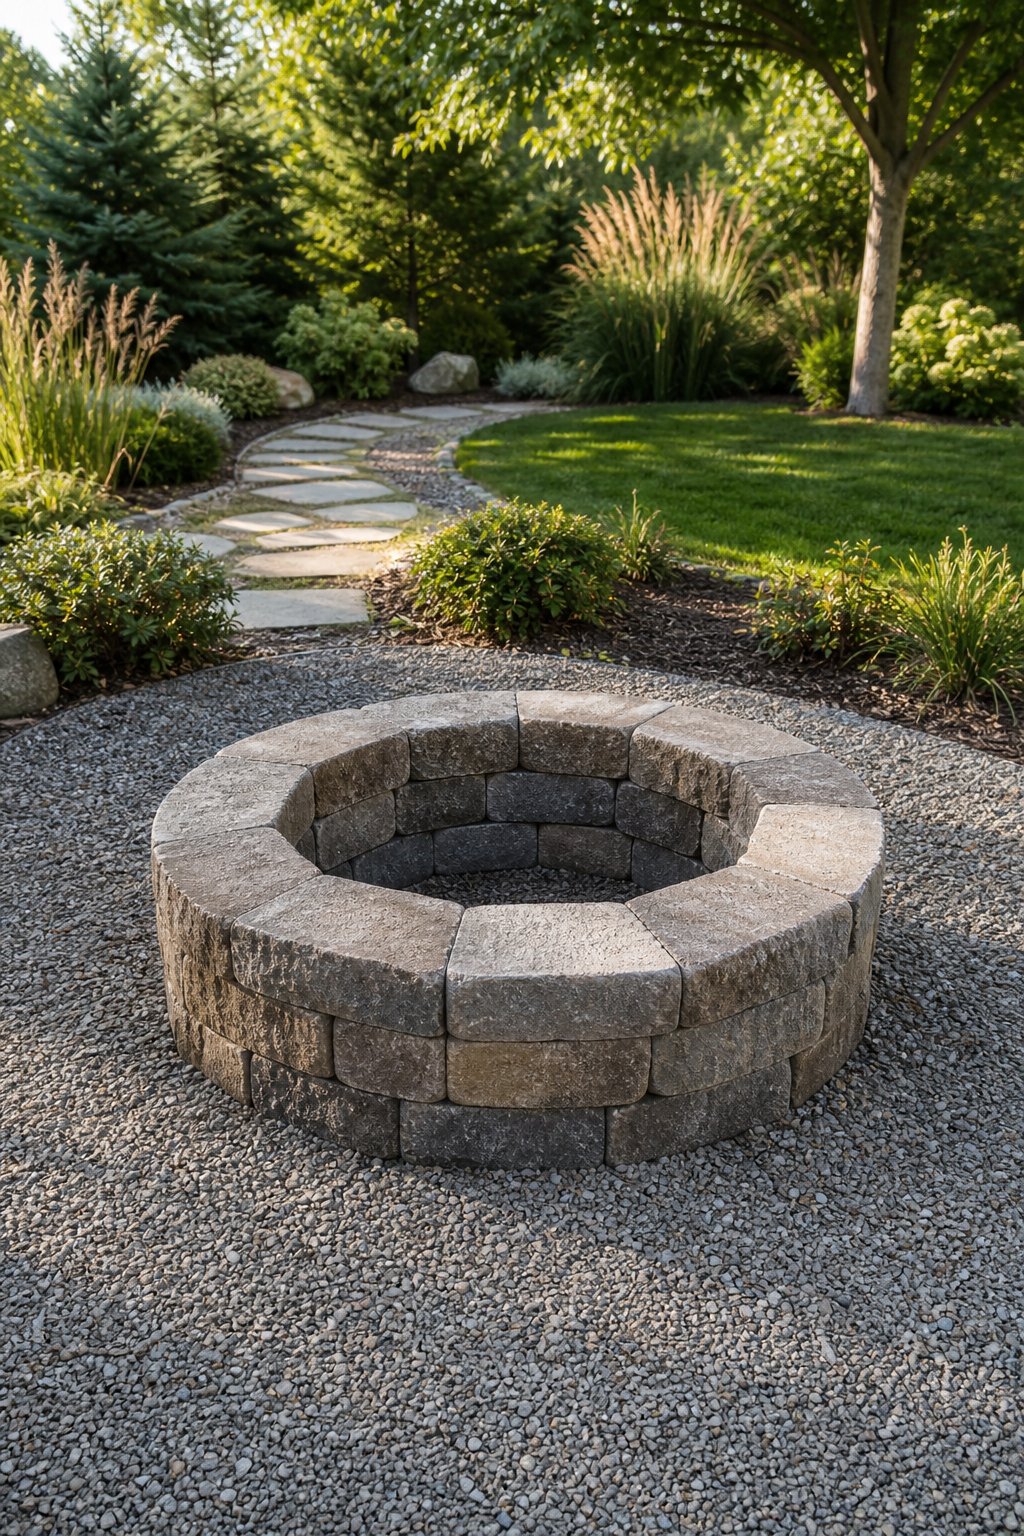
14. Build A Simple Fire Pit With Landscape Blocks
A fire pit can turn a plain patch of gravel into the place everyone suddenly wants to sit. Landscape blocks make a simple ring, though safe placement matters more than fancy styling.
Choose a spot well away from buildings, fences, tree branches, and dry grass. Remove turf, level the ground, and add a compacted gravel base. Arrange rated landscape blocks in a circle, staggering the joints as you build two or three layers. Keep the inside clear of decorative stones that may crack from heat, and check local fire rules before lighting anything.
Surround the pit with noncombustible gravel or pavers. Keep a hose, bucket, or extinguisher nearby, and never leave a fire unattended.
Expert Tip From MrPlanter: “Use a metal fire ring inside the blocks to protect the masonry. Give the pit a wide clear zone so sparks have fewer places to cause trouble.”
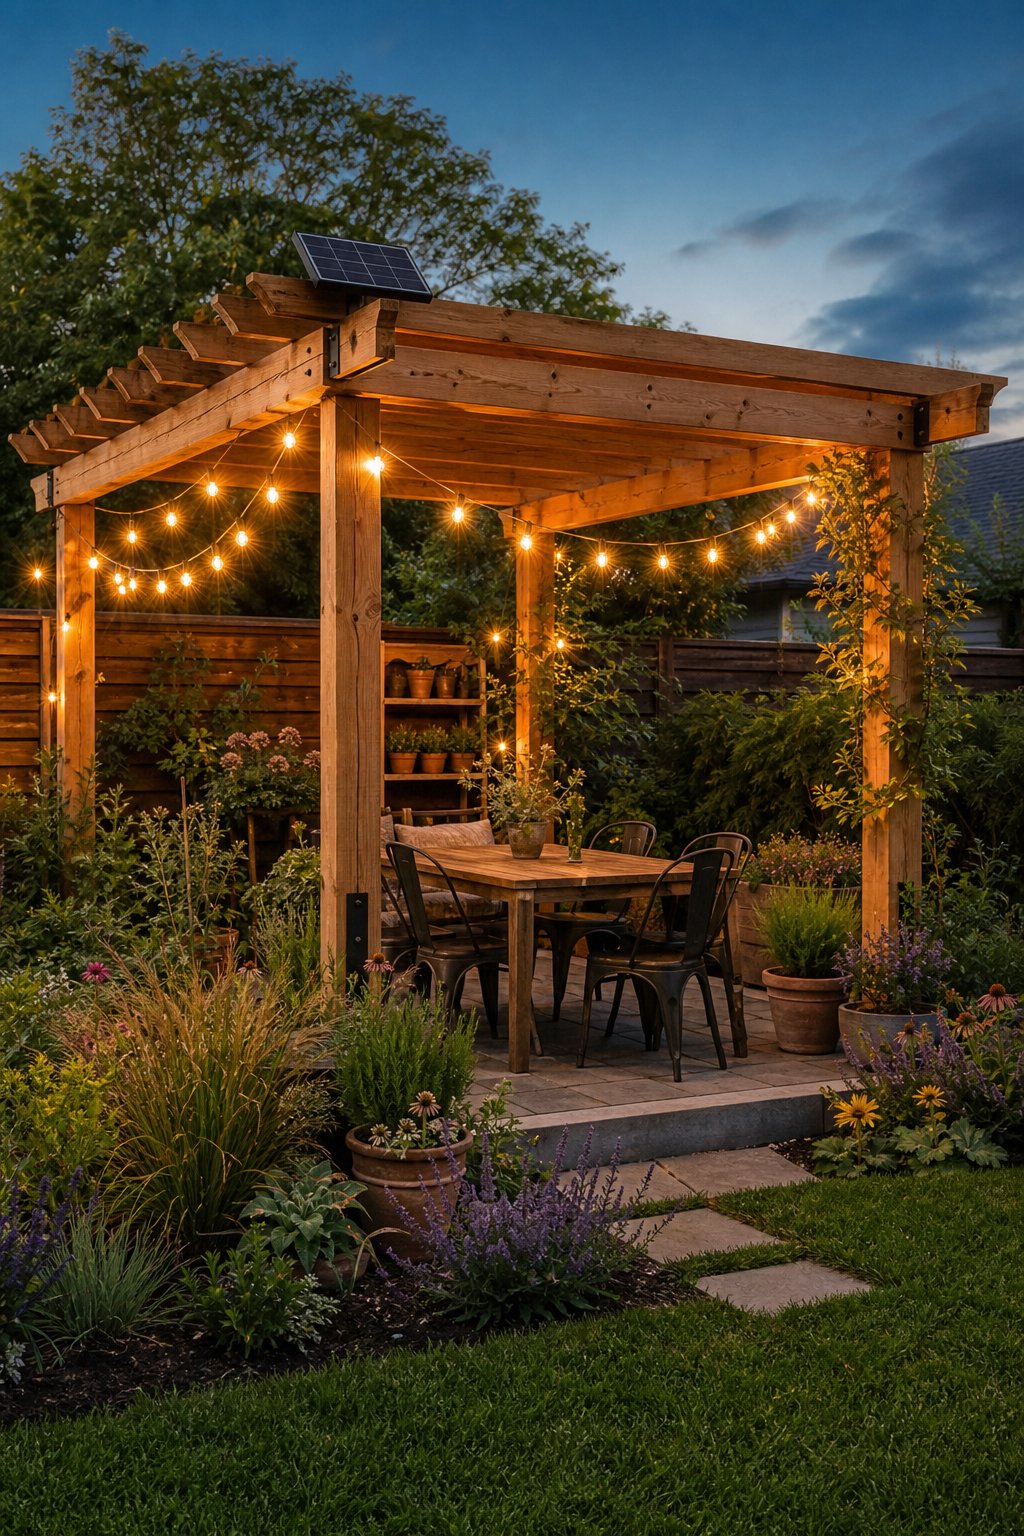
15. Hang Solar String Lights From A DIY Pergola
A pergola can look lovely by day and vanish into the darkness after sunset. Solar string lights keep the structure useful after dinner without running new electrical wiring.
Build or assemble a pergola with posts set securely in concrete and beams rated for outdoor use. Place the solar panel where it receives direct sun, then clip lights along the beams in gentle loops. Leave enough slack for wind movement, but avoid low sections that people can catch with their heads or shoulders. Choose warm-white bulbs for a soft seating area and brighter bulbs near a path.
Charge the panel before the first evening, and wipe dust from it occasionally. Use outdoor-rated lights and connectors made for wet conditions.
Expert Tip From MrPlanter: “Lay the lights on the ground first so you can adjust the spacing. A few neat loops look better than one long, sagging smile.”
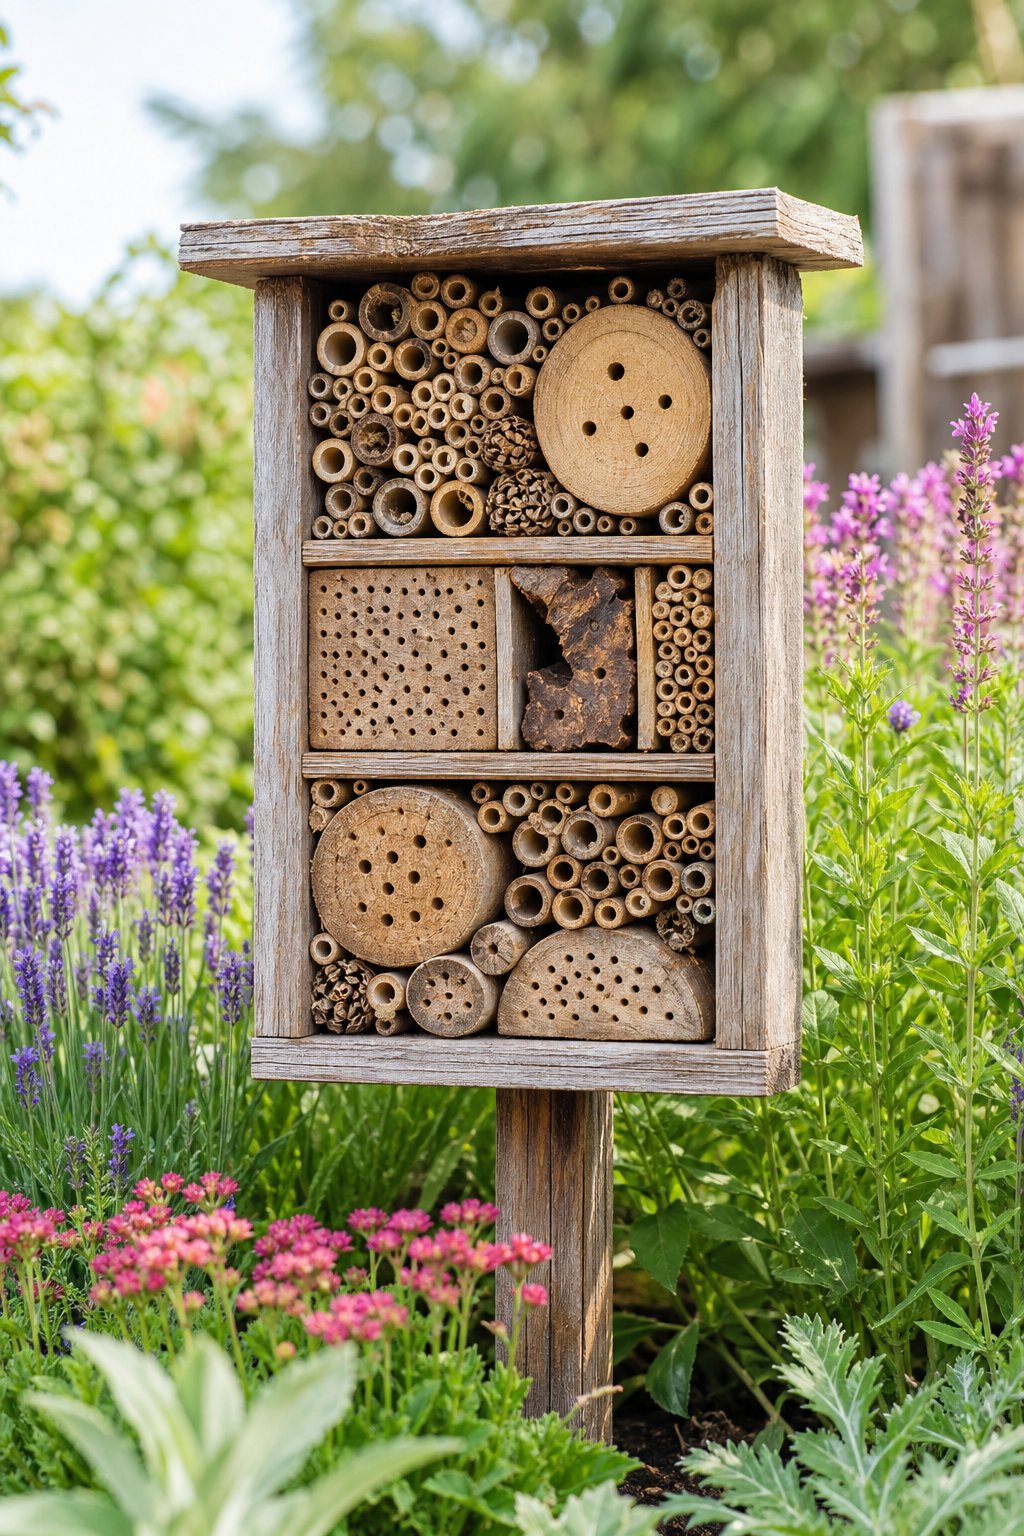
16. Create A Pollinator Hotel From Bamboo Canes And Wood
A pile of bamboo canes may look like garden leftovers, though to solitary bees it can resemble a tiny apartment building. A pollinator hotel gives beneficial insects dry nesting spaces near flowers.
Build a small wooden box with an overhanging roof, then cut bamboo canes into short pieces with smooth, hollow openings. Pack them tightly into the box, with openings facing outward and slightly downward. Mount the hotel at least three feet above ground in a sunny spot protected from heavy rain. Plant nearby nectar-rich flowers that bloom across several seasons.
Replace damaged or moldy tubes when needed, and avoid painting the inside of the nesting materials. Solitary bees do not make honey, and they rarely act aggressively.
Expert Tip From MrPlanter: “Sand the cane openings smooth so insects aren’t injured. Keep the hotel dry, because damp nesting tubes can become a pest problem.”
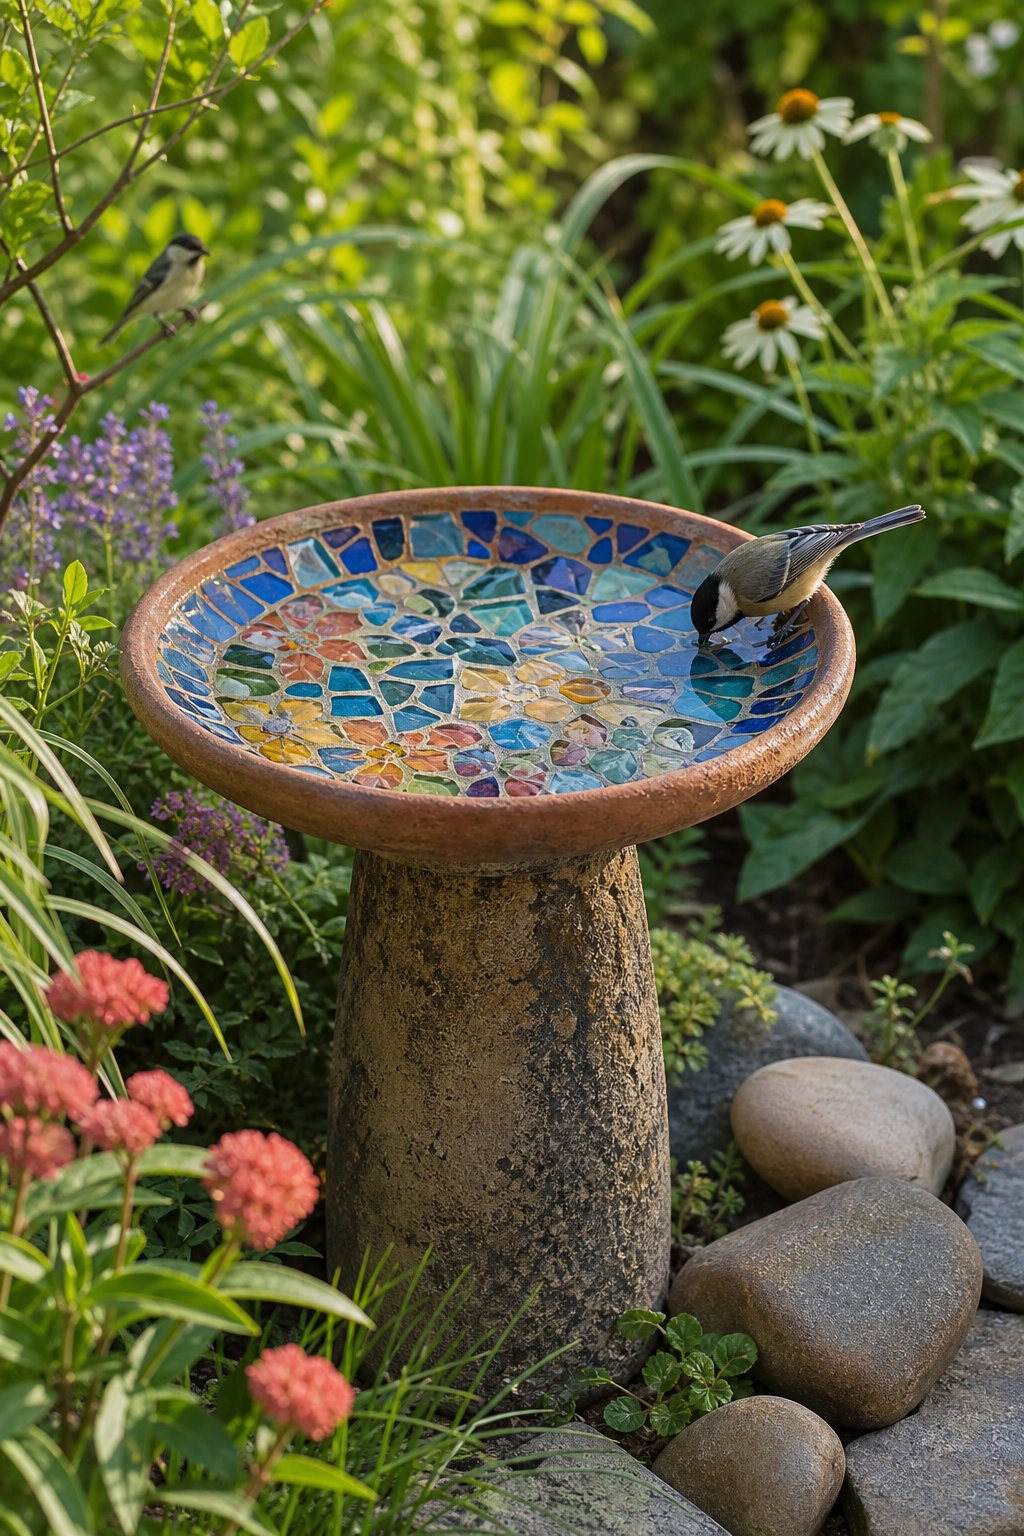
17. Make A Mosaic Birdbath From A Terracotta Saucer
Birds appreciate clean water, while your old terracotta saucer may be waiting for a second act. A mosaic birdbath turns it into a colorful garden accent with a useful purpose.
Clean the saucer, then arrange outdoor mosaic tiles, flat stones, or broken ceramic pieces on its surface. Attach them with outdoor tile adhesive and fill the gaps with exterior grout. Let everything cure fully before placing the saucer on a stable pedestal, upside-down pot, or low stand. Add only a shallow layer of water, and place a few stones inside for smaller birds to grip.
Scrub the basin often and refresh the water every few days. Position it where nearby shrubs offer cover but cats cannot hide directly beside it.
Expert Tip From MrPlanter: “Keep the water shallow enough for a bird to stand comfortably. A rough stone in the center gives tiny visitors a helpful foothold.”
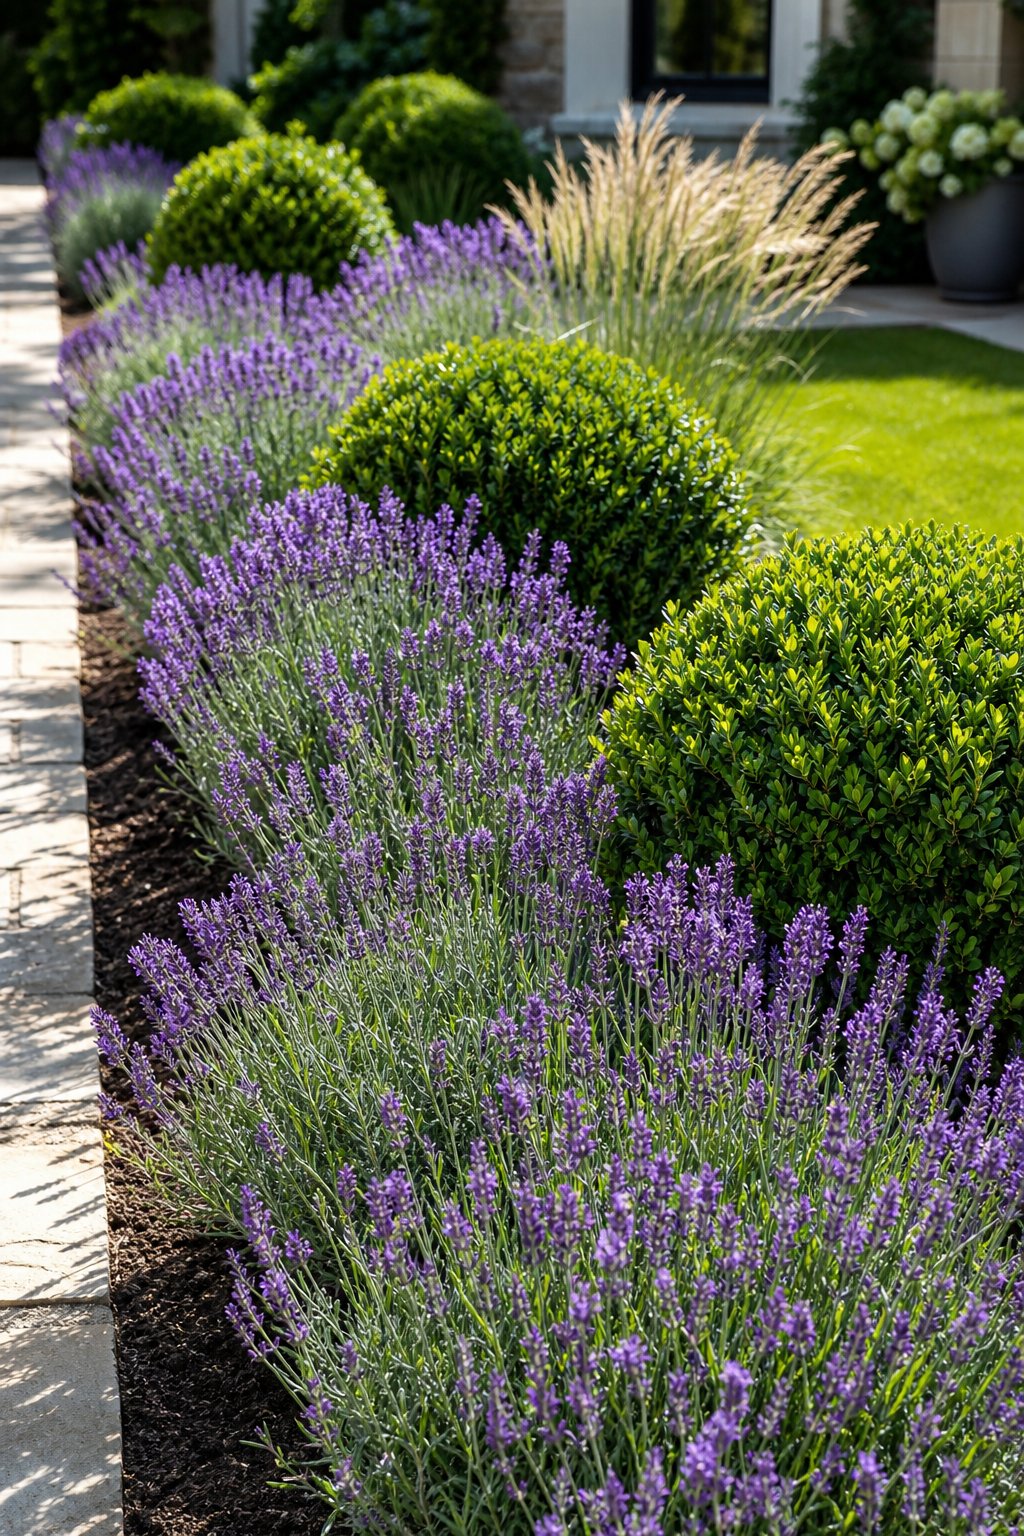
18. Plant A Living Border Of Lavender And Boxwood
A path without a border can feel like it forgot to finish getting dressed. Lavender and boxwood create a tidy living edge, combining fragrant flowers with year-round green structure.
Mark two planting lines along the path, leaving enough width for mature plants. Set lavender in the sunnier, drier spots and boxwood where you want a clipped evergreen form. Improve compacted soil with compost, but avoid making it too rich or wet. Space plants according to their mature size, not the tiny pots you bring home.
Trim boxwood lightly to keep its shape, and shear lavender after flowering without cutting into old woody stems. Check local plant disease concerns before choosing boxwood varieties.
Expert Tip From MrPlanter: “Give each plant room to reach its adult width. A border that starts slightly open will look healthier than one packed too tightly.”
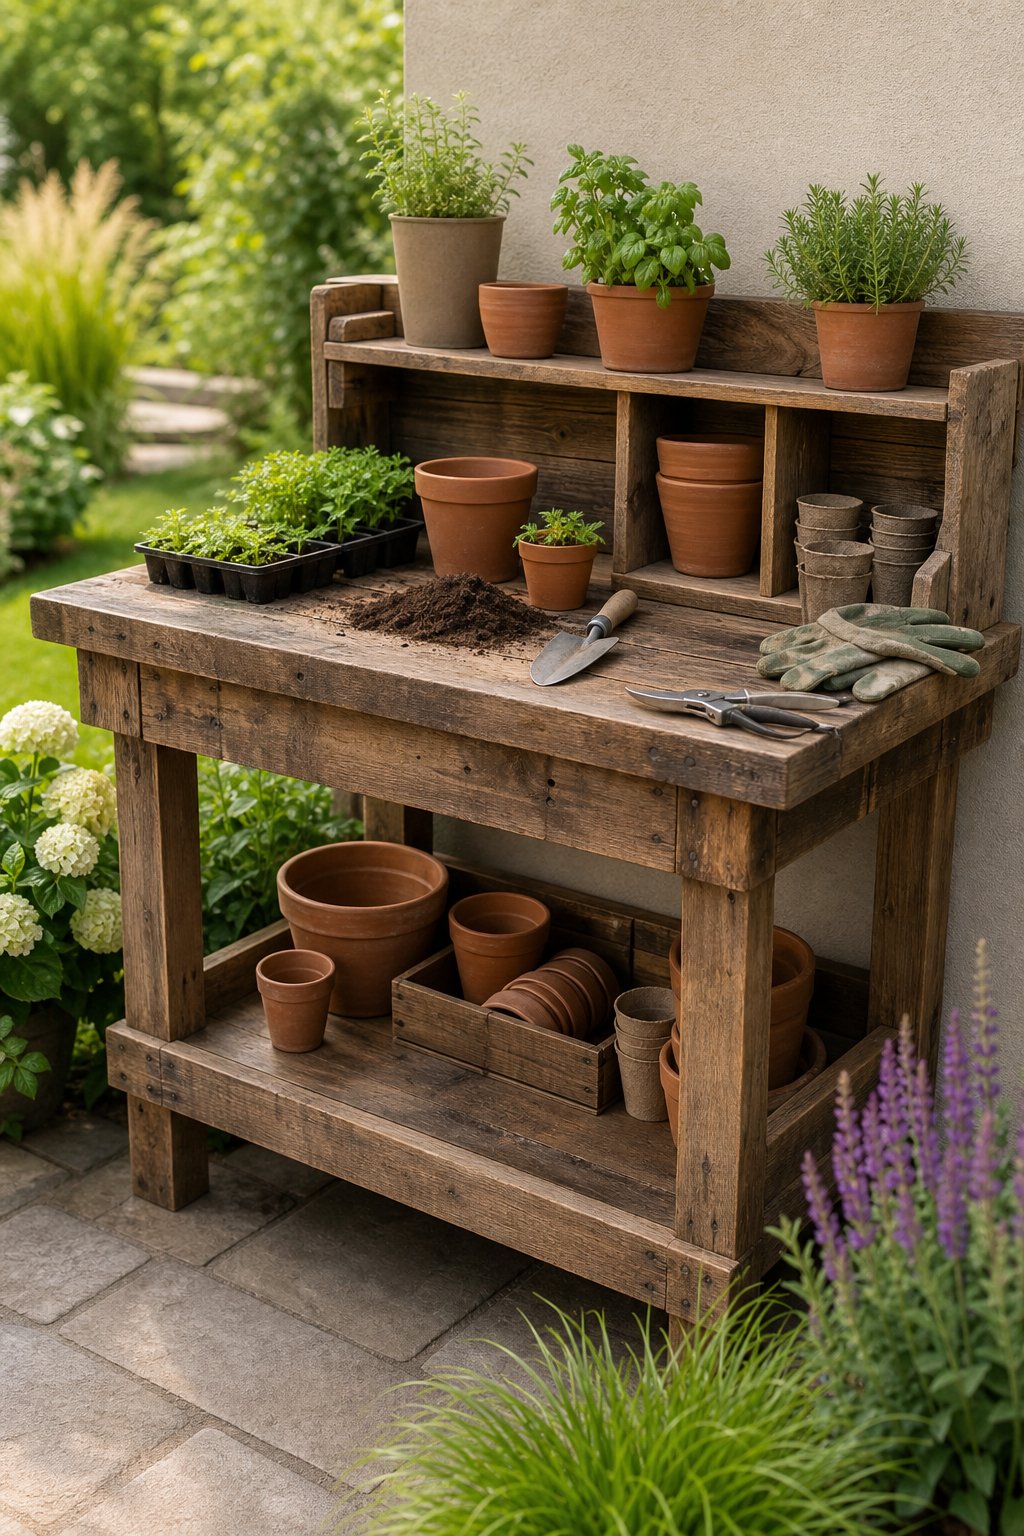
19. Construct A Reclaimed-Wood Potting Bench
Potting soil has a special gift for appearing everywhere except inside the pot. A reclaimed-wood potting bench gives you a dedicated work surface and a home for tools, pots, and compost.
Build a sturdy frame from sound fence boards or old lumber, then add a slatted lower shelf for drainage and storage. Set the worktop at a comfortable height, usually near your waist, and include a shallow back ledge to stop hand tools from rolling away. Sand every surface, drive screws below the wood, and apply an outdoor finish.
Place the bench near a hose or rain barrel, preferably under partial shade. Add hooks for pruners and a small bin for plant labels and twine.
Expert Tip From MrPlanter: “Test the bench height by pretending to pot a plant before you finish it. Your back will thank you for five minutes of checking.”
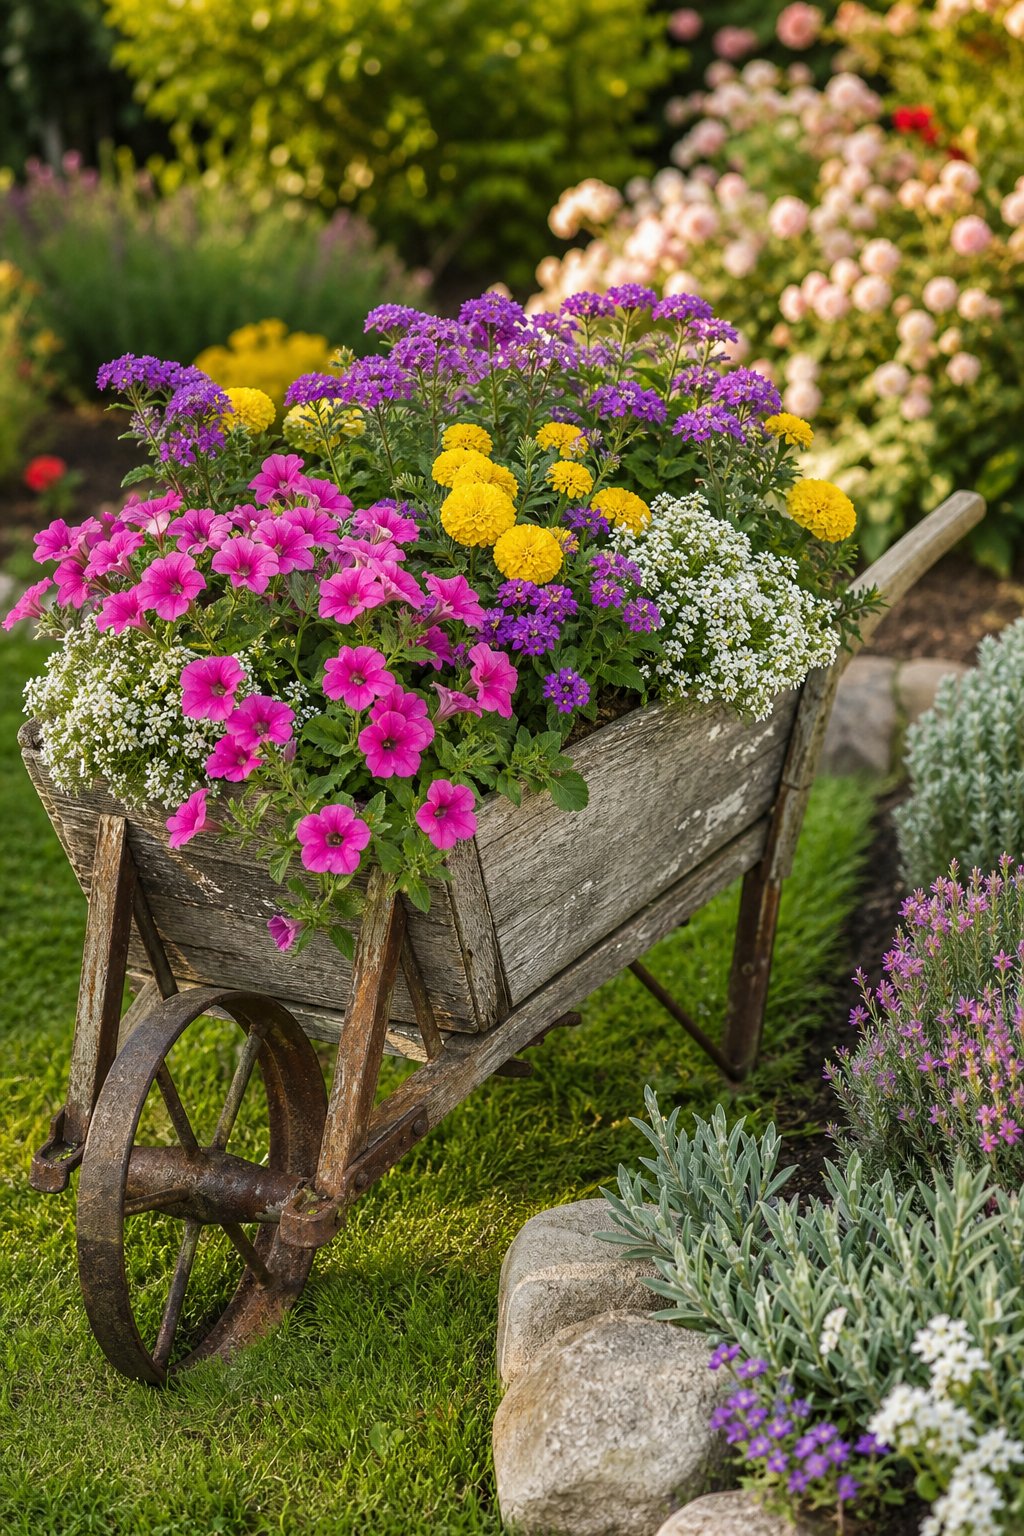
20. Turn An Old Wheelbarrow Into A Seasonal Flower Planter
An old wheelbarrow may have retired from hauling soil, yet it can still carry a garden display with great pride. Its deep basin makes a cheerful seasonal planter for flowers, herbs, or trailing vines.
Check the handles, wheel, and frame for stability before moving it. Drill several drainage holes through the bottom, add a layer of coarse material, and fill with quality potting mix. Combine a tall center plant, rounded filler plants, and trailers that spill over the sides. Place the wheelbarrow where the display can be seen, then anchor it if strong wind is common.
Rotate annuals by season, or use ornamental grasses and hardy perennials for a longer-lasting arrangement. Avoid overfilling the basin because wet soil becomes very heavy.
Expert Tip From MrPlanter: “Tilt the wheelbarrow slightly toward its drainage holes. Water will leave faster, and the flowers will look as though they’re spilling forward.”
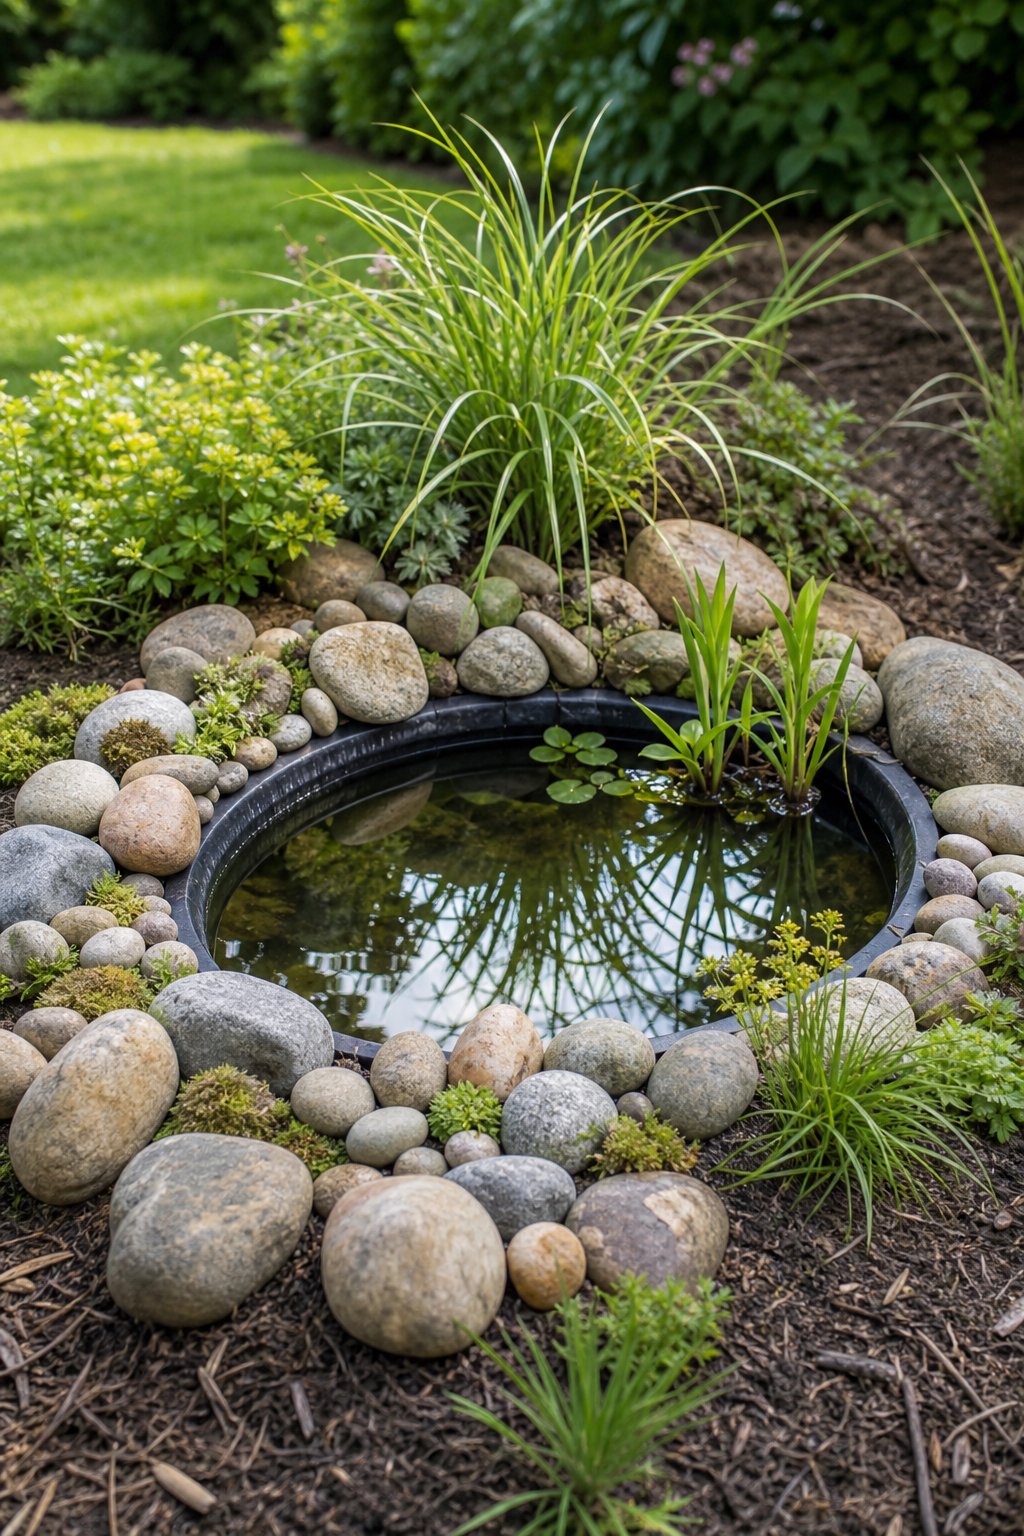
21. Build A Small Tire Pond With River Rocks
A worn tire may be headed for the dump, though it can become the sturdy frame for a tiny pond. This project adds water, texture, and a little backyard sound without requiring a large excavation.
Bury the tire so its top sits just above ground level, then line the cavity with a pond liner that extends well beyond the rim. Add smooth river rocks around the edge to hold the liner and hide the tire. Fill with water, place a few aquatic plants in containers, and add a small solar bubbler if desired.
Choose a location with morning sun and afternoon shade. Remove leaves and standing debris often, and avoid adding fish to such a small volume.
Expert Tip From MrPlanter: “Pad the liner with old towels or sand before adding rocks. Sharp edges are sneaky little troublemakers and can puncture it.”
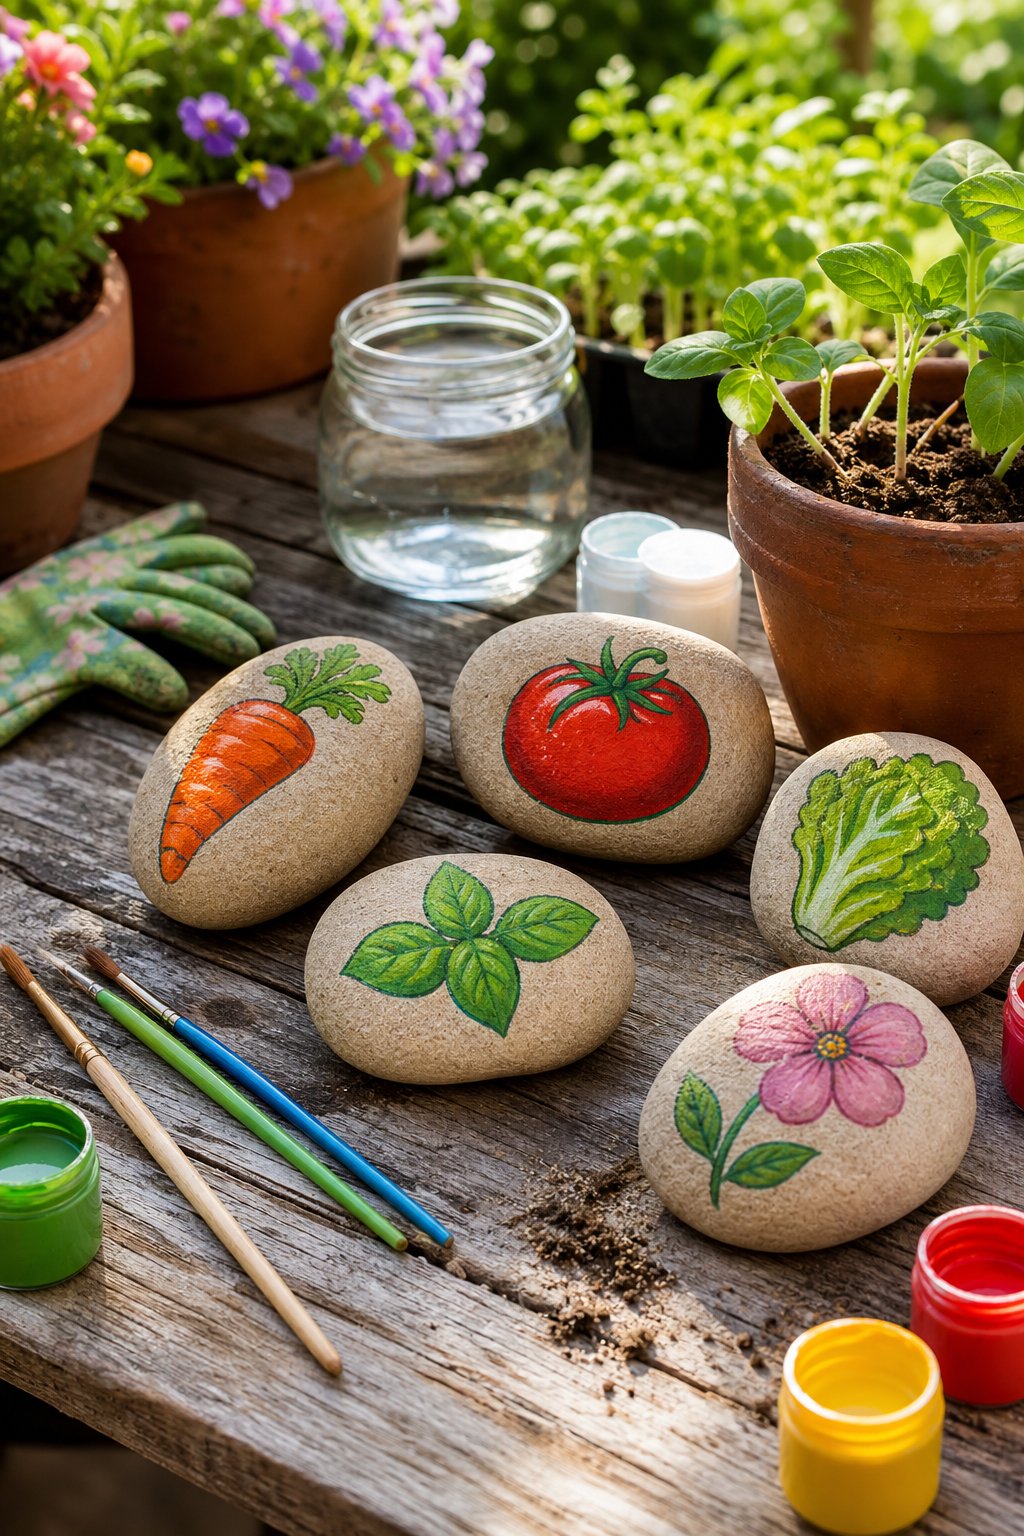
22. Make Painted Rock Plant Markers
Seedlings can look identical enough to make you question every label in the garden. Painted rock markers give you durable plant signs with a bit more personality.
Collect smooth, flat stones, wash them, and let them dry completely. Paint each stone with the plant name, a simple symbol, or both. Use outdoor acrylic paint, then apply a clear exterior sealer after the design cures. Place the markers near seedlings, herbs, or newly planted perennials.
Light colors make lettering easier to read, while a dark outline helps symbols stand out. Keep markers low enough that mowing equipment won’t hit them, and refresh the sealer when the finish begins to fade.
Expert Tip From MrPlanter: “Write the plant name before adding tiny decorations. A marker should help you garden first and make you smile second.”
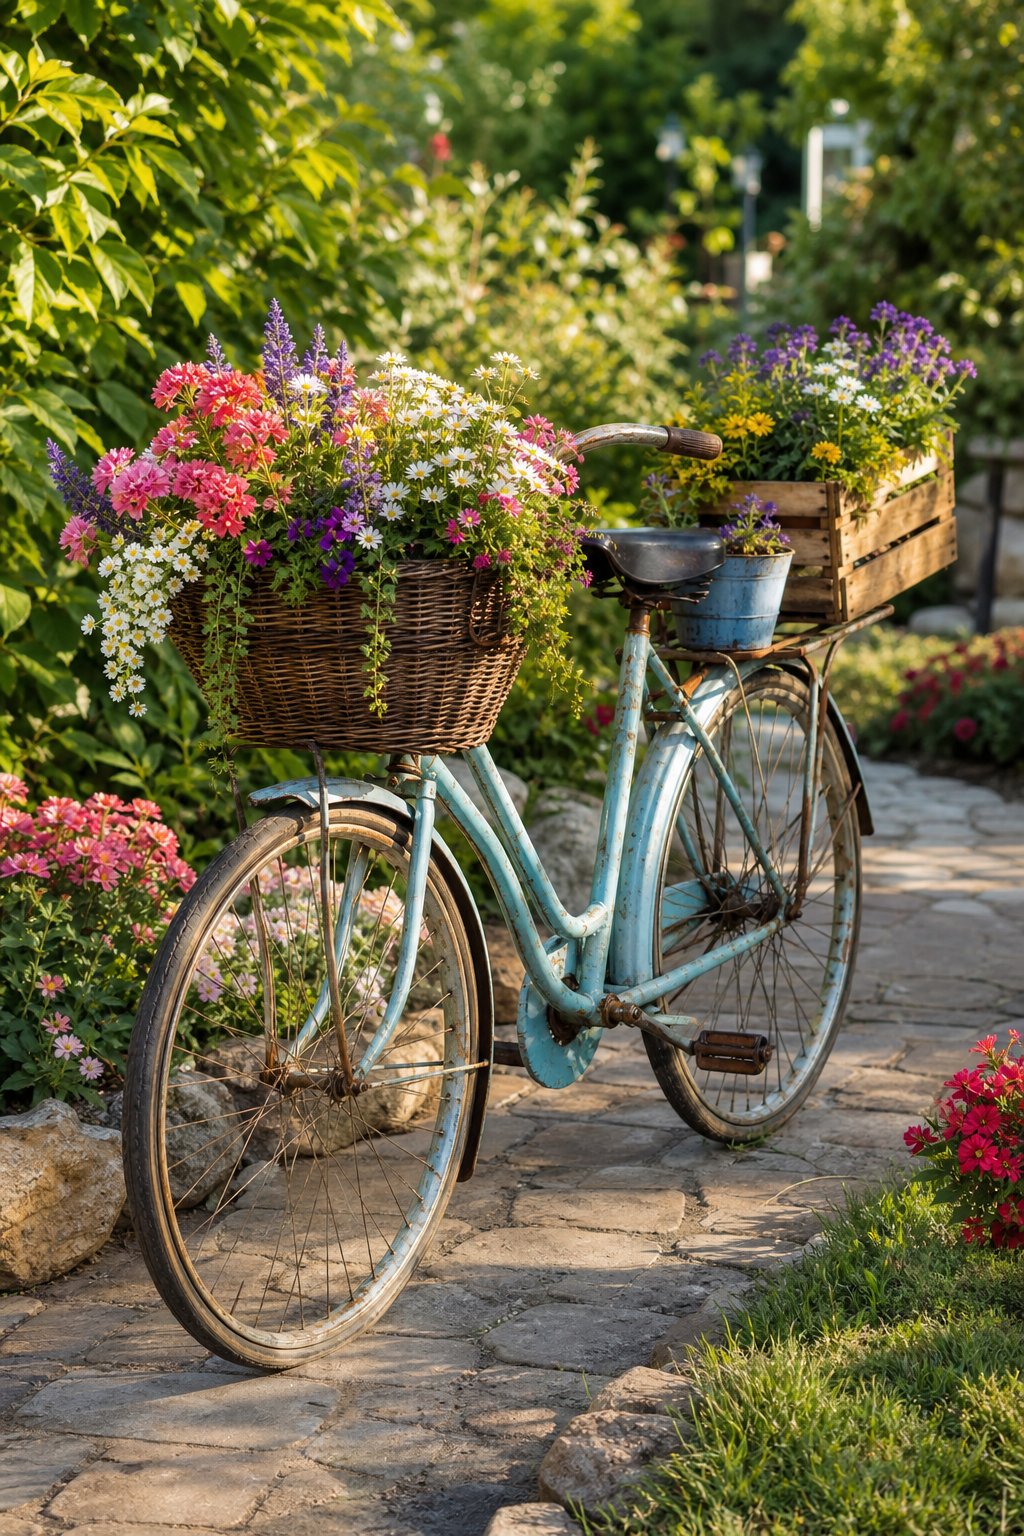
23. Create A Whimsical Vintage-Bicycle Flower Display
A vintage bicycle has already done the hard work of looking charming. Add baskets and flowers, and you get a garden focal point that feels playful without taking up much ground space.
Clean the bicycle, secure its wheels, and apply outdoor paint or rust sealer if needed. Attach wire baskets to the front and rear racks, lining them with coco fiber or landscape fabric. Fill them with lightweight potting mix and trailing annuals. Anchor the frame to a fence, post, or buried stake so wind cannot send it rolling through your flower bed.
Choose plants that match the light at the display spot. Replacing seasonal flowers keeps the bicycle fresh throughout the growing year.
Expert Tip From MrPlanter: “Use a hidden stake through the frame for safety. The bicycle should look ready for a ride, not actually take one.”
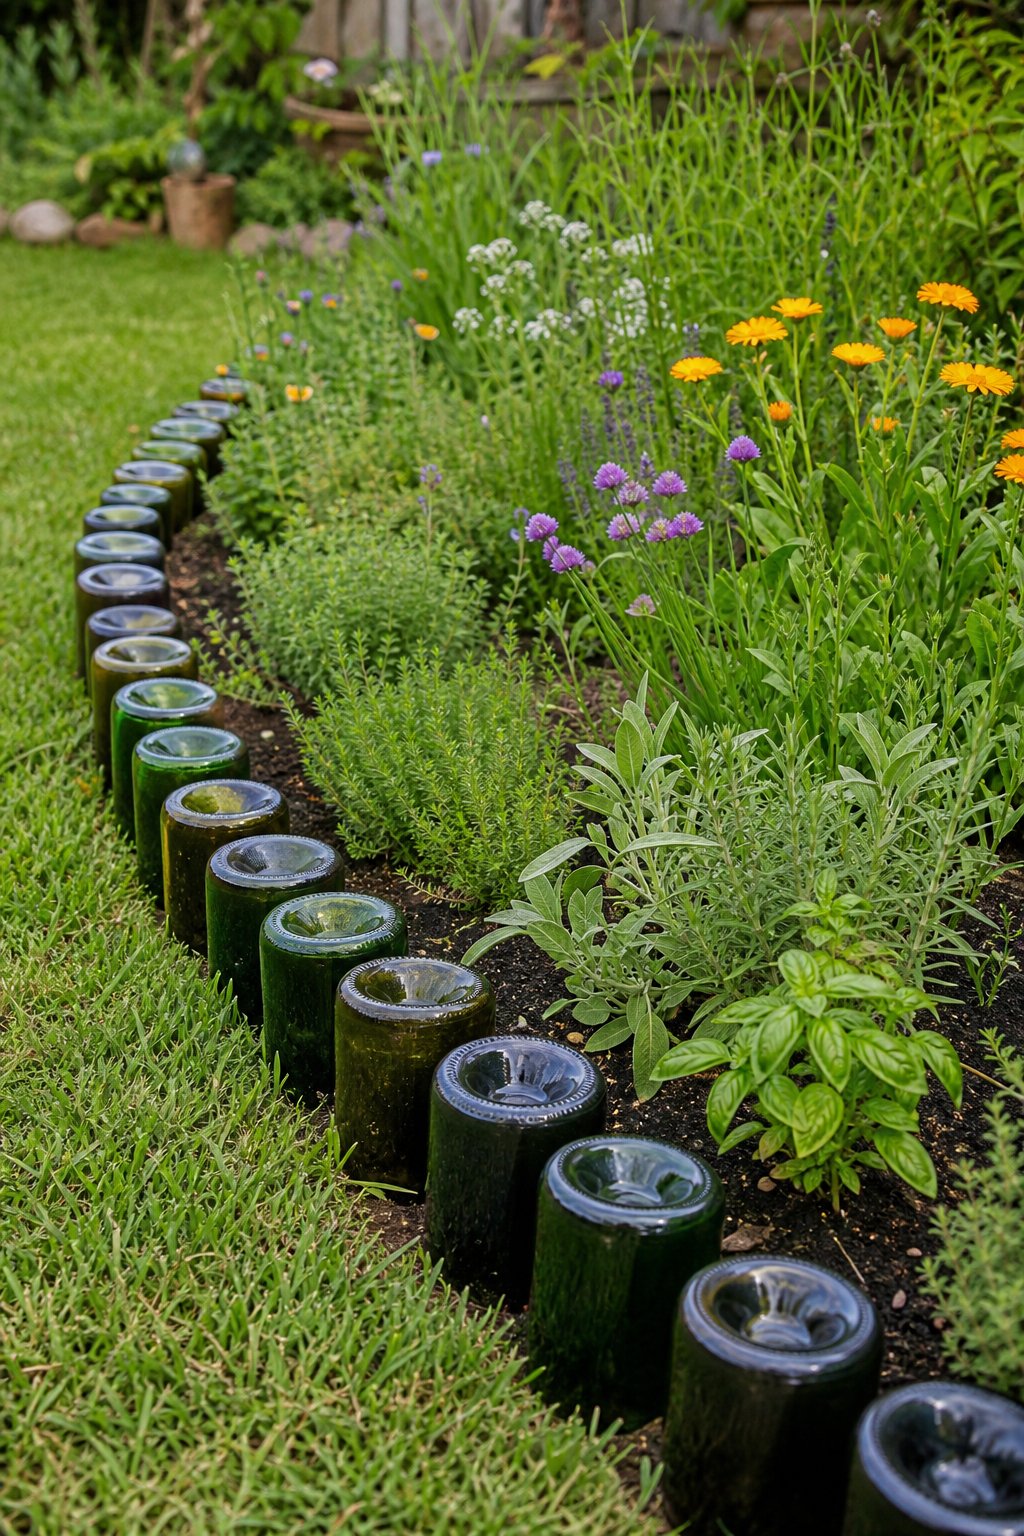
24. Install Wine-Bottle Edging Around A Garden Bed
Glass bottle edging can give a flower bed a jewel-like border, though it needs careful installation. Recycled wine bottles work best where you won’t need frequent digging or mowing.
Clean the bottles and remove labels, then dig a narrow trench about one-third of each bottle’s height. Place bottles upside down with the necks buried, keeping them close together and level. Add soil around them and tamp it firmly. Use only bottles without cracks, and wear thick gloves and eye protection while handling them.
Keep the edging away from play areas and narrow mowing routes. Dark glass absorbs heat, so leave enough space between bottles and tender plants.
Expert Tip From MrPlanter: “Use bottles of similar height for a calmer line. Bury them deeply enough that the border cannot wobble when the soil gets wet.”
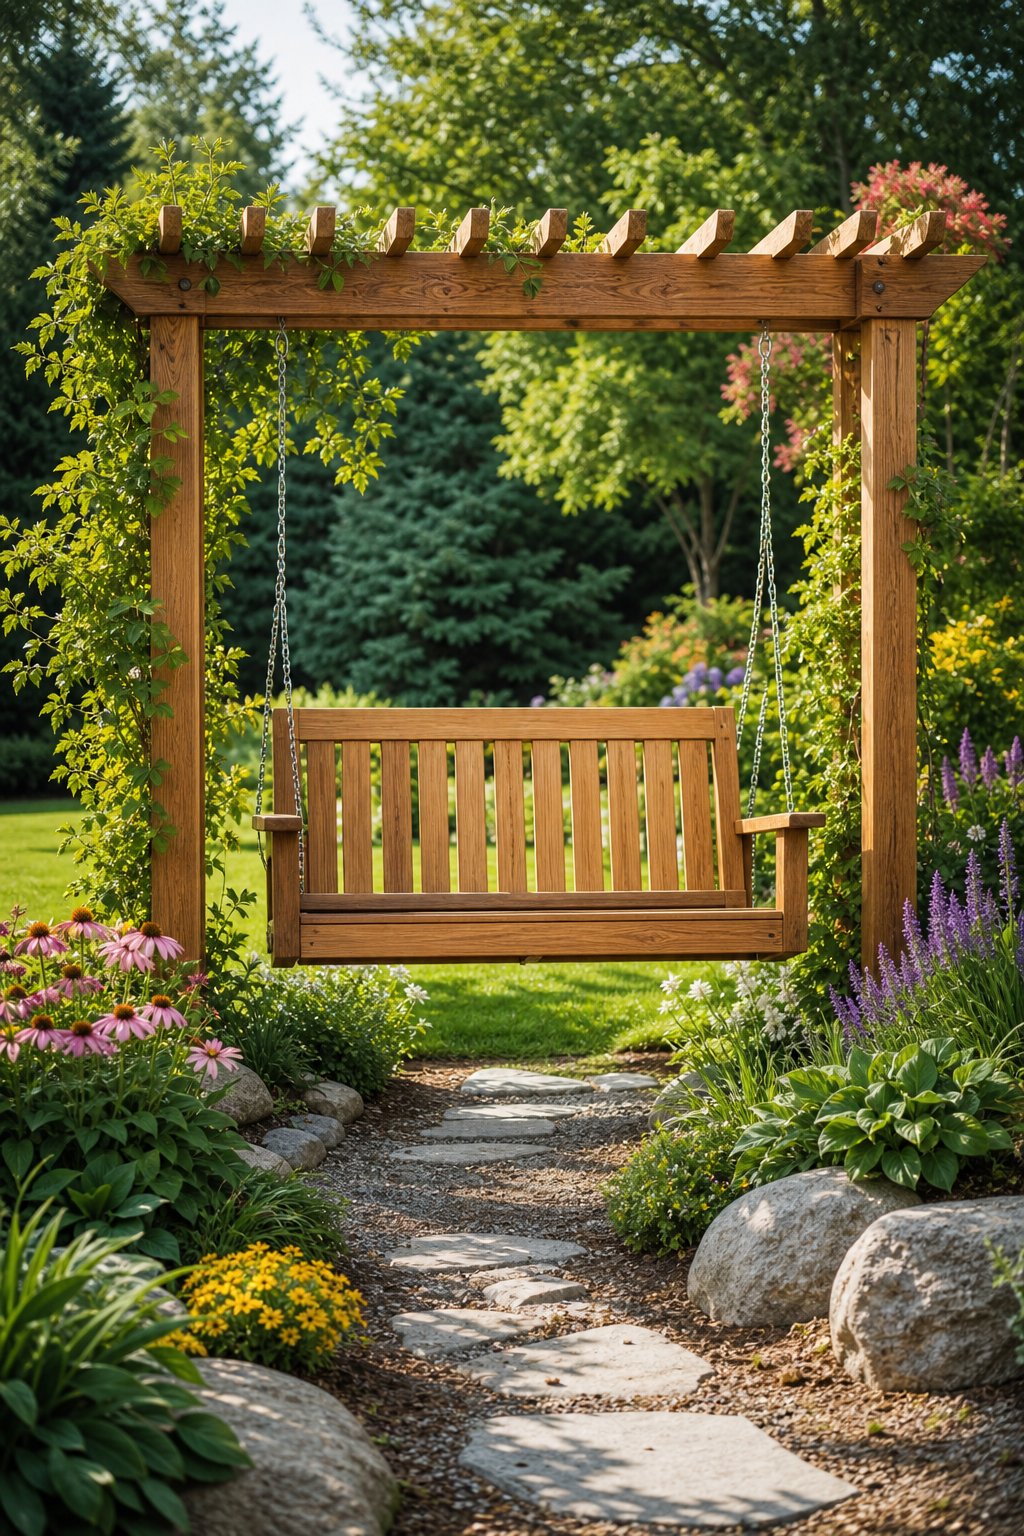
25. Build A Wooden Bench Swing Garden Focal Point
A bench swing can turn an ordinary planting bed into your favorite place to pause. It adds seating, movement, and a clear focal point that helps organize the rest of the yard.
Build the frame from outdoor-rated lumber, using galvanized or stainless hardware. Set the support posts in concrete, check that the beam is level, and choose heavy-duty swing hangers rated above the combined weight of the seat and users. Place the swing where you can see flowers or a path, leaving a clear arc in front and behind it.
Add cushions made for outdoor use, plus nearby shade plants or a small side table. Inspect chains, bolts, and wood joints at the start of each season.
Expert Tip From MrPlanter: “Measure the swing’s full movement before planting around it. Leave breathing room so flowers and toes can both stay safe.”
Plan Your Project By Space, Budget, And Skill Level
A tiny yard can still have a big personality, though it needs projects that earn their footprint. Start by measuring sunlight, drainage, access points, and the space needed to move tools before buying materials.
Tiny Front Gardens And Narrow Side Yards
Choose vertical projects, gutter gardens, narrow gravel paths, crate planters, or a living border. Keep colors and materials repeated so a small space feels calm rather than crowded.
Medium Backyards With Dedicated Beds
Combine raised beds, a fire pit, a potting bench, and a short path. Group edible plants near the water source, then use fieldstone or steel edging to separate planting zones.
Larger Gardens That Need Focal Points And Zones
Use a pergola, bench swing, stock-tank pond, or bicycle display as a visual anchor. Connect each area with stepping stones or brick, and repeat plants along the route to make the yard feel planned.
Expert Tip From MrPlanter: “Pick one project you can finish in a weekend before starting three at once. A completed small feature gives you useful information for every later choice.”
Choose Materials That Survive Outdoor Life
Outdoor materials face sun, rain, insects, soil, and freezing temperatures, so a bargain is only useful if it lasts. Choose supplies based on the project’s moisture, weight, and heat demands.
Weather-Resistant Wood, Stone, And Metal
Cedar, redwood, exterior-rated lumber, galvanized metal, stainless screws, brick, and natural stone suit many garden projects. Seal cut ends of wood, use rust-resistant fasteners, and set wood above standing water whenever possible.
Safe Upcycling And Proper Drainage
Inspect pallets, crates, bottles, tires, and old furniture for damage or unknown coatings. Add drainage holes to containers, use liners where soil could spill, and keep recycled materials away from edible crops if their past use is uncertain.
Low-Maintenance Plant Pairings
Match plants to light, soil, and water rather than choosing only by color. Lavender, thyme, sedum, ornamental grasses, native perennials, and drought-tolerant shrubs often need less care once established, while herbs and annual flowers reward regular watering.
Expert Tip From MrPlanter: “Spend more on good fasteners and drainage than on fancy finishes. Those quiet details do more to keep a garden project standing.”
FAQs on DIY Garden Landscaping Ideas
What’s the cheapest DIY garden landscaping idea to start with?
Painted rock plant markers, plastic-bottle drip irrigation, or fieldstone edging are the lowest-cost projects in your list since they use materials people often already have.
What DIY garden landscaping project is best for beginners?
Concrete stepping stones with leaf imprints or a bamboo teepee trellis are good starting points since they need minimal tools and no advanced building skills.
How much does DIY garden landscaping cost compared to hiring a landscaper?
DIY projects using reclaimed or basic materials (pallets, crates, bricks, gravel) typically run a fraction of professional landscaping costs, though larger builds like a pergola or fire pit will cost more.
Do I need special tools for these DIY garden projects?
Most projects only need basic tools like a shovel, drill, level, and rubber mallet — nothing specialized is required except for a few builds like the fire pit or bench swing.
I’m Anirban Saha, the Founder and Owner of MrPlanter.com. I pay the bills as a software developer, although my BTech is actually in Electronics and Communication. I really love my day job, but what gives me energy every day is interacting with my indoor plants and taking care of them. I have been successfully nurturing and maintaining houseplants for over 10 years now.
📚🔍 Our content undergoes thorough review and fact-checking before publication. For additional details, explore our strict Editorial Policy to deliver helpful content. 📝🔒